DIBS payment provider - installation and user guide
This document describes how to install and use the DIBS payment provider, one of several payment solutions available for EPiServer 7.5 Commerce.
Important notice: multiple shipping is not supported in this version of the DIBS payment provider. In order to enable this, we recommend that you modify the workflow process rather than the DIBS payment provider.
Apps folder
In EPiServer Commerce 7.5, the Apps folder is located in the EPiServer Commerce Manager Shared Files Folder, typically C:\EPiServer\<YourCommerceManagerSite>\eCommerceFramework\5.3\Shared.
If your Commerce Manager site has been updated to the latest version via NuGet, the Apps folder should be located in the wwwroot folder, typically E:\ EPiServer \<YourCommerceManagerSite>\wwwroot\Apps.
Refer to this Apps folder as your corresponding path for the Apps folder mentioned below
Copying files
Do the following to add the DIBS source code files to your solution:
- Download and install the project source code. You can find the referenced assemblies in the bin folder of Commerce back-end site. You can also copy the bin folder to a folder named Library, add this at the same level as the DIBS project folder, and then compile the project.
- Copy the EPiServer.Business.Commerce.Payment.DIBS.dll to the bin folder of the Sample template and Commerce Manager websites.
- Copy the Mediachase.WebConsoleLib.dll (in Library folder) to the bin folder of the Sample site.
- Create a DIBS folder in Apps\Order\Payments\Plugins", and copy ConfigurePayment.ascx to it.
- Create a DIBS folder under Apps\Order\Payments\MetaData", and copy Edittab.ascx to it.
- Copy DIBSPayment.aspx to the page folder of the Sample site, usually "\Templates\ Sample\Pages".
- Copy PaymentMethods.ascx to the DIBS folder in plugin control folder of the Sample site, usually "\Templates\Sample\Units\CartCheckout\DIBS" (create a DIBS folder if needed).
- Copy lang\DIBSPayment_en.xml to the lang folder of the Sample site, usually "Sample\lang".
Configuration
Do the following to create and configure the DIBS payment provider in Commerce Manager:
- Log in to Commerce Manager.
- Go to Administration and Order System/Payments/<The language you want to use>.
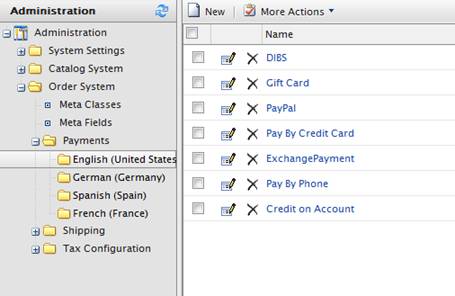
- Click New, and configure the parameters. Note: the following parameters are required and must be configured as follows (Commerce Manager will use these to find the folder that contains .ascx files):
- System Keyword: DIBS
- Class Name: EPiServer.Business.Commerce.Payment.DIBS.DIBSPaymentGateway
- Payment Class: Mediachase.Commerce.Orders.OtherPayment
The other parameters can be set as desired.
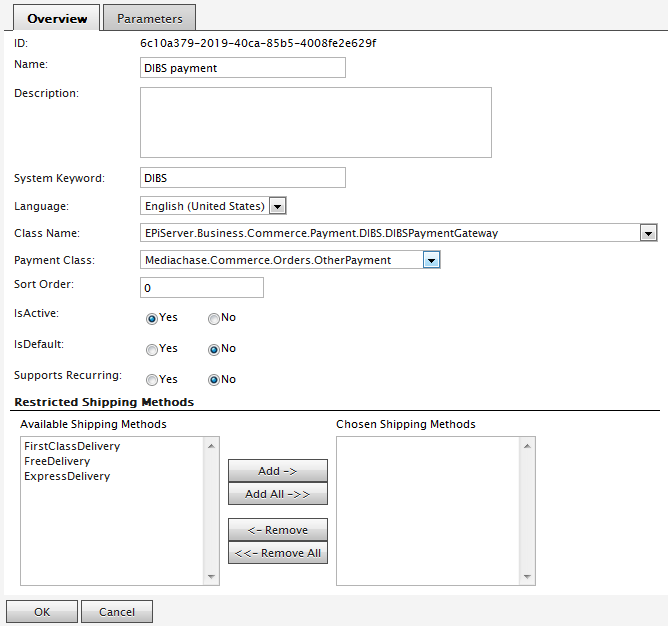
- Click OK to save the payment provider.
- In the payment provider list, click on DIBS payment, switch to the Parameters tab, and set the parameters for DIBS. Note that API UserId and Merchant Password are the login/password for the administration page of DIBS. You just need the API UserId to allow customers to view, but in order to complete and return an order, you must also add a valid Merchant Password.
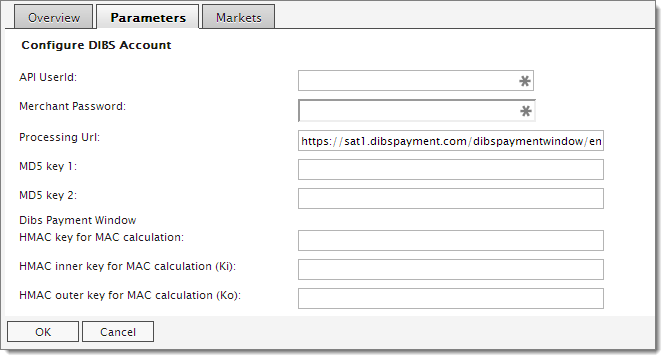
The HMAC values are available from the DIBS Administration interface:

- Go to the Markets tab and add the expected markets for this payment.
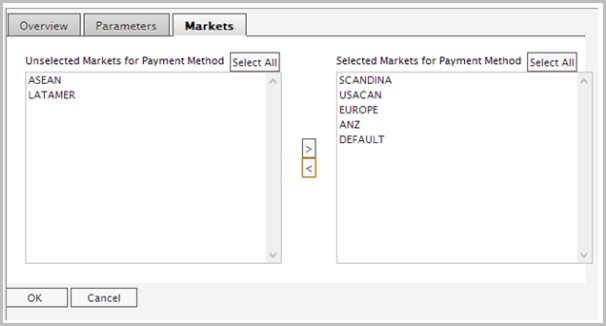
- Click OK to save the payment provider details.
Creating DIBS pages
In order to use the DIBS payment provider you also need to configure a page type to use. See example below for the sample templates.
Do the following to define a page type for DIBS to use:
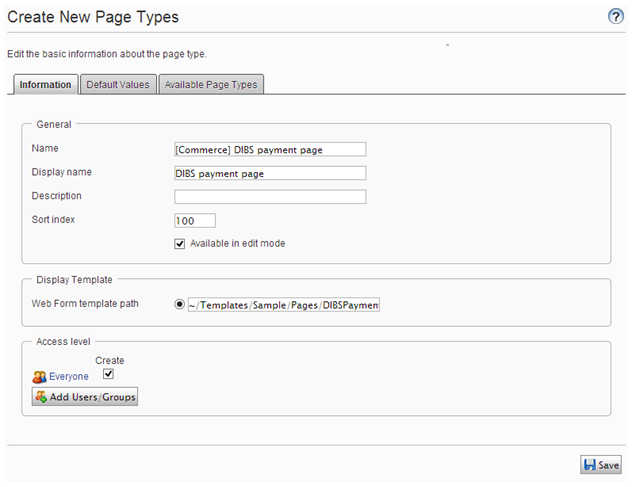
- Go to the Admin view, select Page Types in EPiServer CMS, select Create New Page Type.
- Create a new page type with parameters as in the image below, set the file name to the relative path to DIBSPayment.aspx, for example: ~/Templates/Sample/Pages/DIBSPayment.aspx.
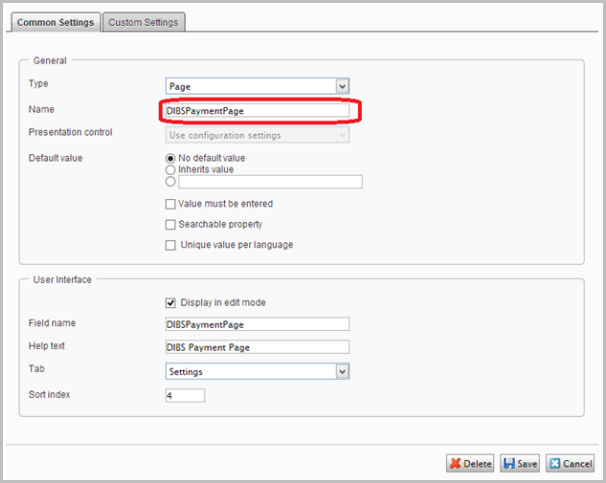
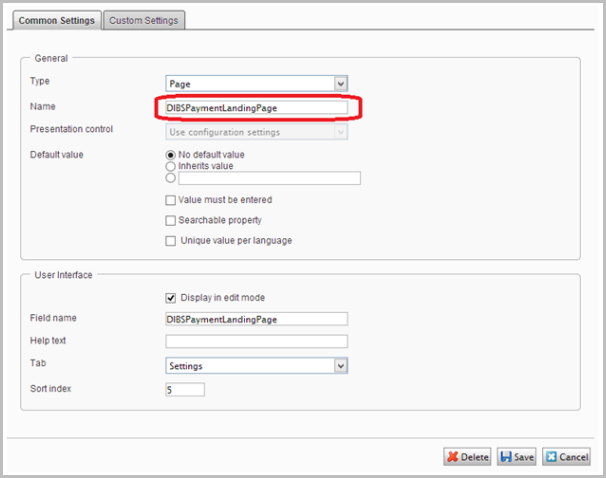
- Add two new properties of the type page to the website Home Page as in the image below, the name of the property must be DIBSPaymentPage and DIBSPaymentLandingPage. In this example the property is added to the Settings tab of the Home page.
- Switch to the EPiServer CMS Edit view.
- In the page tree structure, create a new page under Checkout based on the DIBS Payment page type, and publish it.
- Edit the Home page of the site, go to the Settings tab and define the two new properties:
- DIBSPaymentPage pointing to the new page you just created at the 5th step.
- DIBSPaymentLandingPage pointing to the "Your Order" page.
Using DIBS
When you have deployed and configured the DIBS payment provider, it will appear as an option in the checkout procedure. Add a product to the shopping cart, proceed to checkout and select DIBS as payment option.