Don't miss out Virtual Happy Hour this Friday (April 26).
Try our conversational search powered by Generative AI!
AI OnAI Off
Don't miss out Virtual Happy Hour this Friday (April 26).
This document describes a first time installation of the EPiServer 7 platform with a Relate site. The installation includes CMS, Community, the Relate templates and EPiServer Mail.
Check the system requirements for EPiServer 7 Relate before you start the installation, to ensure that the system requirements are met for the target environment.
This section describes the installation of Relate from EPiServer Deployment Center. It is assumed that you have selected the "Install Relate" option in the previous step. Here you will install and configure a Relate website, including the IIS, database, VPP file storage, and SMTP settings.
Follow the steps below to install Relate
1. Open EPiServer Deployment Center, select EPiServer Relate and expand the appropriate version to see the options.
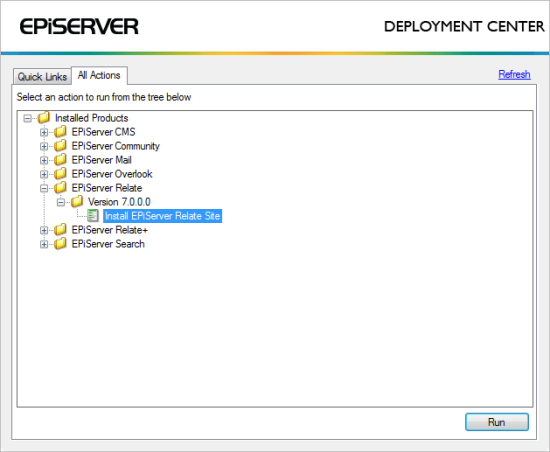
2. Select Install EPiServer Relate Site and click Run to start the installation.
3. Enter values for the IIS configuration:
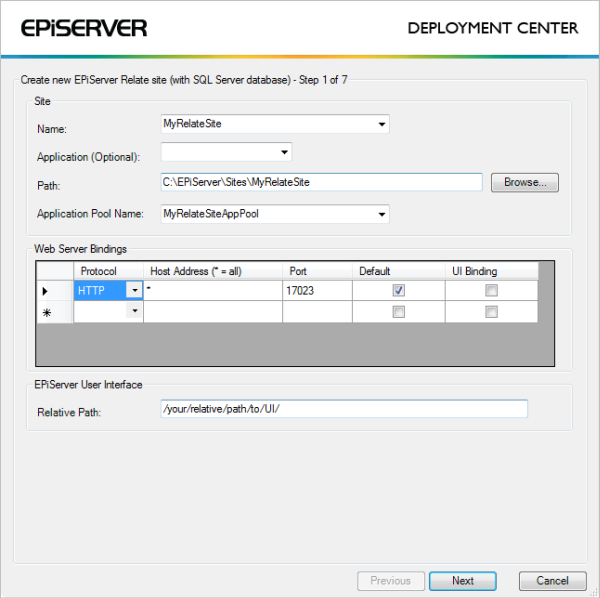
Click Next to continue.
4. Enter values for the SQL configuration:
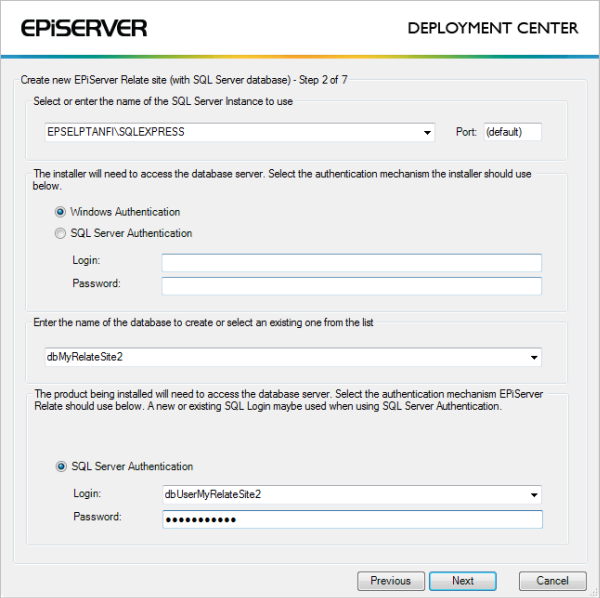
NOTE During the installation, the existing SQL database collation (sort order) will be used when creating the database. If you have specific collation requirements, consider your choice of collation and create a database which meets your requirements ahead of deployment.
Click Next to continue.
5. Enter a Path for the Virtual Path Provider - define the folder in the file system where the default VPP folders (Documents, Global, PageFiles) will be placed. The default value is automatically calculated based on the value in "Name", but can be changed if you want to use a different folder.
Click Next to continue.
6. Provide a path for the license configuration file for the site. This is optional at this point, if left out the site will be created but will report licensing errors. Click Next to continue
7. Create an account for the site administration, enter Administration account username/password. This will be used when logging in to the Relate website the first time. Click Next to continue.
8. Enter values for the SMTP mail server and mailing settings:
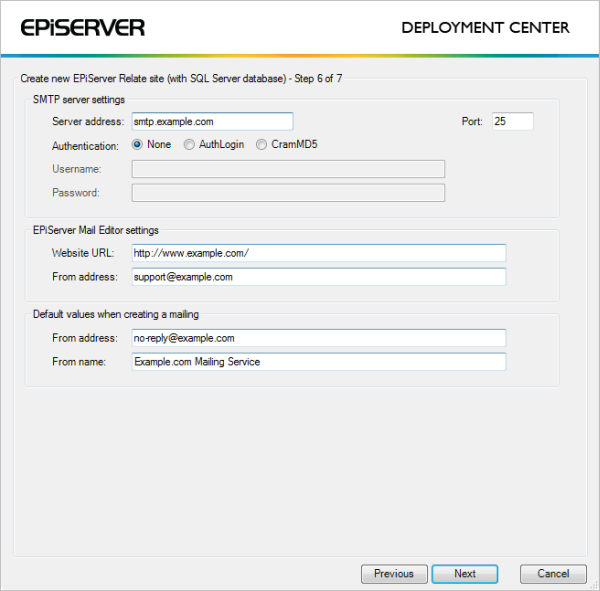
Replace the default values with the values for your mailing settings and click Next to continue.
9. A summary page for the installation will be displayed where it is possible to return to previous steps to change the setup. Click Install to start the installation and let it finalize.
10. When the installation has finalized the Relate website will open in a web browser.
For instructions on breaking changes and how to upgrade between versions, refer to the "Upgrading" section of the SDK for EPiServer Relate.
For this upgrade there is a known issue where the Tiny MCE editor cannot initialize after an upgrading of a Relate 7 site.
Do the following as a workaround for this:
var siteRoot = VirtualPathUtility.ToAbsolute("~/");
After that, change the following:
string tinyMceIncludeScript = "<script type=\"text/javascript\" src=\"../JavaScripts/tiny_mce/tiny_mce_gzip.js\"></script>";
string tinyMceIncludeScript = "<script type=\"text/javascript\" src=\"" + siteRoot + "Templates/RelatePlus/JavaScripts/tiny_mce/tiny_mce_gzip.js\"></script>";
string systemJSIncludeScript = "<script type=\"text/javascript\" src=\"../JavaScripts/SystemJS.aspx\"></script>";
string systemJSIncludeScript = "<script type=\"text/javascript\" src=\"" + siteRoot + "Templates/RelatePlus/JavaScripts/SystemJS.aspx\"></script>";