
Create a recommendations block
Describes how to create recommendation blocks on your website.
Note
The following method addresses implementing recommendations on Optimizely sites only.
Prerequisites
- Install Optimizely Content Recommendations on your site before rendering recommendations.
- Create at least one delivery in your Optimizely Content Recommendations portal to assign to a Content block.
- Populate that delivery with a sections and flows.
- Install tracking via NuGet package.
The NuGet package adds a new block type model and view for rendering the recommendations.

The Content Recommendations block has the following properties:

- Number of recommendations – How many items to show at a time. You can have as many as you want, but make sure that the design can handle them all.
- Delivery Widget – Select the recommendations group (flow) for this instance of the recommendations. A list of delivery widgets is set up in the dashboard.
- Recommendation Template – Enter a Mustache template that defines the repeating pattern for the markup.
Everything inside the {{#content}} {{/content}} mustache markup is repeated for each recommendation item. You can include additional markup.
Note
The recommendation template is rendered in the front-end and has no access to the back-end Optimizely Content Management System (CMS) APIs or content object data. It only knows the JSON that is being returned from the recommendation server.
You can set up custom metadata for tracking earlier in the template. For example, if you need to display specific category and description content, set it to track in custom tags, and then render those values in the template.
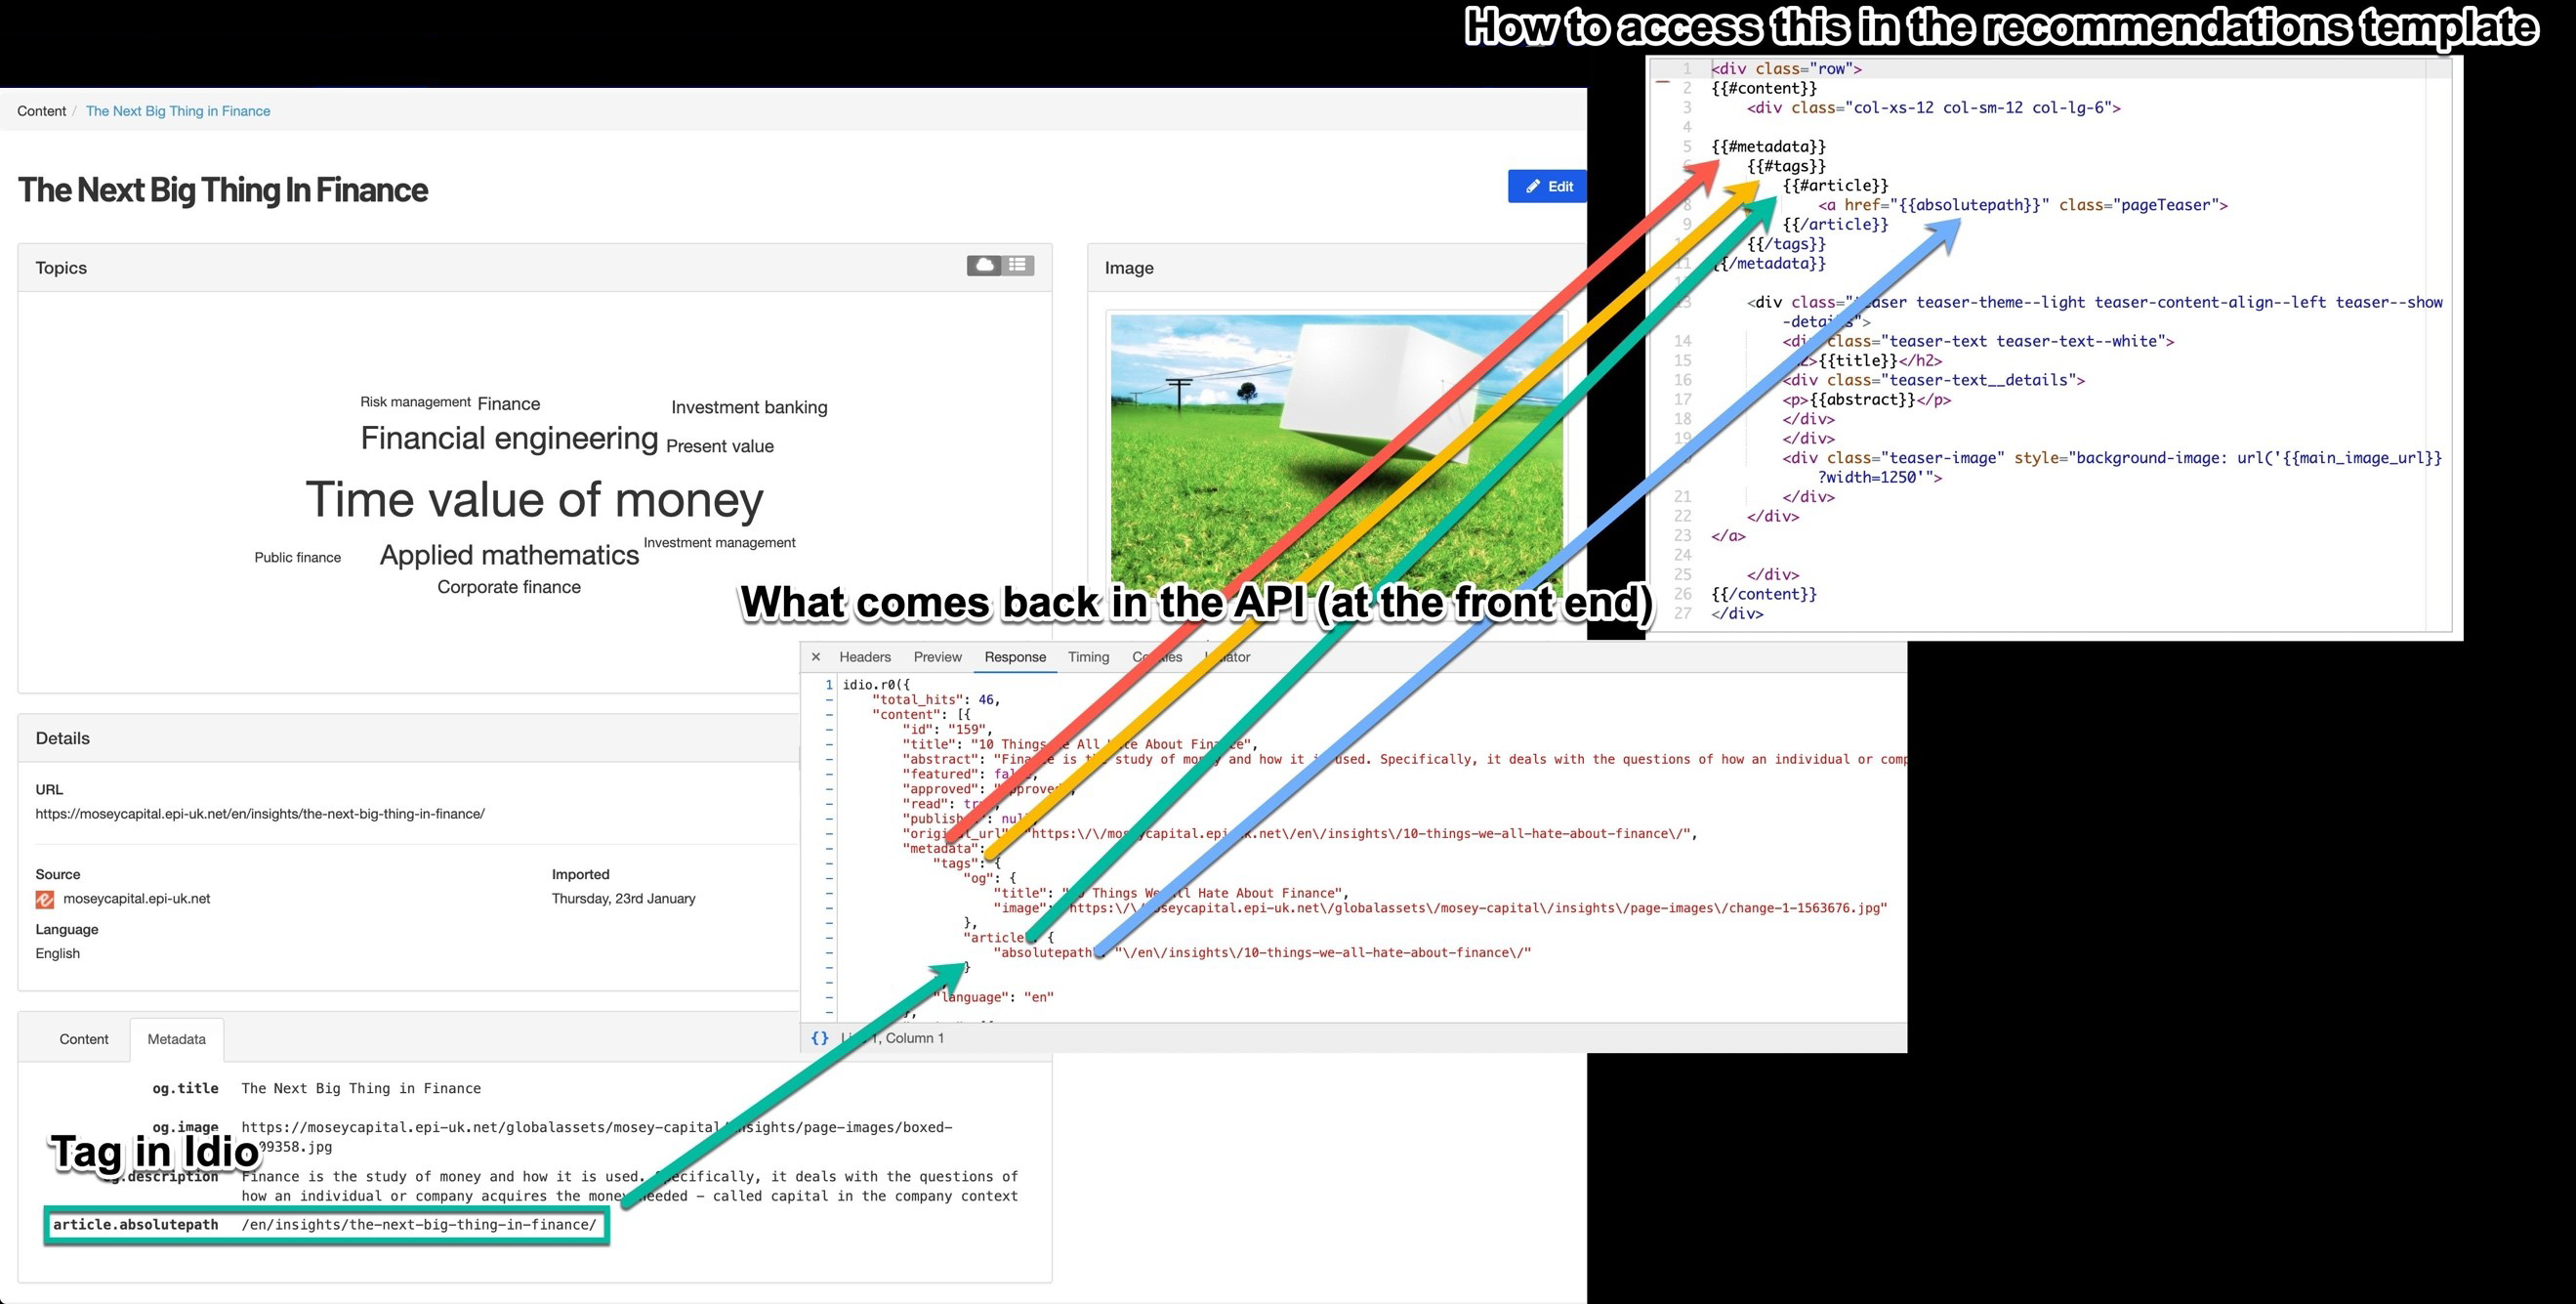
To use the custom metadata, use the mustache syntax to traverse the JSON nested property values. For example:
{{#metadata}}
  {{#tags}}
  	{{#og}}
  		{{description}}
  	{{/og}}
  {{/tags}
{{/metadata}}
If you put your markup inside of the nested structure, (if nothing is passed), then the markup will not be rendered. For example, if no description is passed in the response, then the <p> tags in the following code will not be rendered either.
{{#metadata}}
	{{#tags}}
		{{#og}}
			<p>{{description}}</p>
		{{/og}}
  {{/tags}}
{{/metadata}}
Customize the Content Recommendations block
You can embed CSS styles in within Content Recommendations block to modify its appearance when the content block renders.
The following example shows full delivery widget code and CSS to make recommendations responsive which you can embed directly in code.
<style>
.idio-recommendation{float: left;width: 50%; padding-bottom: 50px;}
.idio-recommendation p{margin-right:50px;}
.idio-recommendation a{color: black; text-decoration:none;}
@media only screen and (max-width: 768px){
.idio-recommendation{width:100%;}
.idio-recommendation p{margin-right:0px;}
}
</style>
{{#content}}
<div class="idio-recommendation">
{{#main_image_url}}
<a href="{{link_url}}"><img src="{{main_image_url}}?w=150&h=150" class="image" /></a>
{{/main_image_url}}
<h3><a href="{{link_url}}">{{title}}</a></h3>
<p>
{{abstract}}
<a href="{{link_url}}">Read more...</a>
</p>
<div class="meta">
<ul class="topics">
{{#topics}}
<li>{{title}}</li>
{{/topics}}
</ul>
{{#source}}
<span class="source">{{title}}</span>
{{/source}}
{{#author}}
<span class="author">{{title}}</span>
{{/author}}
</div>
</div>
{{/content}}
The following image shows the recommendation block after rendering:

Updated 8 days ago