
Implementing Pay by Credit payments
The Scenario
One common scenario for B2B Commerce is allowing organizations to pay using credit for purchases which they will have to settle by invoice at a later date. Normally an organization would have to go through an approval and receive a credit limit from the retailer.
In this example I will show how we implemented a basic payment gateway for setting up Pay by Credit payment methods.
Credit fields for Organization
To start with we will add two new fields to the Organization entity through Business Foundation. Both fields will be a Currency data type.
First add CreditLimit which will be used to set the limit for the Organization. By default this will not be null and be 0 as not every organization should have a credit limit.

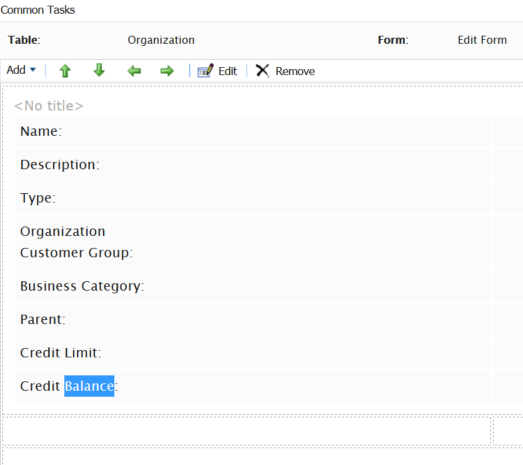
Next add another Currency field called CreditBalance, this again will have 0 as the default value and allow Nulls. It will also allow negative values. Make the changes and Save. Now from the organization screen click on the Forms tab and edit the Edit Form.
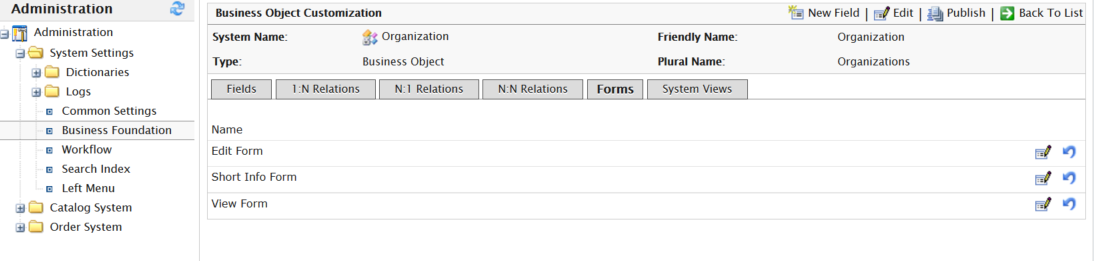
Select the Credit Balance field and click on the Remove button.
Now that these two fields are available you can open an existing organization or create a new one. Set the Credit Limit value to some value like 5000 and save. Note that we don't want to set the Credit Balance as we will be updating this through the payment provider. This is why we removed it from edit view.
Add a Payment Gateway
Now we are ready to add some code to the solution. We will utilize the exisitng OtherPayment payment type for our example. If we had some additional payment properties we wanted to set we could create our own derived payment type, for example CreditPayment. The payment gateway code is best if its in a seperate code library as it needs to be referenced by both the front end and Commerce Manager sites. We will create a new gateway called CreditLimitPaymentGateway which implements IPaymentGateway.
The main method you need to implement is ProcessPayment. This takes the incoming payment and allows you to pass back a message from the payment gateway. Because the credit limit is on the organization we retrieve this through the current contact. The full source below shows a number of validations against whether the credit payment is valid. If valid we update the credit on the account to the organization.
public class CreditLimitPaymentGateway : IPaymentGateway
    {
        public const string CreditLimitKey = "CreditLimit";
        public const string CreditBalanceKey = "CreditBalance";

        public bool ProcessPayment(Payment payment, ref string message)
        {
            bool hasPaid = false;

            if (payment is OtherPayment)
            {
                // Get the customer's organisation
                Organization organization =  CustomerContext.Current.CurrentContact.ContactOrganization;
                if (organization != null && !string.IsNullOrWhiteSpace(organization.Name))
                {
                    decimal limit = Convert.ToDecimal(organization[CreditLimitKey]);
                    decimal balance = Convert.ToDecimal(organization[CreditBalanceKey]);
                    decimal totalWithPurchase = balance + payment.Amount;

                    if (limit > 0)
                    {
                        if (totalWithPurchase <= limit)
                        {
                            // Take payment
                            if (UpdateCreditToAccount(organization, totalWithPurchase))
                            {
                                hasPaid = true;
                            }
                            else
                            {
                                message = "Unable to add credit to your account.";
                            }
                        }
                        else
                        {
                            message = "You have insufficient credit for this purchase.";
                        }
                    }
                    else
                    {
                        message = "You do not have a credit limit.";
                    }

                }
                else
                {
                    message = "You can only pay by credit on business accounts.";
                }
            }
            else
            {
                message = "Only Credit Payments can be accepted.";
            }

            return hasPaid;
        }

        private bool UpdateCreditToAccount(Organization organization, decimal totalWithPurchase)
        {
            try
            {
                organization[CreditBalanceKey] = totalWithPurchase;
                organization.SaveChanges();
                return true;
            }
            catch (Exception ex)
            {
                //Log exception
                return false;
            }

        }

        public IDictionary<string, string> Settings
        {
            get;
            set;
        }
    }
Configure the Payment Method
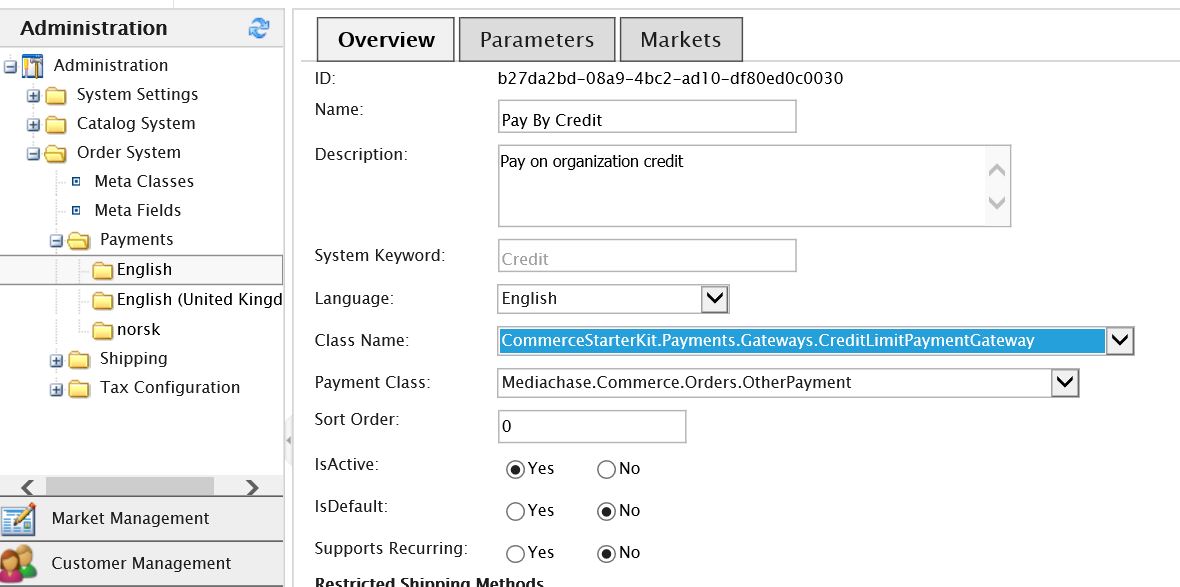
Once this project has been compiled and referenced in both the web and commerce manager project you can start utilising the new Payment gateway. Go into the Administration in Commerce Manager and open up the Order System -> Payments section. Here normally you will choose the language that the payment type is applicable to (usually defaulted to 'English' or your default language) and then click on New. In the next screen you will configure your new Pay by Credit payment method to use the new CreditLimitPaymentGateway and appropriate OtherPayment class. See example below
Wiring it up
I'm not going to go into detail here too much as how the payment option is displayed on the front end of your checkout page is up to you. If you use the EPiServer Starter Kit or Github OXXAS Starter Kit then these work by retrieving all payment methods for the market and displaying them automatically. You will need to update a bit of code to ensure that an OtherPayment is sent with the appropriate amount, and some handling if the workflow throws and error on the payment method, for example if the credit limit has been reached.
Now the rest is up to you to decide how you could extend this further.
Happy coding!
Comments