

Creating your device background
Note: This article extends the blog post by Stefan Torstensson on Adding a new device to the view resolution drop-down
Having created your new resolution, you will obviously want to attach a shiny looking device to sit behind it!
The way CMS7 handles this is to attach your device image to the viewports containing div, positioning the background with center/center in the css. This means that when you’re creating your image it’s imperative that the viewport is centered within your canvas, and not the device itself. This adds a few extra steps when creating your device image, and here’s how you do it:
1. Make sure your device image is 72dpi on a transparent background, and does not contain shadows outside of the device. Also make sure the device is scaled correctly so that the viewport matches that of the pixels you set in your view resolution settings.
2. Create a layer containing only the viewport and use the selection of this layer to black out the viewport on your device image. Make sure your new viewport layer has a colour that stands out against your device. 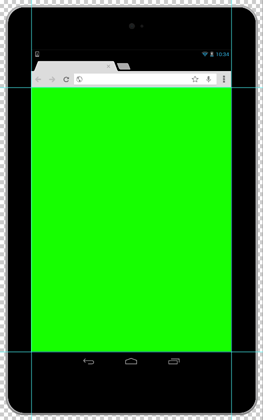

3.Copy the viewport layer and create a new image. Then add a large amount of pixels to the canvas size of this image to give yourself plenty of white-space around the viewport. Note that the viewport layer is now centered within the image and should not be moved from here on. 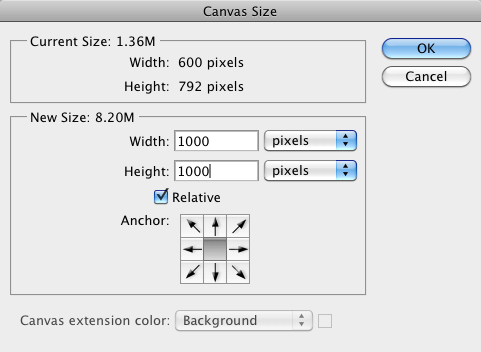
4. Now go back to your original image and drag both the device and viewport layers into the new image. If you want to make it easier for yourself you can change one of the viewport layers to a new color. Use the original viewport layer as your guide and position the device and viewport layers perfectly against it. Using the example image - when you are done you should see nothing of the green layer. 
5. You now have a perfectly positioned viewport and device within your image and you can go ahead and remove the viewport layers. For the standard devices we've added a bit of shadow with the light coming from the top straight down to the device. The simplest way to do this is to simeply copy your device layer twice, drag down the brightness of the layer so you're sure it's completely blacked out. Next gaussian blur one of the layers slightly and set the opacity to about 40%. Then gaussian blur the second layer with a medium value, again setting the opacity to 40%. Position this shadow slightly below the device so the shadow appears to be cast down. 
6. You can now crop the image using canvas size (again to keep centering) if you have a lot of white-space, but keep in mind that empty pixels don't cost much so this isn't strictly necessary as the image will be positioned using css.
7. Name the image something relevant and impress all your friends!
Comments