
Episerver Languages add-on 2019
Now, you can translate your Episerver Digital Marketing platform content using Episerver Languages add-on. This smart and free add-on is able to export your content in a clean format (XLIFF) in just a few clicks. Also, you can easily import back your translation using the Episerver Languages add-on with the Episerver Project approach. It requires a separate installation but no additional license.
Here is a step by step Installation guide. The installation is simple but technical background is required with the first time installation.
Installation:
Download and install the latest Episerver Languages add-on from the following URL: Episerver NuGet
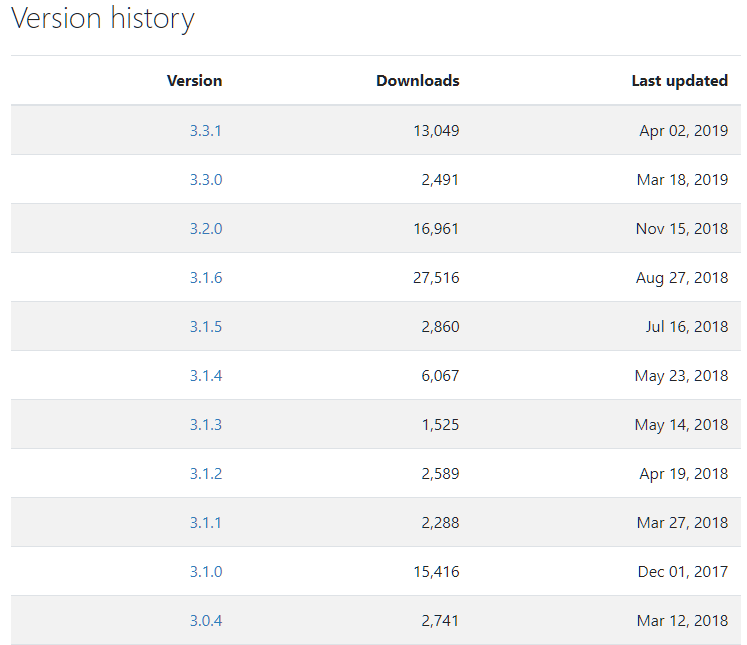
Second, make sure your current Episerver components, Core and UI, are compatible with the languages Add-on. If not, select an older version from the list on the same page:
Your technical team will have to install the Nuget using Microsoft Visual Studio as recommended by Episerver. For more details about this part please check: Episerver WebHelp
What are the functionalities and benefits of this smart Episerver Languages add-on?
- On a multi-lingual Episerver website, it helps you easily manage the enabled languages and related translations workflow.
- It integrates with Episerver Project, in order to manage localization projects from one central place.
- It exports the content into XLIFF format (XML Localization Interchange File Format) which is the worldwide standard format for translation recognized by all the Translation CAT tools like SDL Trados.
- By testing this tool in detail; including the exported XLIFF files, I found that it exports the content in a very clean way without grabbing any non-relevant content such as code, HTML or CSS. This makes these files ready for automated Engineering preparation without any additional rounds of preparation. Therefore, you will save a lot of time and effort and will reduce the localization costs.
- The tool provides the option to select the current node only, the current node and/ or sub-nodes. Further, it gives the user the option to export any related content of this page such as blocks: This is a great feature and it overcomes a challenge that other localization tools faced before.
Step by Step: How to Export and Import Content in a few easy steps
Pre-requisites:
- If it is a new instance, make sure you already enabled the target languages and the Languages inheritance from Root to subpages. This is set to be up correctly.
Steps:
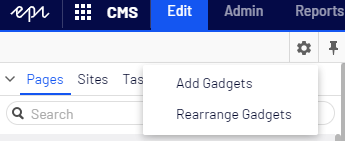
Once the Add-on is installed, go to your CMS Edit mode. Click the wheel in the top right corner and click Add Gadget.
Then, select All from the left column and Languages from the middle one.

The Gadget will be installed below the Pages Tree as following:
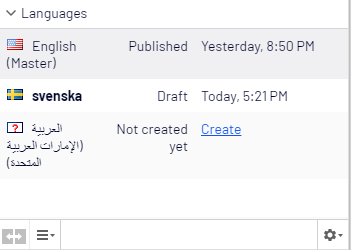
Now to translate a Page, select the page from the pages tree and then check the Languages Gadget. You will see something similar to the screen below (For demo purposes I am using Swedish and Arabic).
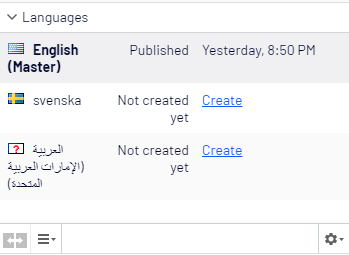
As you can see in the above screen, the selected page has the English US as the Master Language and there are 2 other languages available BUT NOT yet created. The next step is to click Create
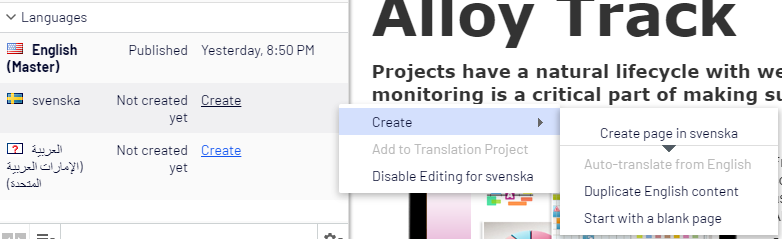
As you can see you have 3 options now:
- Auto-Translate from English (which needs an additional step from the Admin module in order to use an Auto-translate service like Google.)
- Duplicate the content (which means that the content from the English page will be copied to the target language)
- Start with a blank page. This is useful if the content in the target language will not be identical in comparison with the English.
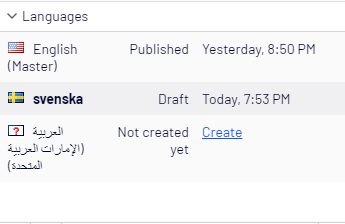
You can select any of the options based on your business needs. For demo purposes, I selected the second choice. Now, the language record will show that a new version in Draft mode is created in the target language (in my case Swedish) See below:
Now, go to the most right corner of the record and click the arrow there. You will see the following options:
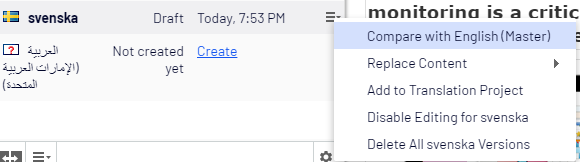
What we need to check on the above popup, is the option number 3 Add to Translation Project. Click this one and the following popup will be displayed:
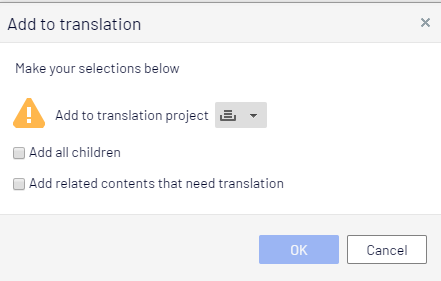
Important: You need to have an Episerver Project available
Now Select a project, whether you need the sub-pages or not and also if you want related contents like blocks etc… and click OK
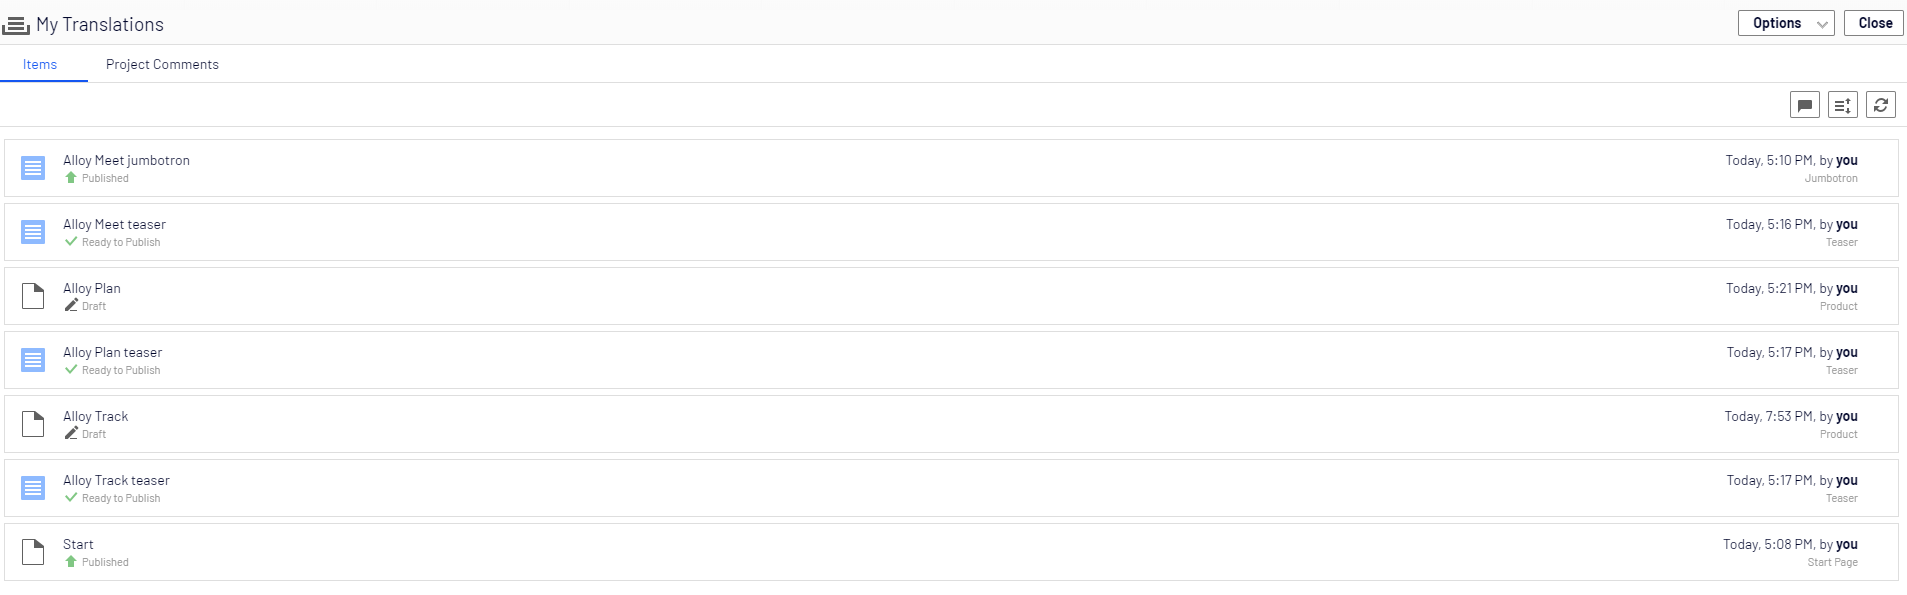
Now, go to your project. It should appear in the bottom left of your page
From the top right corner, click Options
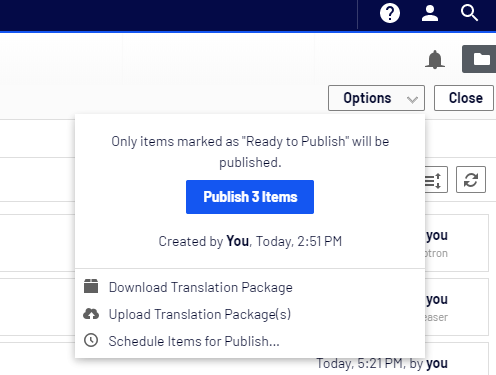
You can now see options like Download and upload Translation Packages
In a just few steps, you will be able to localize your content in a very smooth way.
Further, from the back-end of the CMS, you can even choose to send your selected content directly to your favorite localization house without manually downloading and uploading packages. Also, a related job can be scheduled to automatically import packages without any manual process. This requires a little bit more of technical implementation and I will cover this in a next article.
Feel free to leave a comment or to Contact Me for an open discussion!
Comments