
Creating Custom Actors for Optimizely Forms
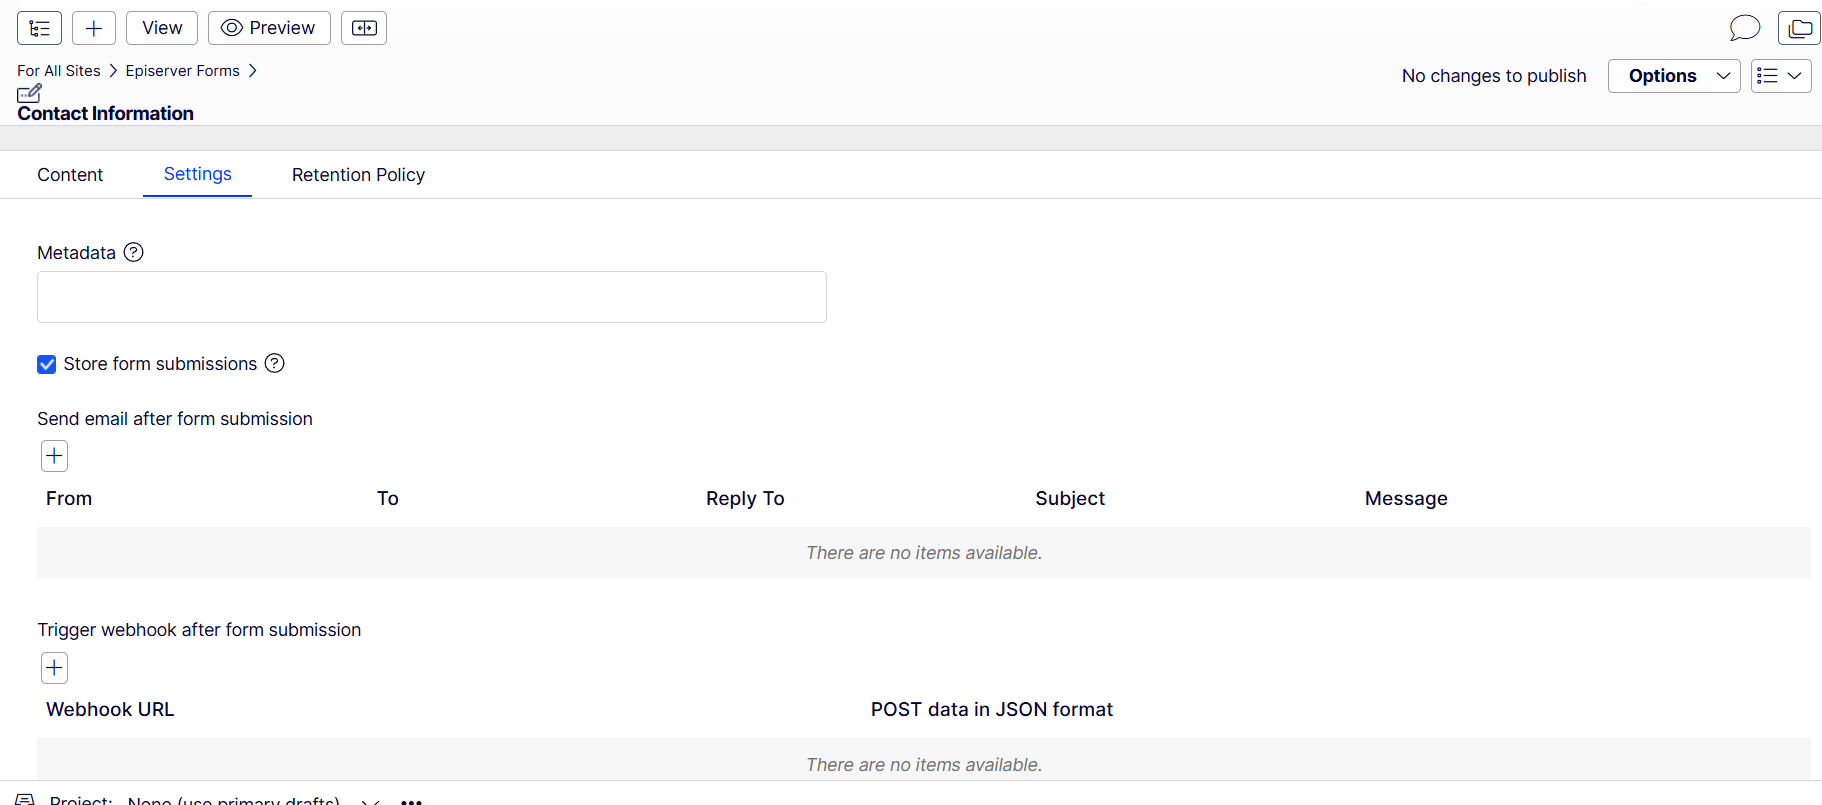
Optimizely Forms is a powerful tool for creating web forms for various purposes such as registrations, job applications, surveys, etc. By default, the submitted data is stored and can be exported in different formats. Additionally, it has two other default actors: email and webhook, which are helpful for sending emails as well as webhooks.
However, sometimes clients want to use their own third-party development to integrate and save/post API data. This is where custom actors come into play. In this blog, we'll learn how to create custom actors and how to integrate them with APIs. Let's get started!
Custom Actor Model
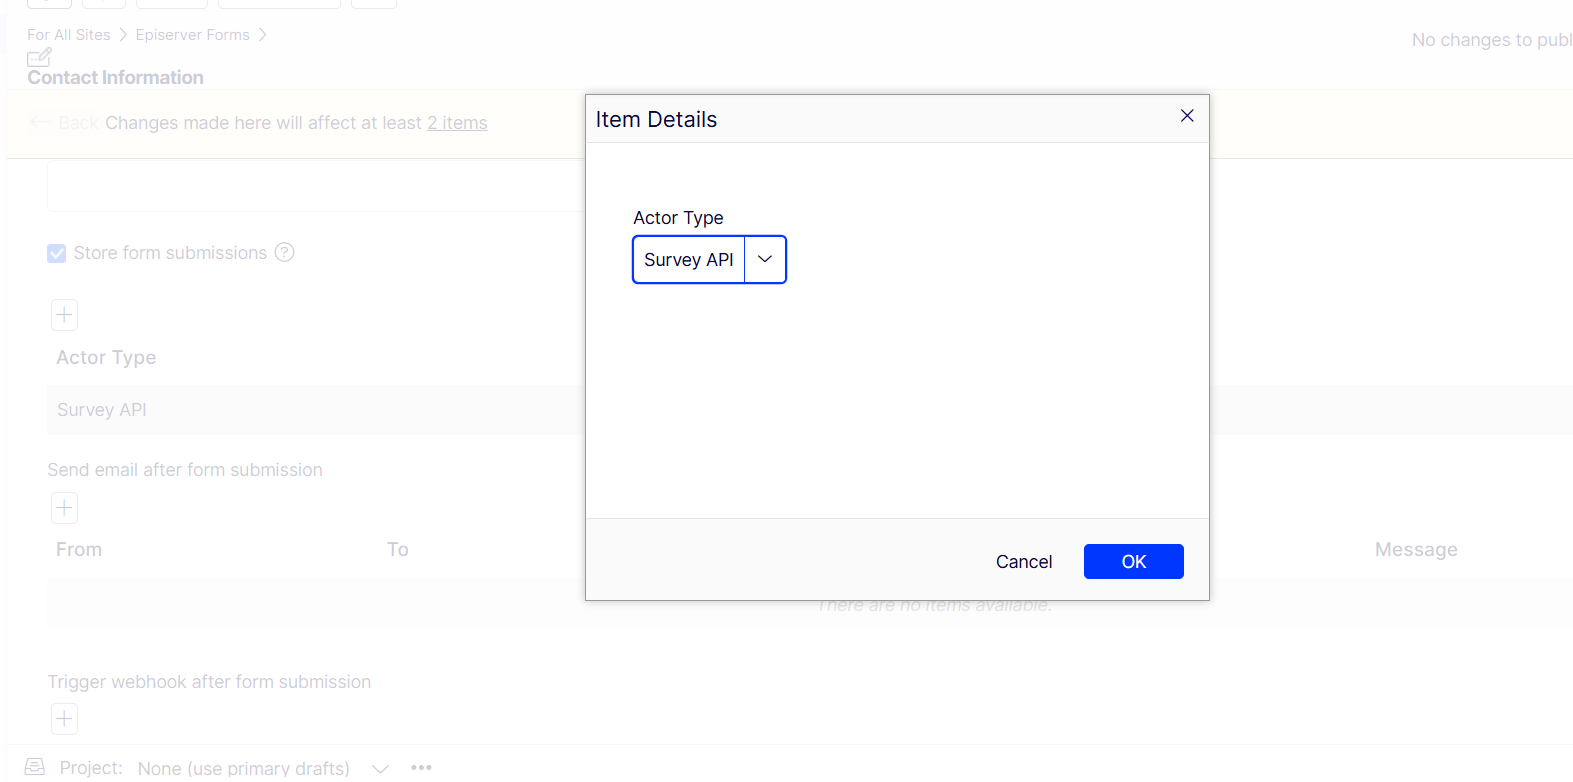
To create a custom actor, we first need to create a class that inherits from IPostSubmissionActorModel and ICloneable. This class is used for the actor definition. In this example, we'll use two actor models in the dropdown list: one for Survey and another for Registration. You can use selection based on your requirements. Also, note that this model should be serializable.
public class CustomActorModel : IPostSubmissionActorModel, ICloneable
{
    [Display(Name = "Actor Type", Order = 101)]
    [SelectOne(SelectionFactoryType = typeof(CustomActorTypeFactory))]
    public virtual string ActorType { get; set; }

    public object Clone()
    {
        return new CustomActorModel
        {
            ActorType = this.ActorType
        };
    }

    private class CustomActorTypeFactory : ISelectionFactory
    {
        public IEnumerable<ISelectItem> GetSelections(ExtendedMetadata metadata)
        {
            return new ISelectItem[]
            {
                new SelectItem() { Text = "Survey API", Value = "1" },
                new SelectItem() { Text = "Registration API", Value = "2" }
            };
        }
    }
}
Editor Descriptor
After creating the custom actor model, you need to inject this into the editor descriptor, which is used to render the grid UI. For this, you need to inherit an editor descriptor class using the Dojo widget CollectionEditor to render.
[EditorDescriptorRegistration(TargetType = typeof(IEnumerable<CustomActorModel>), UIHint = "ConfigurableActorPropertyHint")]
public class CustomActorEditorDescriptor : CollectionEditorDescriptor<CustomActorModel>
{
    public CustomActorEditorDescriptor()
    {
        ClientEditingClass = "epi-forms/contentediting/editors/CollectionEditor";
    }
}
Property Definition
After creating the editorial descriptor, you need to add a property definition for this actor model and inject the editorial hint from the editorial descriptor
[EditorHint("ConfigurableActorPropertyHint")]
[PropertyDefinitionTypePlugIn(DisplayName = "ConfigurableActorProp")]
public class PropertyForDisplayingCustomActor : PropertyGenericList<CustomActorModel>
{
}
Custom Actor
The final part involves implementing the custom actor, which inherits from PostSubmissionActorBase and implements the interface IUIPropertyCustomCollection. The PostSubmissionActorBase will override the Run method where our custom implementation will be done, and IUIPropertyCustomCollection will be used for the edit view user interface of configuring the actor model.
Here, PropertyType will be our custom property type name.
Below is a sample implementation of the Run method where we inject formDataRepository. We take the submitted data and find the data based on the element name. We create a custom method that will get the value based on the element name. As you can see, we can use CancelSubmit and ErrorMessage on the result response to prevent data submission as well.
public class CustomActor : PostSubmissionActorBase, IUIPropertyCustomCollection
{
    private readonly Injected<IFormDataRepository> _formDataRepository;

    public override object Run(object input)
    {
        var result = new SubmissionActorResult { CancelSubmit = false, ErrorMessage = string.Empty };
        var configs = (Model as IEnumerable<CustomActorModel>);
        var submittedData = _formDataRepository.Service.TransformSubmissionDataWithFriendlyName(SubmissionData.Data, SubmissionFriendlyNameInfos, true).ToList();

        if (configs.Any() && configs.Select(ap => ap.ActorType).FirstOrDefault() == "1") // Survey
        {
            // Get by form element name
            var nameData = GetValueByKey(submittedData, "name");
            // Implement your API
            // If success, then just return result;
            // If not successful, then:
            result.CancelSubmit = true;
            result.ErrorMessage = "your message";
        }
        else if (configs.Any() && configs.Select(ap => ap.ActorType).FirstOrDefault() == "2") // Registration
        {
            // Follow the previous comment
        }
        else
        {
            return result; // It'll call other actors if it has any;
        }
        return result;
    }

    public virtual Type PropertyType => typeof(PropertyForDisplayingCustomActor);

    private string GetValueByKey(List<KeyValuePair<string, object>> list, string key)
    {
        var item = list.FirstOrDefault(kvp => kvp.Key == key);
        return item.Value?.ToString();
    }
}
Now, if you run your project, you will see that the custom actor has been displayed in your form, and you can select any of them. Based on the selection, when you submit the form, your custom actor will be invoked.
Comments