This article provides the setup instructions on how to prepare your local machine to run the InsiteCommerce installer and launch a site locally. Before beginning the installation process, make sure your machine meets all of the necessary requirements:
System Requirements
- Visual Studio 2017 or newer
- Internet Information Services (IIS)
- PowerShell 2
- .Net Framework 4.8
- C#
- Typescript 3.7
- Java JRE or JDK
- SASS
- Grunt
- SQL Server and Management Studio
NuGet Packages
NuGet packages are available on https://nuget.episerver.com/, which does not require authentication
Prerequisite Instructions
Setting Up SASS
NOTE: Command Prompt, PowerShell, and Visual Studio all need to be run as Administrator.
- Run the command below in a Command Prompt as administrator to Install Chocolatey to assist in installing some of the dependencies.
@powershell -NoProfile -ExecutionPolicy unrestricted -Command "iex ((new-object net.webclient).DownloadString('https://chocolatey.org/install.ps1'))" && SET PATH=%PATH%;%ALLUSERSPROFILE%\chocolatey\bin - Open PowerShell as administrator
- Install nodejs by running the following command in PowerShell as administrator, Node.js is a dependence of Grunt:
choco install nodejs.install --force
Enter 1 to run the script.
- Install ruby by running the following command in PowerShell as administrator, Ruby is a dependency for SASS as it is a gem from Ruby:
choco install ruby --force
IMPORTANT: ISC is not compatible with the most recent release (v2.5.0.1 -released 12/26/2017) of Ruby. To avoid installation issues with Sass, please use v2.4.3.1.
- Restart PowerShell as administrator so that new Windows Environment variables get picked so we can continue the setup
- Run the following commands in PowerShell:
Installs Grunt
npm install -g grunt-cli
Installs Typescript
npm install -g typescript@1.7.5
Installs Compass
gem install compass
Troubleshooting Common Setup Issues (4.2)
Bundling Error
If there are bundling errors, try manually running the Sass task. This can be done in Task Runner Explorer or by right clicking the gruntfile.js, selecting the grunt menu, and clicking on grunt: sass.
If the following error is shown Fatal error: Unable to find local grunt. try re-installing grunt in Powershell by using the following command, then restart Visual Studio.
X509 Certificate Error
npm install -g grunt-cli
The X509 Certificate should only be used for development/QA, this is the certificate that comes with IdentityServer3 and anyone who downloads it would have the private key for it.
When deploying to production, a real X509 Certificate should replace this one. Developers should be able to use their SSL certificate. Add the insiteidentity.pfx file to the bin folder of the web application.
Resharper Build
The Resharper build currently does not trigger the Grunt Watch or Restore Nuget Packages when running a build. If this extension is running, the Sass task will manually need to be triggered in Task Runner Explorer and restore packages from the Nuget manager.
Running the InsiteCommerce Installer
Running the InsiteCommerceSetup.exe installer guides you through setting up the project directory, configuring IIS, installing Elasticsearch, and setting up the SQL Database.
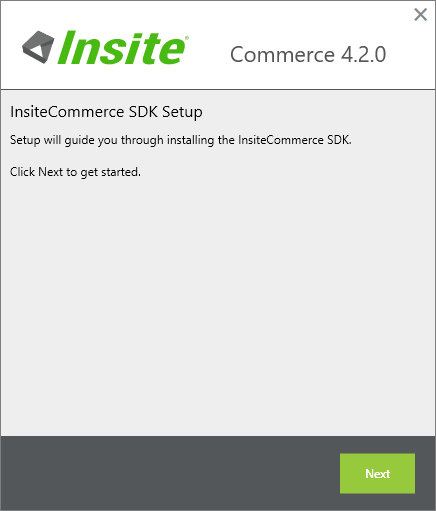 |
1. Welcome Screen This is the welcome screen when you fist launch the installer. To proceed with the installation Click Next. |
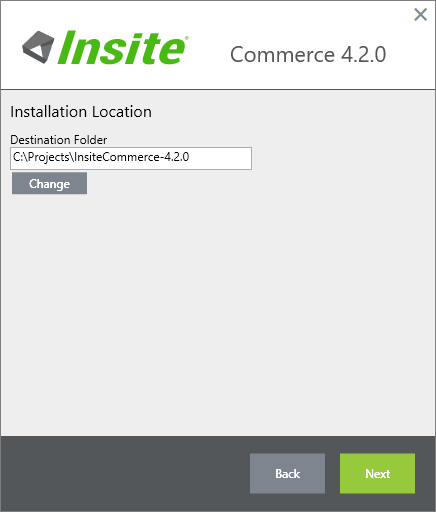 |
2. Installation Location NOTE: Do not specify the Users folder for this location. Permission issues will cause problems when rebuilding the search indexes. It's recommended to create a Projects folder on your C:\ drive. |
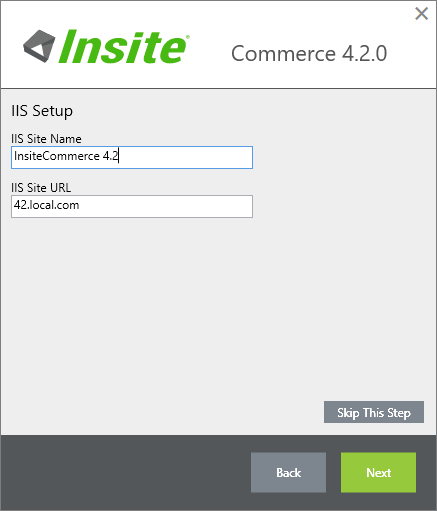 |
3. IIS Setup This step allows you to create an IIS website so you can view the site with a URL and without running Visual Studio in debug mode. If this step is skipped you'll need to add the domain name you create later to the Website.DomainName field in the database and also update the Identity Server URL in the config/appSettings.config file. |
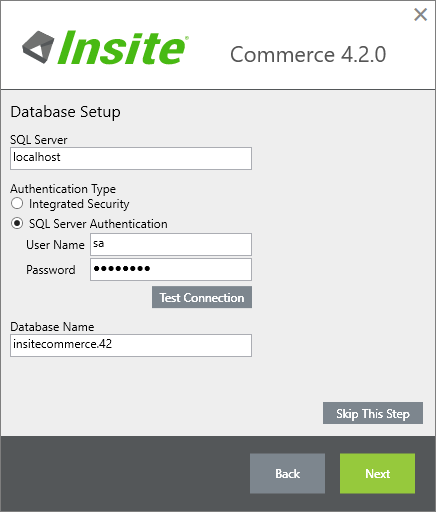 |
4. Database Setup Next, specify the Authentication Type the app will use to connect to the database. We recommend using SQL Server Auth, as Integrated Security requires additional steps after the installer to work. You can click Test Connection to validate. A green checkmark will appear after the validation is successful. |
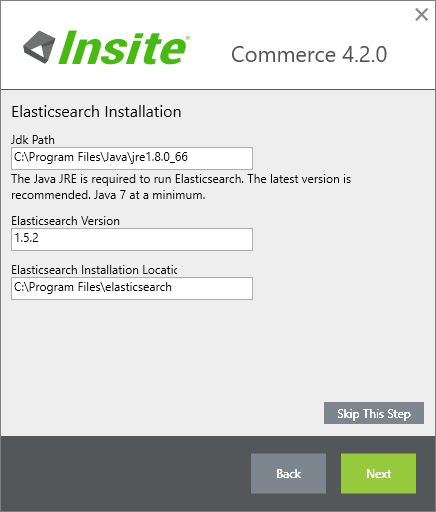 |
5. Elasticsearch Setup If you already installed Elasticsearch skip this step. To install Elasticsearch you'll need the location of the JRE installation. The screenshot shows the typical install location for the 64-bit version. It's recommend to leave the other fields with their defaults, but you can change the version and default install location of Elasticsearch if desired. |
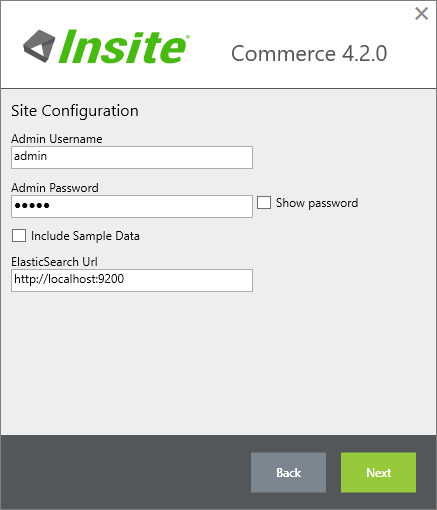 |
6. Site Configuration IMPORTANT: If you do not include sample data, review this article. NOTE: If you choose to include sample data, the indexes need to be rebuilt in order for categories and products to show up in the website. For more information on rebuilding indexes, refer to the understanding indexing article. |
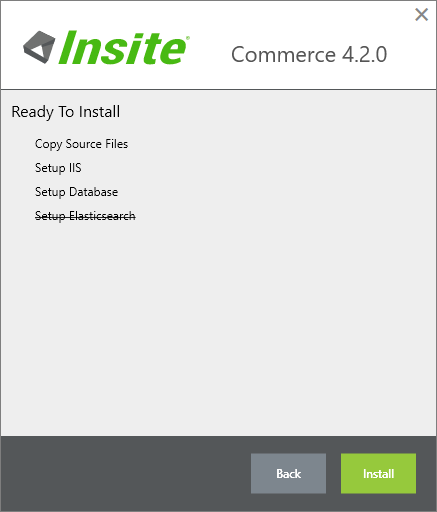 |
7. Setup Overview You are now ready to install InsiteCommerce. This screen provides an overview of the steps to finish the install (steps you skipped are crossed out). Click Install when ready. |
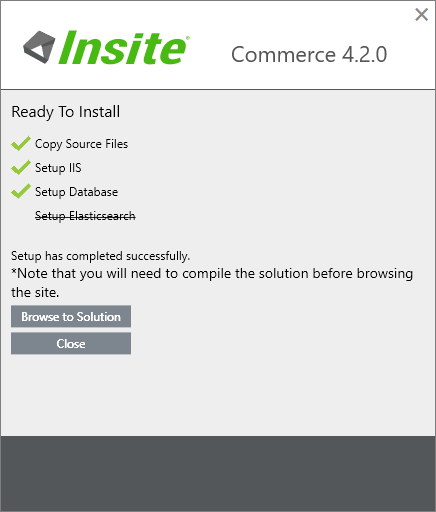 |
8. Installation Complete Your installation is now complete! However, there are a few more steps required to get the site running correctly. |
9. Create a Custom Theme
Create a project theme using the Powershell script provided. Multiple themes can be created in a single repository, however, themes cannot have the same name.
- In Windows Explorer, locate the local git repository and navigate to the /src folder
- Open Powershell and execute the ./createTheme.ps1 Powershell script
For example, ./createTheme.ps1 -themeName "YourCustomTheme" - Open the InsiteCommerce.Web solution in Visual Studio and validate it contains an InsiteCommerce.Web project and the custom Theme project.
10. Configure NuGet source in Visual Studio
- In Visual Studio, navigate to Tools > Options > NuGet Package Manager > Package Sources
- Click Add
- Name - B2B Commerce
- Source - https://nuget.episerver.com/
- Restore packages
11. Build Visual Studio Solution
If you still have the last screen of the installer open you can click the browse to the solution to open an explorer window to the location with all your SDK files. Otherwise, you'll need to navigate to the location you specified in Step 2.
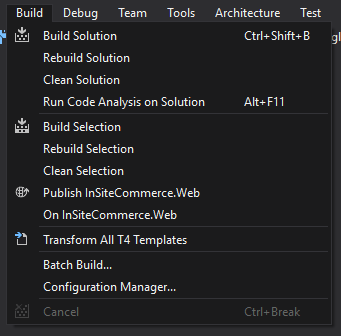
Open the InsiteCommerce.sln file in Visual Studio. Once the project has opened you need to build the solution. The build can be run in a few different ways:
- You can open the Build menu and click Build Solution
- Right click on InsiteCommerce.Web in the Solution Explorer and select Build.
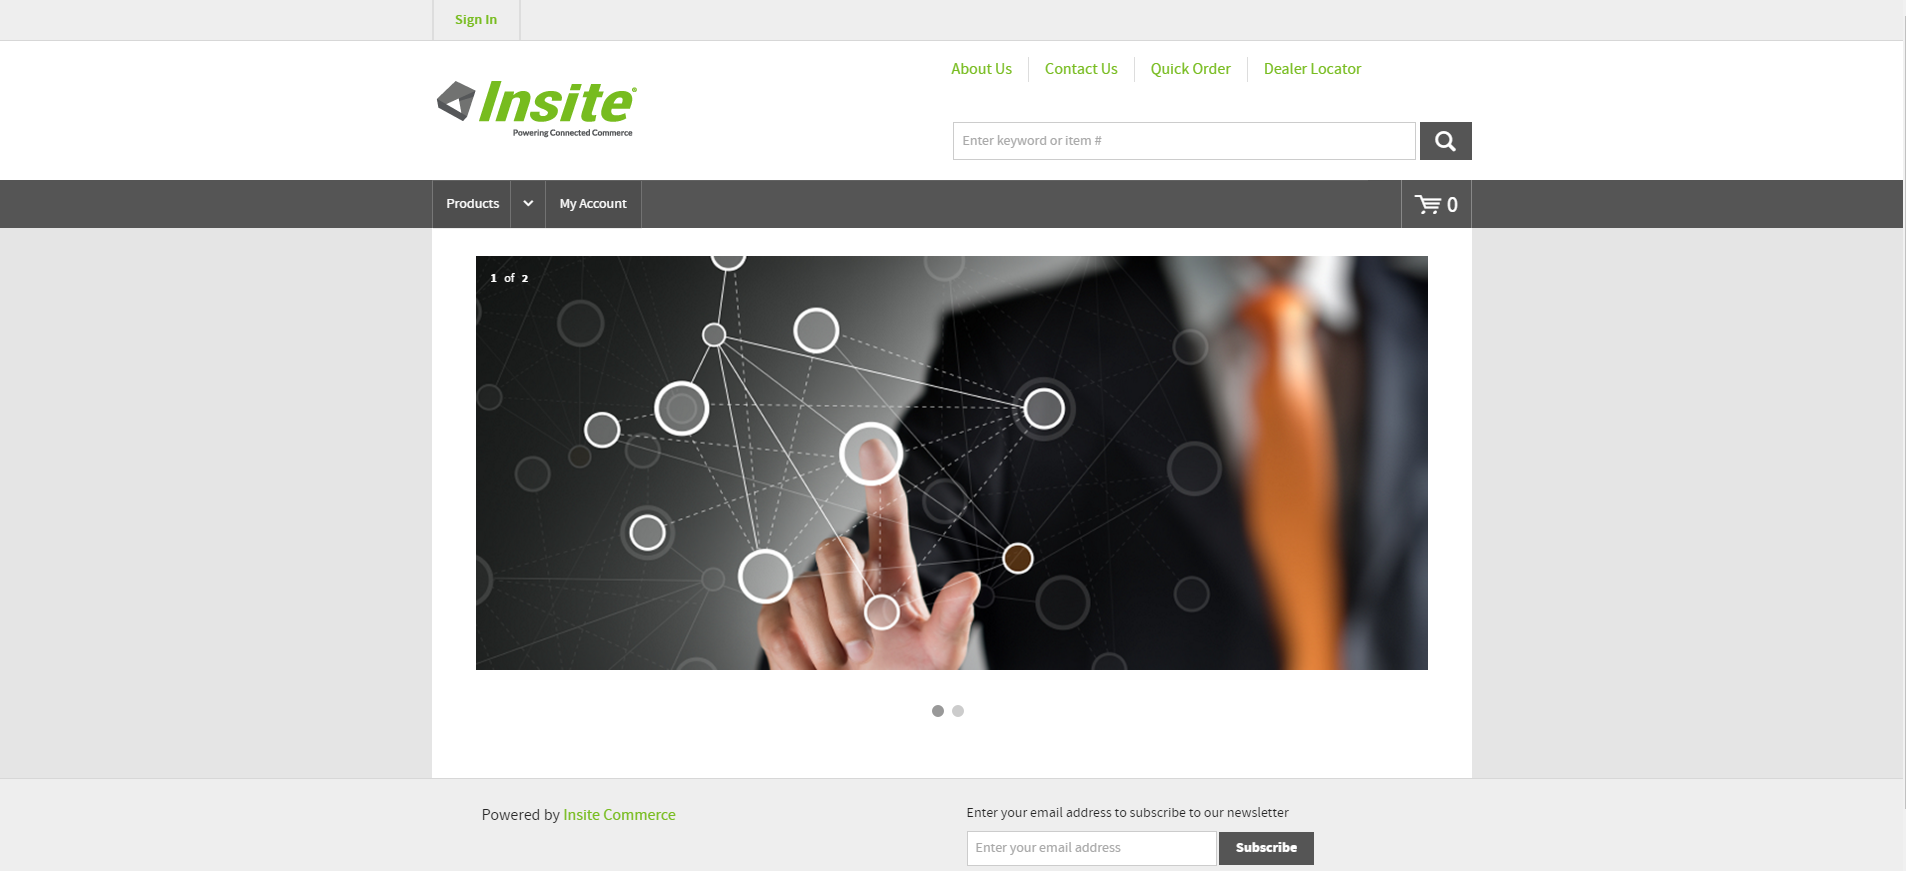
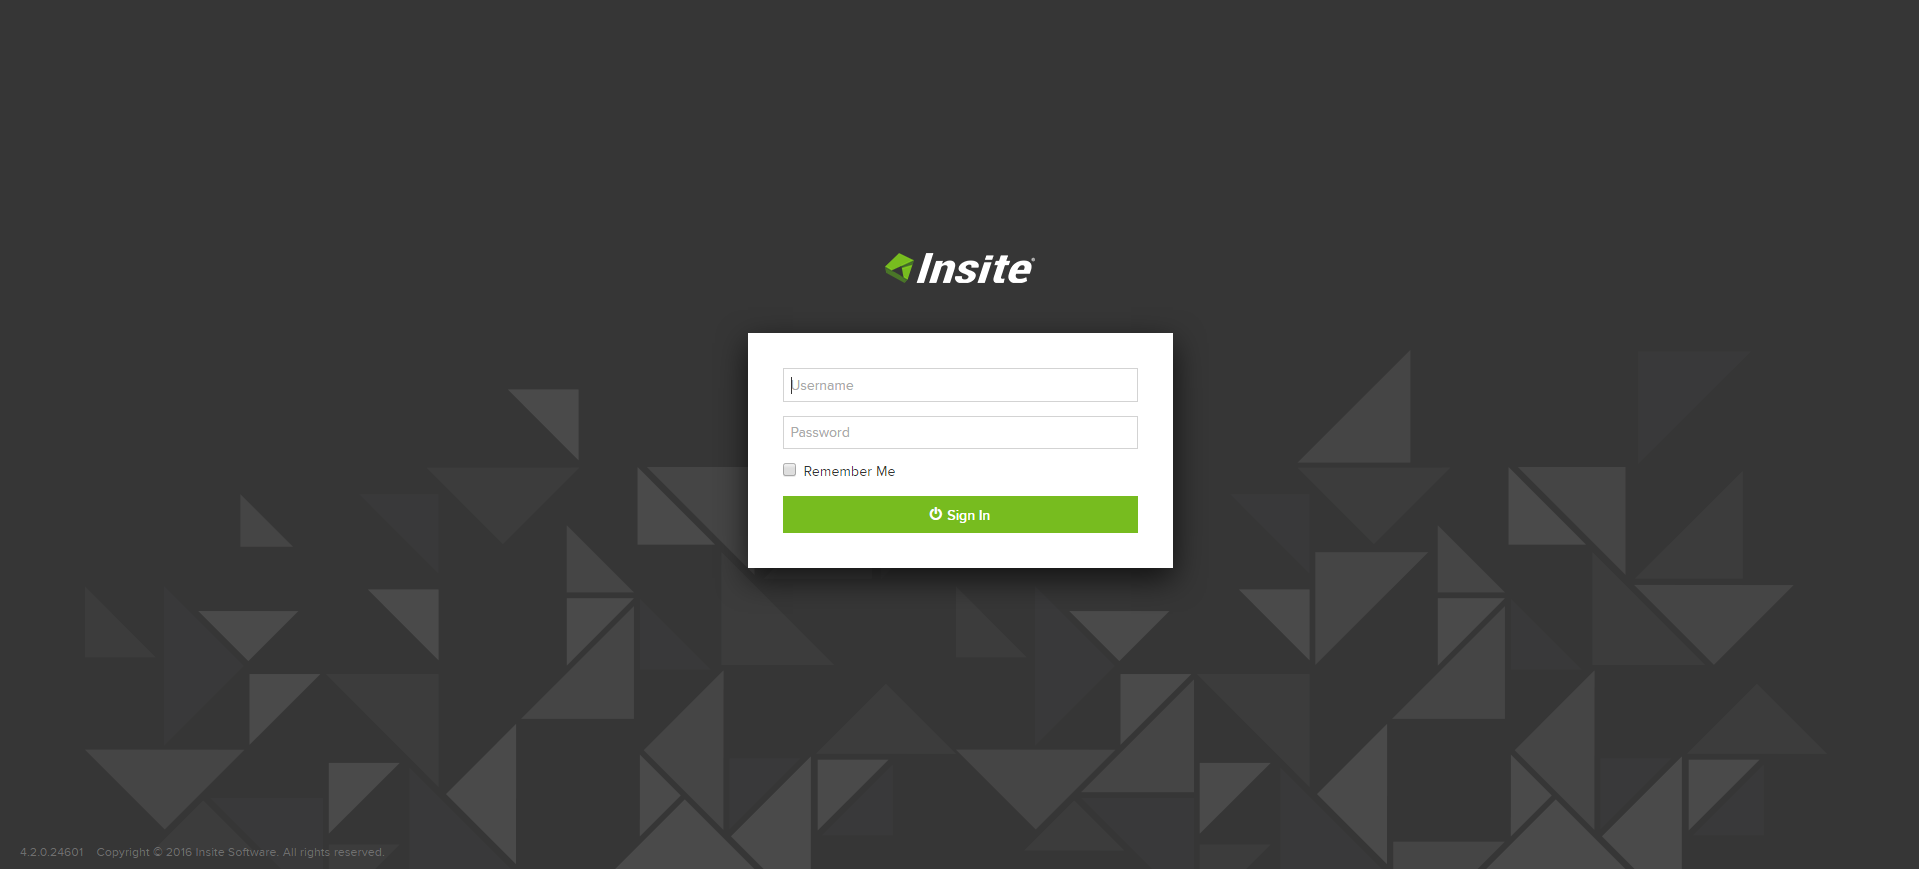
Once the build is complete, navigate to the URL you created in the IIS Setup and view your InsiteCommerce website. You can add /admin after the URL in order to log in to the Admin Console, for example: https://insitesoft.com/admin
Once installed, use the following default username and password to access the Admin Console:
Username: Admin
Password: Admin
Website
Admin Console
Last updated: May 03, 2021