
How to Setup Episerver for Localization
Episerver is one of the most powerful Content Management Systems capable of efficiently manage your digital assets. The Episerver platform is very user-friendly. Authors, editors, and administrators are always feeling very comfortable when they deal with Episerver's great features.
Episerver is also recognized as a strong Marketing and e-commerce platform, that helps Brands to achieve their goals and more. One of the requirements of expending a Brand Message globally is Content Localization. Episerver is one of the best CMSs in that regard. Here are the easy 4 steps to apply to make your Episerver ready for localization.
Also, you can check my YouTube Video about how to localize Episerver here: https://www.youtube.com/watch?v=CTDkNwO_hvI
First,
Log in as Admin. Go to the Admin section and click the second tab Config.
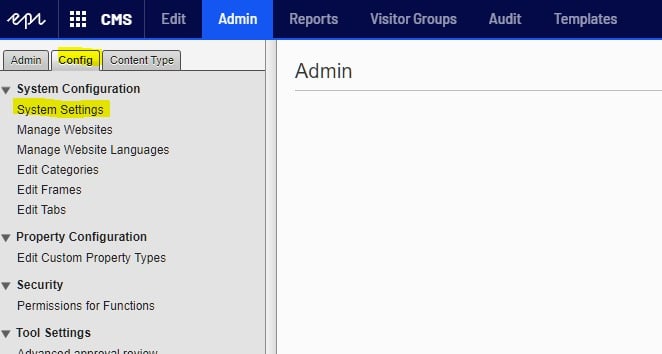
Now, click System Settings. You need to check the Enable Globalization checkbox.
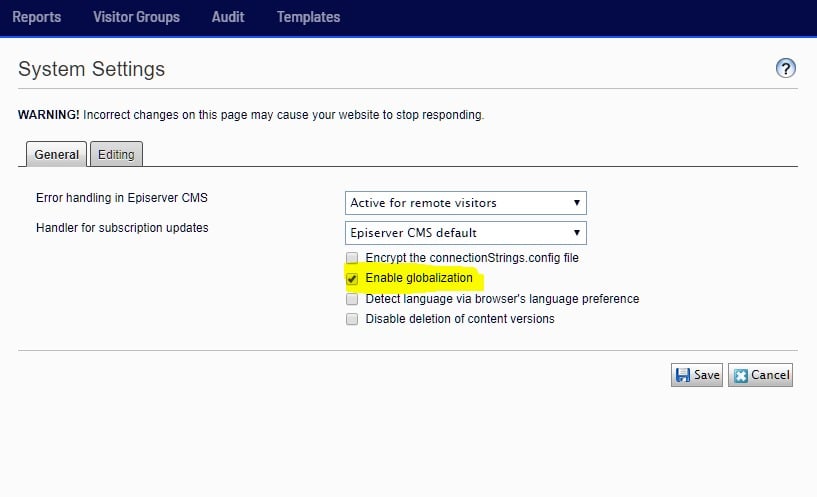
Optionally; you can check the third option ‘Detect Language’ via browser's language preference, in case you want the CMS to automatically detect the preferred language.
Second,
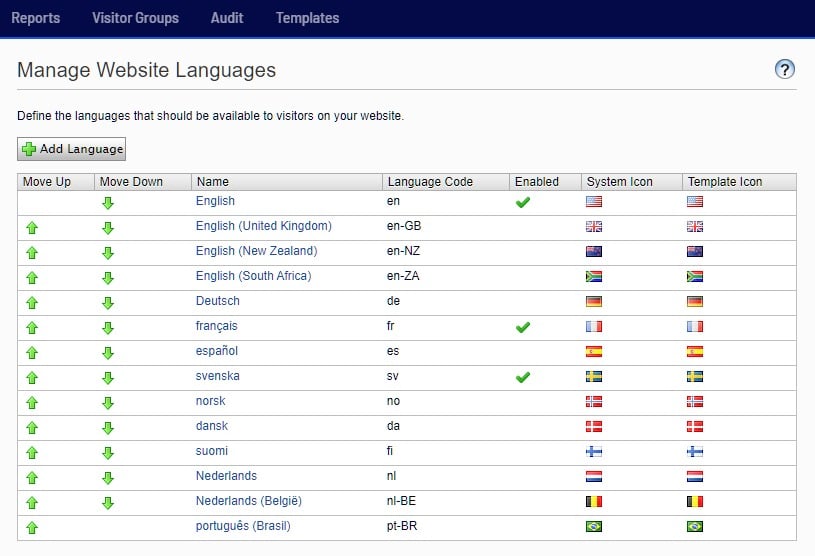
you need to add your new languages to the System. From the same tab click Manage Website Languages.
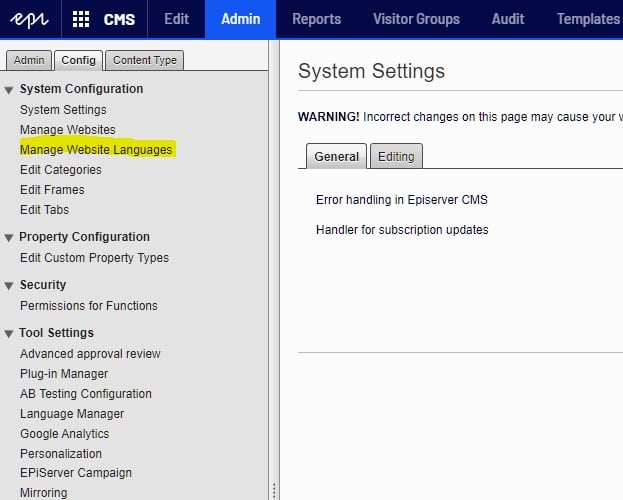
Then, select your target language from the list
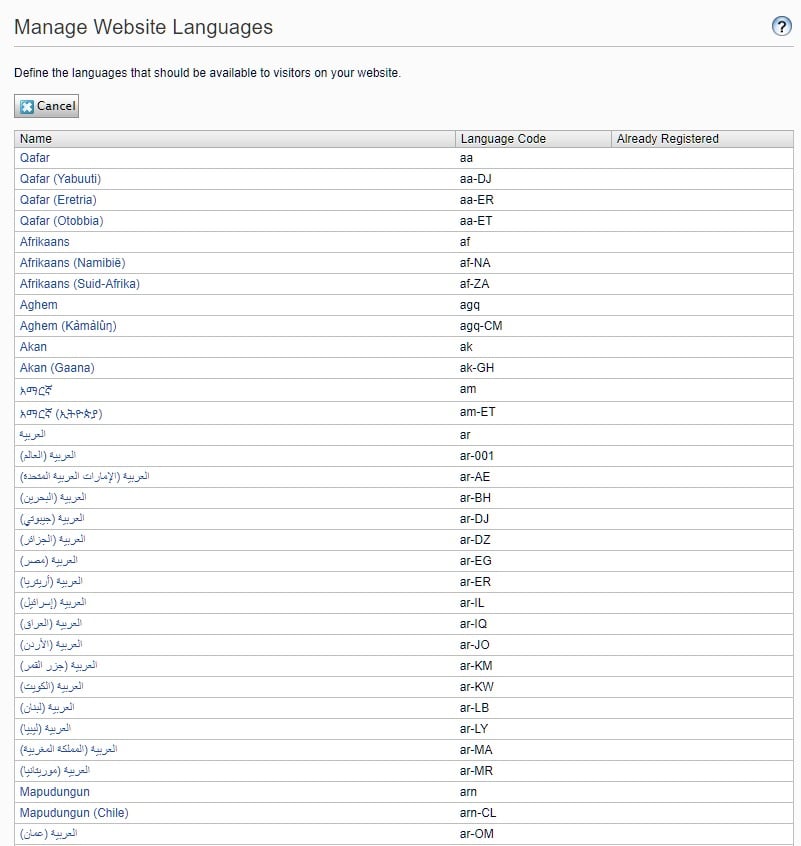
If you cannot find your language (or Locale), Click the Add Language button at the top. Now you have all the languages available in the System to select from.
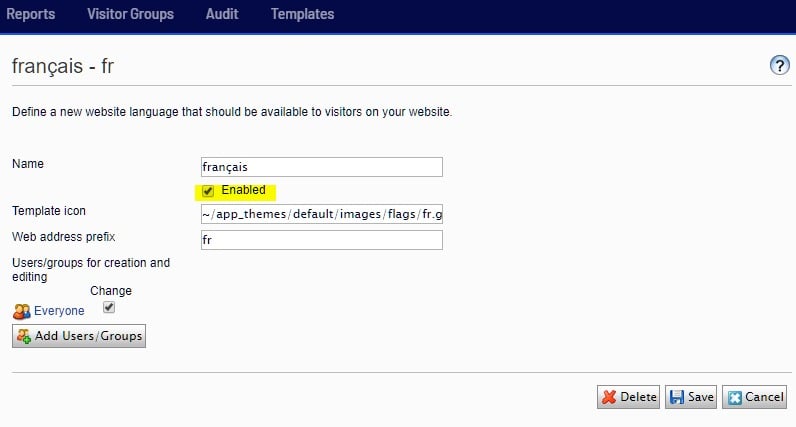
Then, click the language you select and check Enabled
By default, the language will be available to all the internal users of the CMS. If you want to change this behavior click Add Users/ Groups
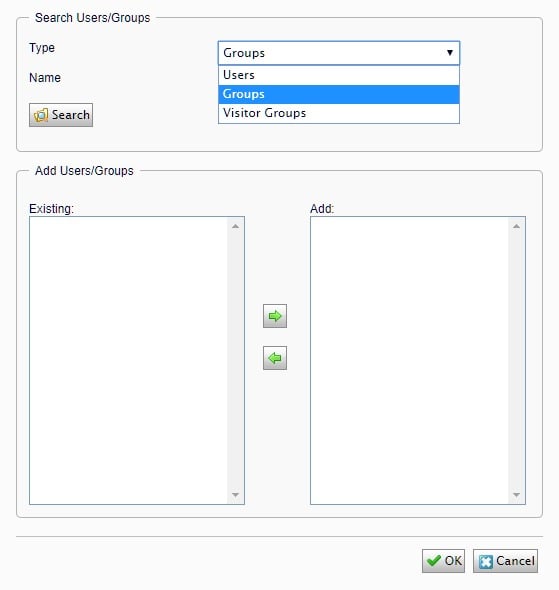
Now you can search by individual user or group of users and weather to provide access or not to this particular language.
Third,
so far, we enabled globalization and we added the languages to the System. The third step is to set up the language inheritance hierarchy on the Content Items (pages) level. To do that, we need to go to the Edit mode of the CMS, click the Pages tab and select the Root node.
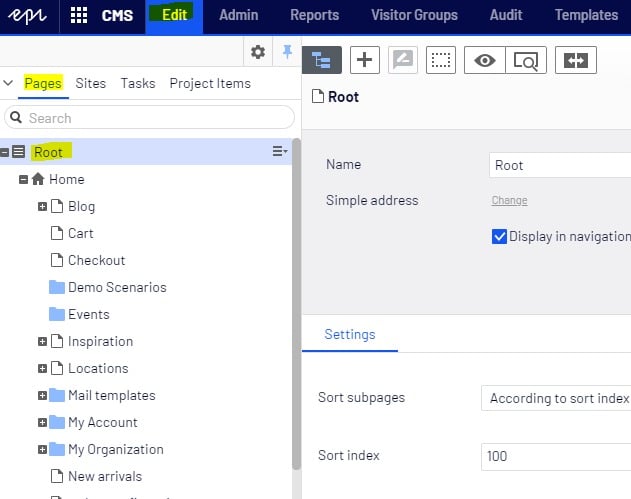
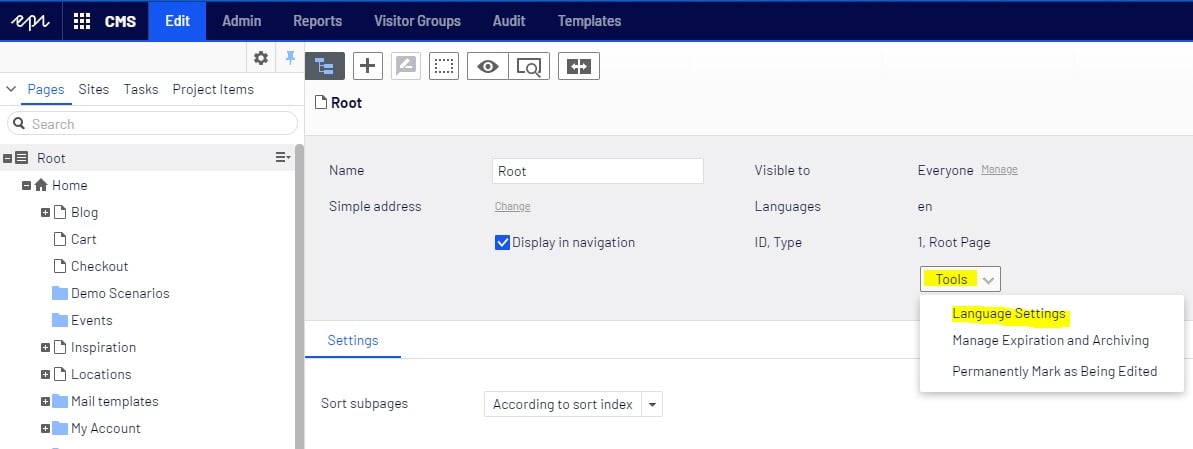
Now, click Tools and then Language Settings
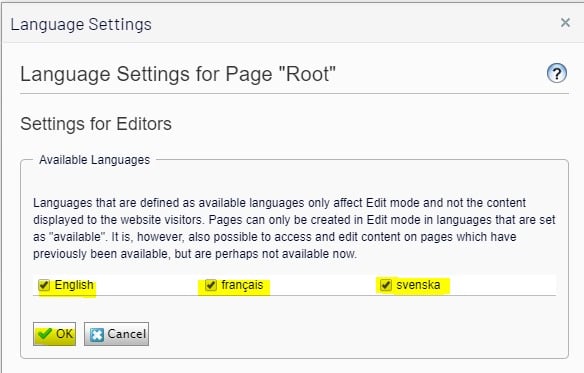
Next, is to add the language and click
To apply the inheritance for this language setup for all subpages. Go to the Home node and make sure that Inherit settings from the parent page: "Root" is selected.
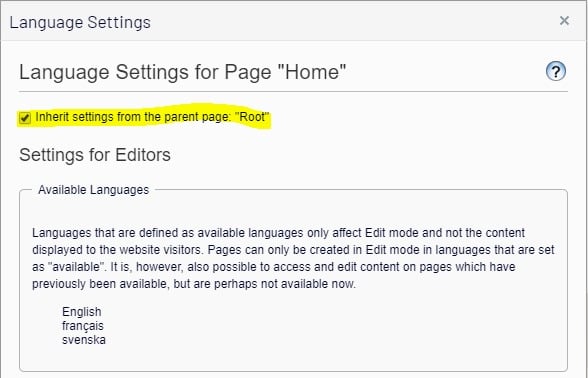
Now if you got to any of the other subpages, you will see that it inherits the same language settings as in the setup root node.
Fourth,
as we finished the third step, now we need to create the pages in the target language. You need to go to the second tab Sites and select the new target language that you have already set up in the first step. In this demo, I am using French.
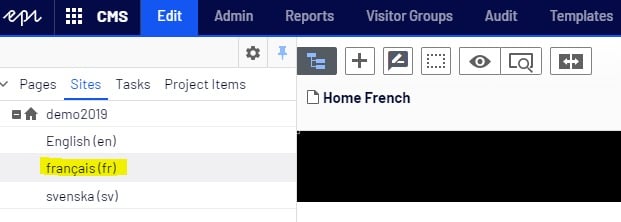
Then, return back to the Pages tab and select any of the pages you want to translate into French. So far, the page doesn't exist in the target language and needs to be created first.
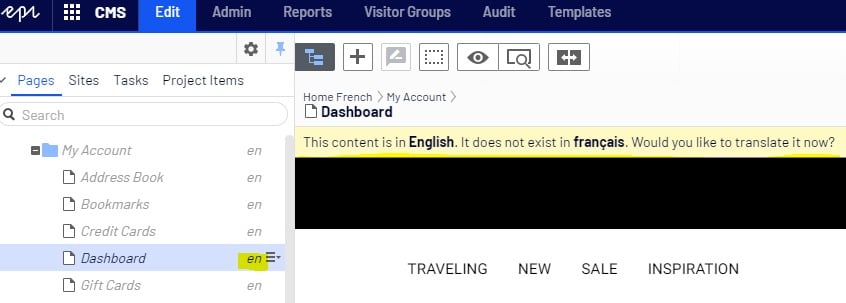
As you can see the page node is in Italic and its current language is English. There is a Yellow message on the top that says that this page doesn't exist in French. Two ways to create it in the new target language:
The first approach is to click the Translate button at the top right as in the below screen
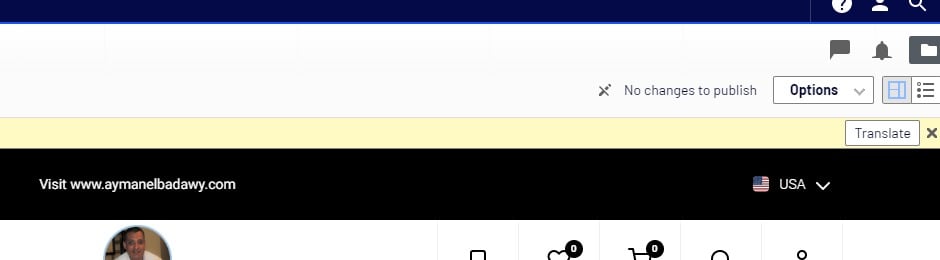
This approach will create the page structure into the new language but will not copy the English content to the French page.
The second approach is to user Episerver Languages Gadgets and creates the page using it to clone both; the page structure and the content from the source default language.
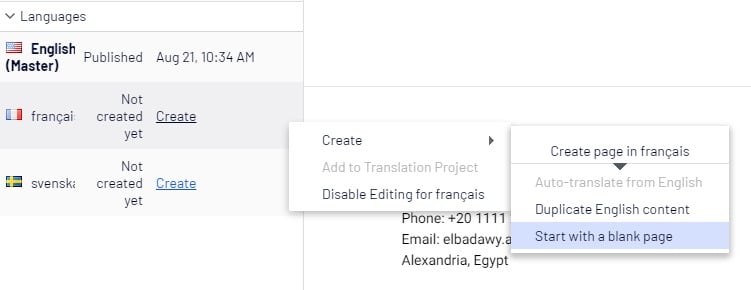
In the below link you will find one of my blogs that explain how to set up the Episerver Translate Gadget in detail.
https://world.episerver.com/blogs/ayman-elbadawy/dates/2019/11/episerver-languages-add-on-2019/
Also, if you need to get more information about how to set up your Episerver CMS for multilingual you can watch my tutorial video here:
https://www.youtube.com/watch?v=CTDkNwO_hvI
Fill free to leave a comment or to contact me at elbadawy.ayman@gmail.com
Nice post Ayman!