Set Up EPiServer Mail “Developer” Environment
Based on CMS 6 R2, Mail 5 R2, and Windows Server 2008
This blog is intended for a partner or EPiServer employee looking to set up a EPiServer Mail in a demo or test environment or perhaps even a customer testing the product out in a similar environment before purchasing. The title of this blog says “Developer” environment simply because it utilizes the EPiServer Mail developer license. I will walk you through the basic steps get set up based on my specific environment and software versions. If your environment varies the step details will likely vary as well but the overall may still serve as a valid guideline.
I’m going to start by assuming you’ve already installed EPiServer Mail on your site. If not, please refer to the instructions on EPiServer World or the templates you are using. For more information on EPiServer mail go here. Next I’m going to walk through setting up a basic SMTP server on your local webserver, ordering your EPiServer Mail developer license, and putting that in place. Keep in mind there are multiple ways you could set up a SMTP server and that this will only serve as one example. My focus is not to set up a robust secure SMTP server but simply to get the basics going. After all, I probably shouldn’t be re-writing Microsoft’s and there are many people with greater expertise in this area than myself. However, it can’t hurt to help out the community a bit by including a sample. If you want to set up a more complex environment you can seek out this information via your trusty friend Google (oh, sorry Microsoft, or Bing).
The EPiServer Mail developer license has some restrictions. For more information on this please navigate to the Activating Account and Handling Licenses section on the Installation and Instructions EPiServer Mail R2 page.
Set Up SMTP
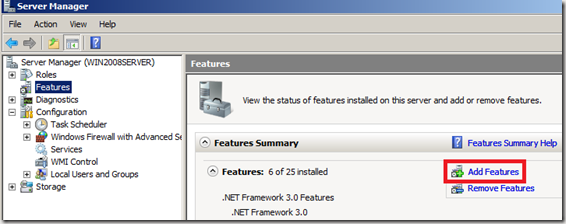
- If you have not already set up SMTP you need to do so. To set it up (or validate it’s set up) open the Server Manager console.
- Select “Features”.
- Select “Add Features”.
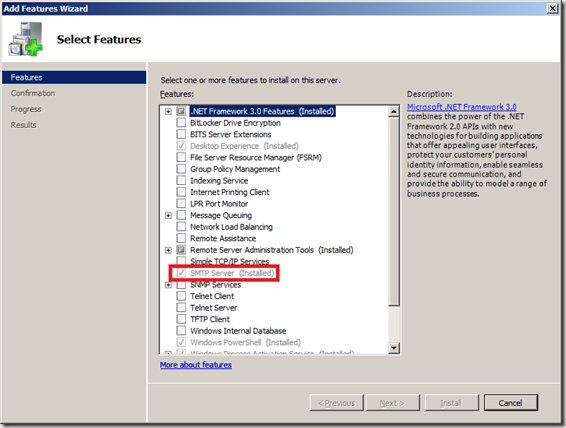
- Scroll down on the “Add Features Wizard” window until you see “SMTP Server”. If it’s installed, it will be checked off. If not, select this checkbox. If SMTP is already installed skip to the step that starts with “Now that SMTP is installed…” below, otherwise continue.
- Continue with the installation selecting the many “Next”, “Next”, “Next” buttons. Note that you may be asked to add a necessary role service. Assuming this is your demo/test environment and you have no concerns, please do so.

- Select the “Install” button.
- When the installation is complete select the “Close” button.
- Now that SMTP is installed navigate to the Windows Start menu.
- Navigate to Administrative Tools.
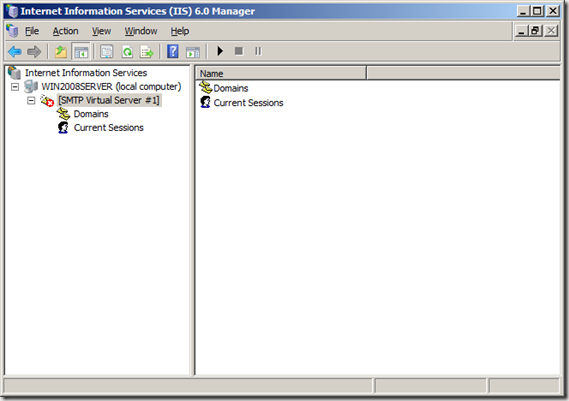
- Select “Internet Information Services (IIS) 6.0 Manager”.
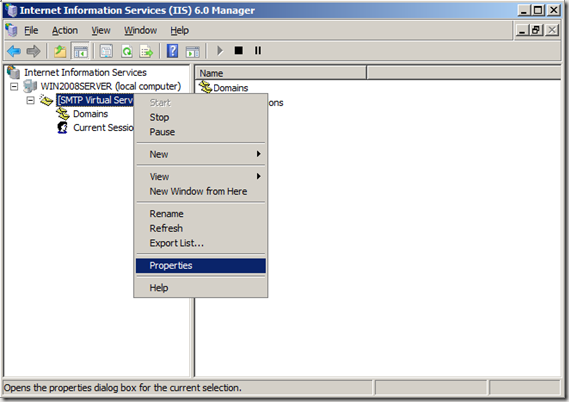
- Select the relevant SMTP Virtual Server.
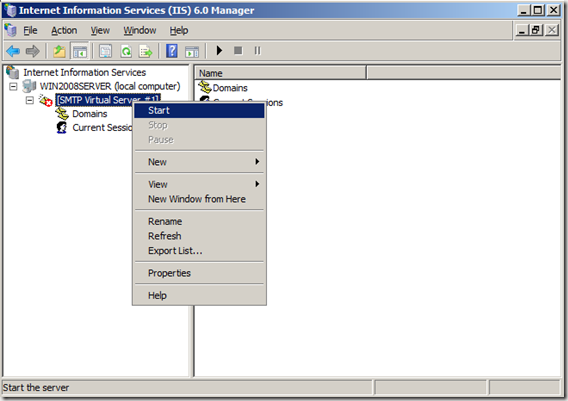
- If it is not already started, right click on the SMTP Virtual Server and select “Start”.
- Now that the SMTP server is started right click on it again and select “Properties”.
- Select the “Access” tab.
- Select the “Relay” button.
- Select the “Add” button.
- Select the “Single computer” radio button.
- Enter 127.0.0.1 for the IP if you are using localhost (or whatever is relevant for you)
- Select “OK”.
- Select “Apply”.
- Select “OK”.
- Close the IIS 6.0 Manager.
Configure the SMTP Server for the EPiServer Site in IIS
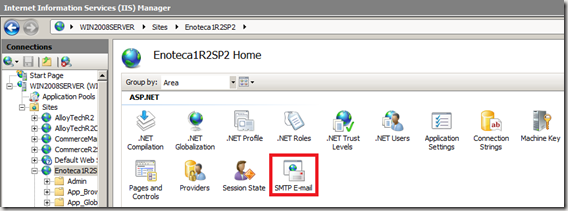
- Open up the current version of IIS (the above is an older manager version).
- Navigate to and select the site you intend to set up EPiServer Mail on.
- Open the SMTP E-mail settings
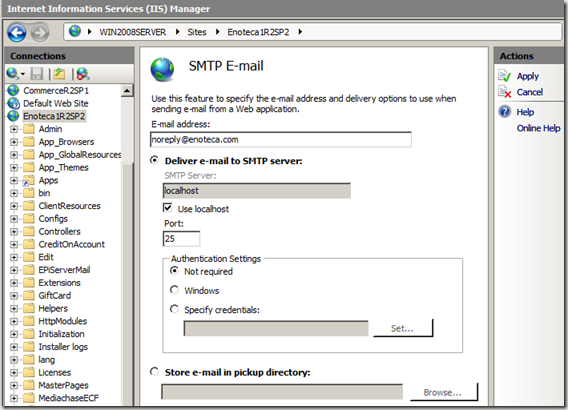
- Enter the relevant information you want to be used when sending email from the SMTP server and configure it for localhost on port 25 as identified below.
- Select the “Apply” button.
Activate EPiServer Mail Developer License
- Log into EPiServer.
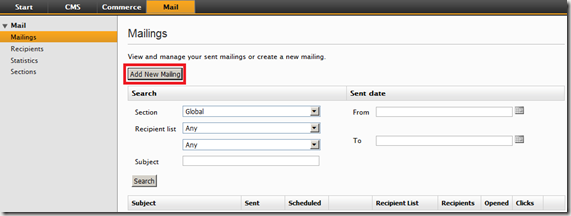
- Select the “Mail” menu item in the top level navigation.
- Select the “Add New Mailing” button.
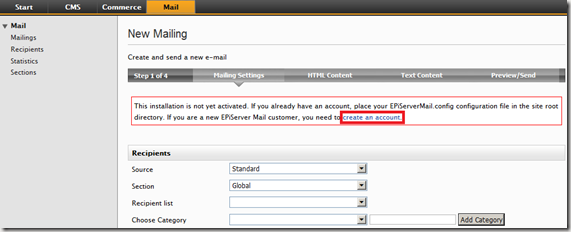
- You should see a message indication the installation is not yet activated. Select the “create an account” link.
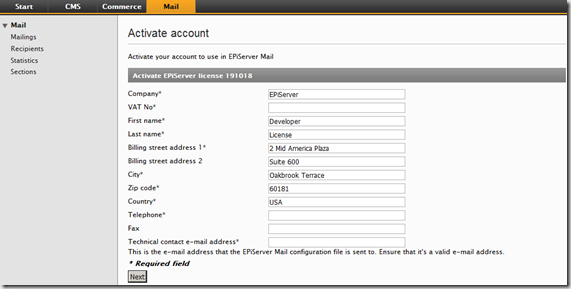
- Enter your information to set up the account. Partners should enter their VAT No. If you are a customer or a partner that does not know their VAT please contact the appropriate EPiServer sales manager. If you are an internal EPiServer employee please contact your manager or relevant member of the technical team.
- Read the license agreement and if you agree select the check box accepting this agreement.
- Select the “Activate account” button.
- If all goes well you should see a message similar to the following.
- Shortly after, again if all is well, you should see an email that looks similar to the following.
- Copy the EPiServerMail.config file from the email and place it in the root directory of the site you are setting up EPiServer Mail on.
- If all goes well you should now be able to send mail.
Enjoy!
Additional Information:
http://msdn.microsoft.com/en-us/library/8b83ac7t.aspx






Comments