
2 Factor Authentication In EPiServer
A client approached us one day asking if we could setup 2 factor authentication on their EPiServer site based on some requires their Information Technology team requested due to security concerns. I am not sure what concerns they had but we thought it would be a good challenge and a fun little project. We know there has been a lot of posts going around discussing how secure is 2FA and how beatable is it. We are not going to dive into all the ways people are trying to beat the system but more how to enable 2FA in your Episerver site.
There are some items you need to consider here first. If you have a large user database already using asp.net memberships and roles, you will need to convert those over to Identity users. We ended up writing a scheduled job for converting the users over to identity users and sending them a temporary password to handle the transition a bit smoother. The users will also need to have an application available for generating the token. In our case, any OTP application will work as we use OTP for generating the One Time Password.
There are quite a few pieces that we need to hook into here to get EPI to play nicely will 2FA. They are not hard I promise that but will take some time and tinkering to make tie it altogether.
The first thing we need to do is make sure the tables are created in your application for Identity to use for our user store. If you do not have a table, I have included them in the link below in github under the TwoFactorAuth folder. Once those tables are created, optional if you have them already, is to handle the packages needed for 2FA. We are going to install the OTPSharp.Core package. Note, this assumes you already have OWIN installed already. If you do not, you will need to install the following packages:
Install-Package Microsoft.AspNet.Identity.Owin
Install-Package Microsoft.Owin.Security.OAuth
Install-Package Microsoft.Owin.Security.Cookies
Install-Package OtpSharp.Core
Install-Package Wiry.Base32.Patched
Now that we have those packages installed, we can now wire up epi to let OWIN know a couple things at startup needed to run 2FA. We need to tell the system to use our provider as well as we need to tell the system to use our new ApplicationUser model which inherits EPiServer.Cms.UI.AspNetIdentity.ApplicationUser. By doing this we get the benefit of adding our 2 custom fields to the Identity object which will store the IsTwoFactorAuthenticatorEnabled boolean for letting the system know we have another step before we are authenticated, and a field for the TwoFactorAuthenticatorSecretKey to help with the token.
So in startup, we are going to add our cod to wire up the 2FA to the system:
public void Configuration(IAppBuilder app)
        {
            // Register our two factor auth into the site.
app.AddCmsTwoFactorAspNetIdentity<SiteApplicationUser>();
app.UseTwoFactorSignInCookie(DefaultAuthenticationTypes.TwoFactorCookie, TimeSpan.FromMinutes(5));
            app.UseTwoFactorRememberBrowserCookie(DefaultAuthenticationTypes.TwoFactorRememberBrowserCookie);

            // Add CMS integration for ASP.NET Identity
            // app.AddCmsAspNetIdentity<ApplicationUser>();

            // Remove to block registration of administrators
            app.UseAdministratorRegistrationPage(() => HttpContext.Current.Request.IsLocal);

            // Use cookie authentication
            app.UseCookieAuthentication(new CookieAuthenticationOptions
            {
                AuthenticationType = DefaultAuthenticationTypes.ApplicationCookie,
                LoginPath = new PathString(Global.LoginPath),
                Provider = new CookieAuthenticationProvider
                {
                    // If the "/util/login.aspx" has been used for login otherwise you don't need it you can remove OnApplyRedirect.
                    OnApplyRedirect = cookieApplyRedirectContext =>
                    {
                        app.CmsOnCookieApplyRedirect(cookieApplyRedirectContext, cookieApplyRedirectContext.OwinContext.Get<ApplicationSignInManager<ApplicationUser>>());
                    },

                    // Enables the application to validate the security stamp when the user logs in.
                    // This is a security feature which is used when you change a password or add an external login to your account.
                    OnValidateIdentity = SecurityStampValidator.OnValidateIdentity<ApplicationUserManager<ApplicationUser>, ApplicationUser>(
                        validateInterval: TimeSpan.FromMinutes(30),
                        regenerateIdentity: (manager, user) => manager.GenerateUserIdentityAsync(user))
                }
            });
        }
I do want to point out the bold section of the Configuration Method. We need to intercept EPiServers “AddCmsAspNetIdentity” method to configure our service which allows us to tell episerver to use our SiteApplicationUser and to configure our password policy if we want too. We also configure the new 2FA Provider in the AddCmsTwoFactorAspNetIdentity Method. See how this is done below
public static IAppBuilder AddCmsTwoFactorAspNetIdentity<TUser>(this IAppBuilder app) where TUser : IdentityUser, IUIUser, new()
        {
            var applicationOptions = new ApplicationOptions
            {
                DataProtectionProvider = app.GetDataProtectionProvider()
            };

            // Configure the db context, user manager and signin manager to use a single instance per request by using
            // the default create delegates
            app.CreatePerOwinContext(() => applicationOptions);            app.CreatePerOwinContext<ApplicationDbContext<TUser>>(ApplicationDbContext<TUser>.Create);            app.CreatePerOwinContext<ApplicationRoleManager<TUser>>(ApplicationRoleManager<TUser>.Create);       app.CreatePerOwinContext<ApplicationUserManager<TUser>>(CreateApplicationUserManager);

// 2 Factor Auto Registration            app.CreatePerOwinContext<ApplicationSignInManager<TUser>>(ApplicationSignInManager<TUser>.Create);

            // Configure the application
            app.CreatePerOwinContext<UIUserProvider>(ApplicationUserProvider<TUser>.Create);            app.CreatePerOwinContext<UIRoleProvider>(ApplicationRoleProvider<TUser>.Create);            app.CreatePerOwinContext<UIUserManager>(ApplicationUIUserManager<TUser>.Create);            app.CreatePerOwinContext<UISignInManager>(ApplicationUISignInManager<TUser>.Create);

            // Saving the connection string in the case dbcontext be requested from none web context
            ConnectionStringNameResolver.ConnectionStringNameFromOptions = applicationOptions.ConnectionStringName;
            return app;
        }

        public static ApplicationUserManager<TUser> CreateApplicationUserManager<TUser>(IdentityFactoryOptions<ApplicationUserManager<TUser>> options, IOwinContext context) where TUser : IdentityUser, IUIUser, new()
        {
            var manager = new ApplicationUserManager<TUser>(new UserStore<TUser>(context.Get<ApplicationDbContext<TUser>>()))
            {
                UserLockoutEnabledByDefault = true,
                DefaultAccountLockoutTimeSpan = TimeSpan.FromMilliseconds(5),
                MaxFailedAccessAttemptsBeforeLockout = 5,

                PasswordValidator = new PasswordValidator
                {
                    RequiredLength = 6,
                    RequireNonLetterOrDigit = false,
                    RequireDigit = false,
                    RequireLowercase = false,
                    RequireUppercase = false
                }
            };

            manager.UserValidator = new UserValidator<TUser>(manager)
            {
                AllowOnlyAlphanumericUserNames = false,
                RequireUniqueEmail = true
            };

            manager.RegisterTwoFactorProvider("TwoFactor Authenticator", (IUserTokenProvider<TUser, string>)new TwoFactorAuthenticatorTokenProvider());
            var provider = context.Get<ApplicationOptions>().DataProtectionProvider.Create("EPiServerAspNetIdentity");
            manager.UserTokenProvider = new DataProtectorTokenProvider<TUser>(provider);

            return manager;
        }
A lot of this code should look familiar as it is in the default Alloy website. The three items we are more concerned about here is the top three lines of our startup.cs file. The first line is to tell the system to use our SiteApplicationUser instead of EPiServer default ApplicationUser store. The second line is to use 2FA in the login process. The third is to allow browser cookie remembering. The other thing to note here is we must replace all the ApplicationUser objects with our new SiteApplicationUser (or whatever you named your model) but I will be referring to my naming in this sample.
Now we have most of the inner plumbing done to wire it up, minus the controllers and views to help us along the way, if we to build the application, it should build for you, if not, there might be some namespaces or packages that need to be added yet but it should build for you. From here, we are going to add another setup in the registrationcontroller that EPiServer kindly provided in the alloy demo site. What we are trying to achieve here is to let the application know that we need to redirect the user to the 2fa screen to setup a new token in their OTP app. Based on my testing and setup of allow, I have use Microsoft Authenticator, Google Authenticator, TOTP Authenticator, and 1Password which all worked in the code I will provide at the end of the post. Since we are not deriving our registration controller for an EPiServer page, we are going to need a route to tell the system our new controller and action are available. This is just the standard default mvc route to a default action and controller, but you can narrow it down to just the account controller if need be.
In the Global.asax.cs file, I am going to insert a default controller last in the pipeline to ensure that we don’t mess with any of EPiServer’s routes.
protected override void RegisterRoutes(RouteCollection routes)
        {
            base.RegisterRoutes(routes);

            RouteTable.Routes.MapRoute(
                 name: "DefaultRoutes",
                 url: "{controller}/{action}",
                 defaults: new { action = "Index" });
        }
Here I am just telling the system to accept any controller and action as a default route along with adding it to the routing table’s routes. This is by default normally wired up for you in a default mvc application out of the box.
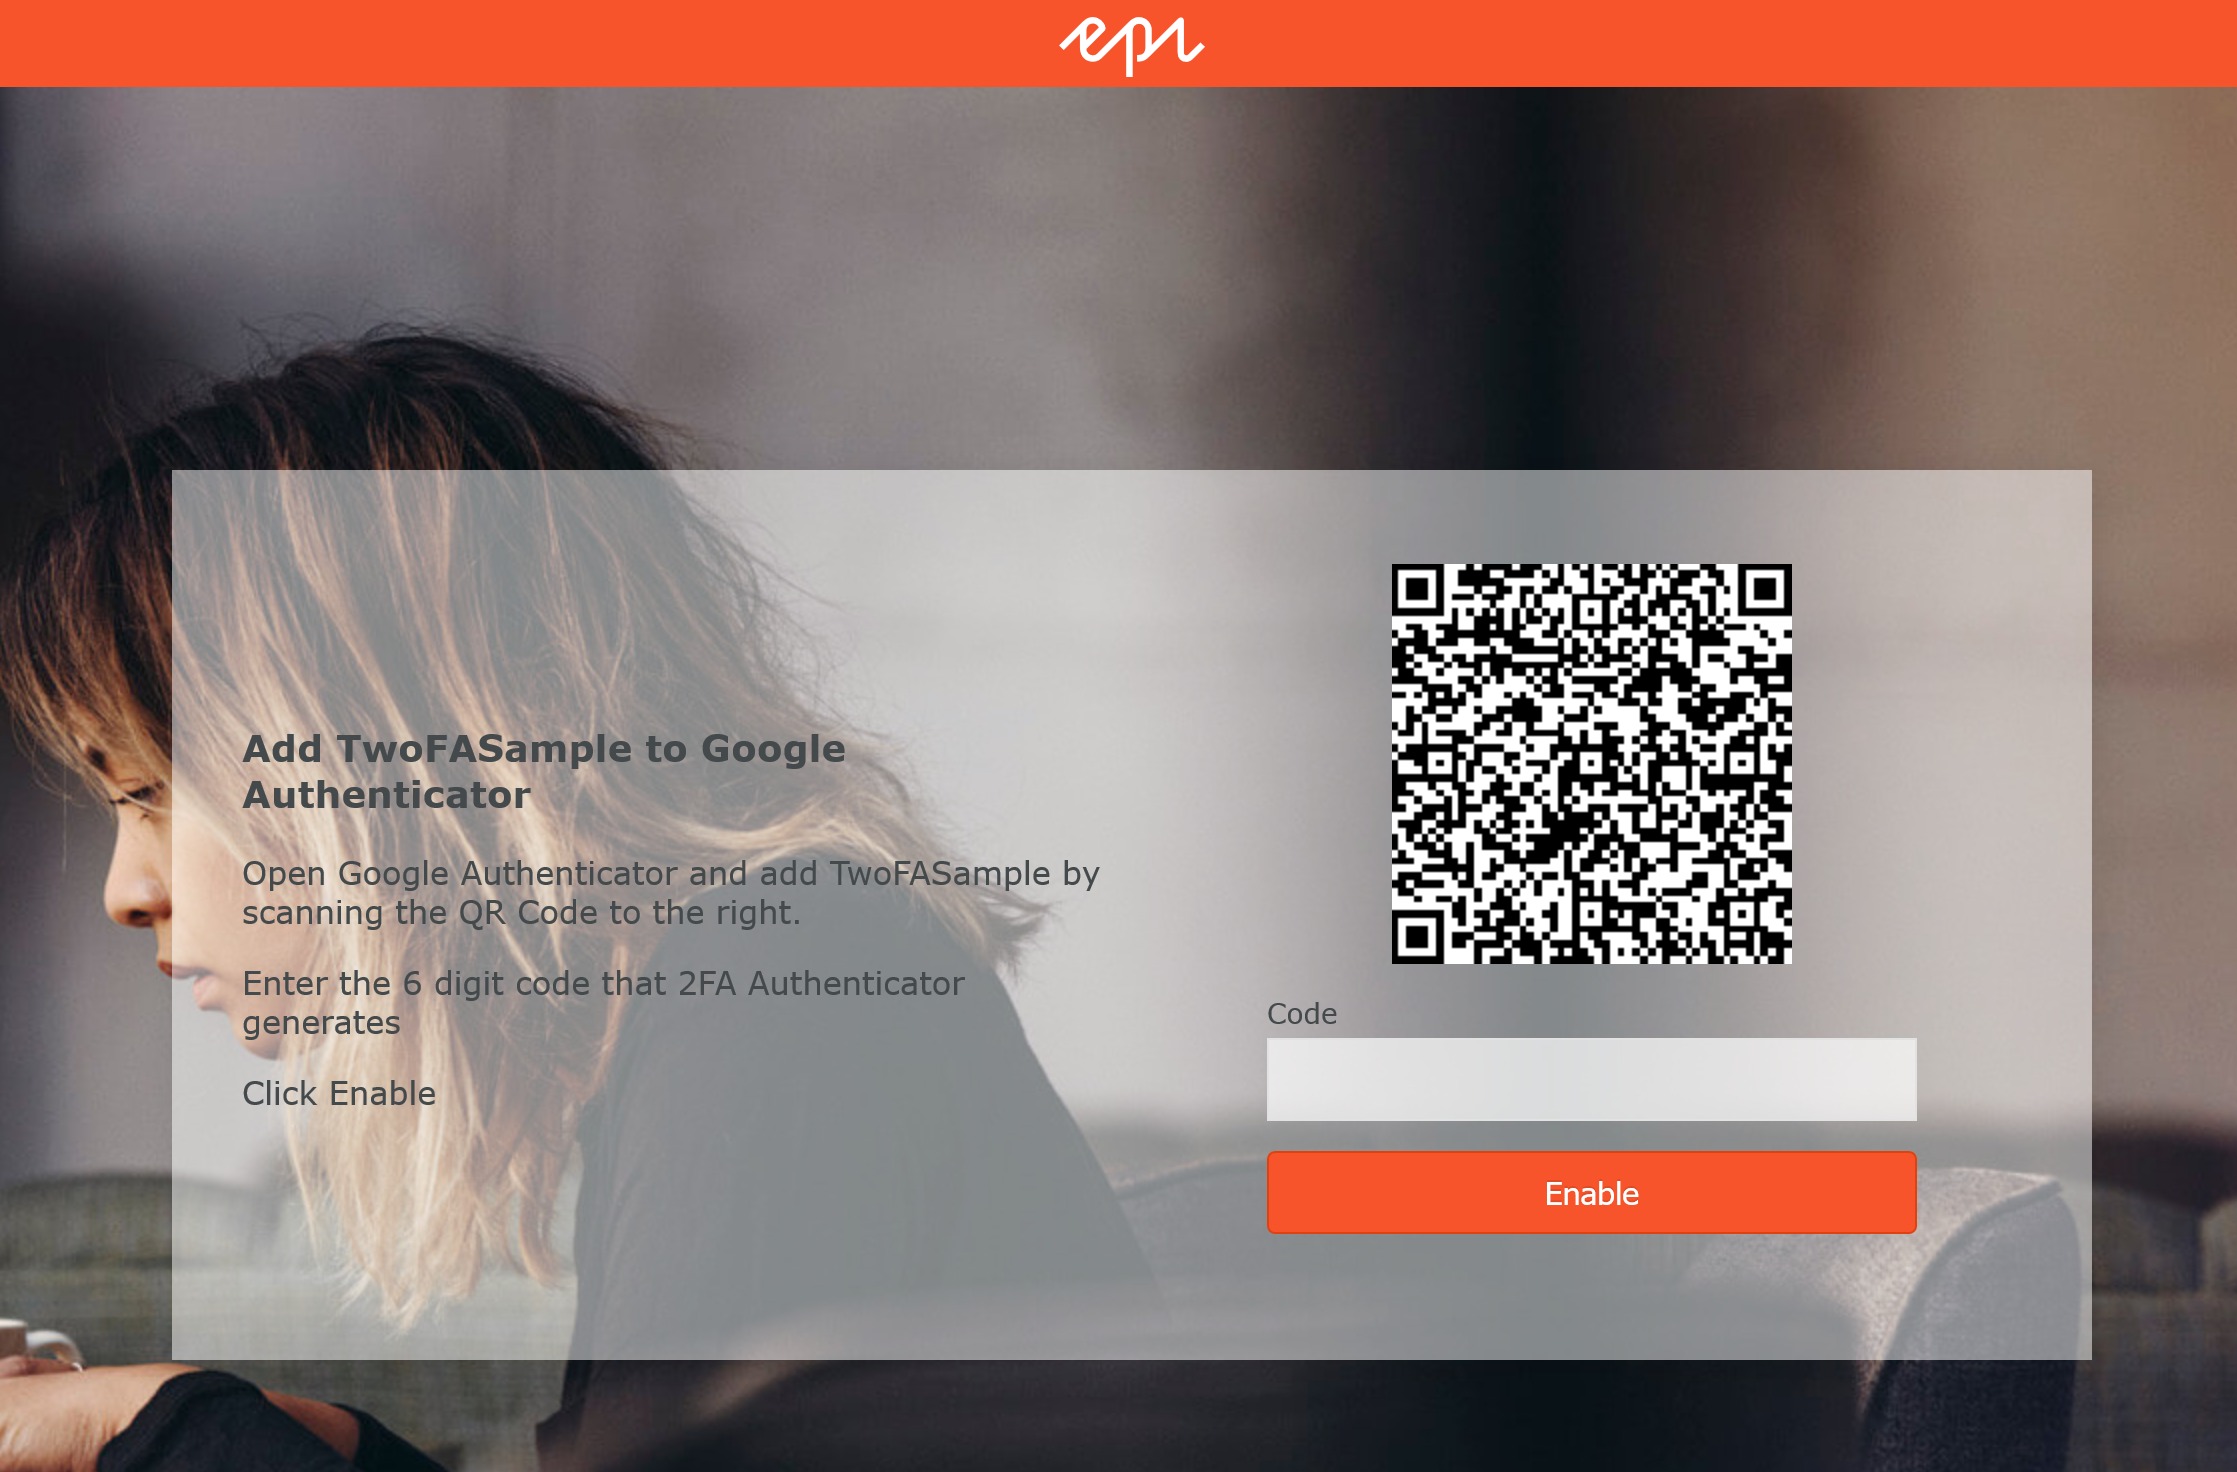
Now that we have the route available, we are going to add the accountcontroller that handles enabling the 2FA for users once they have logged in. So the process is as follows. A user logins/registers for the first time, upon registration, if they have a 2fa token, they will be directed to a second screen to allow them to enter their OTP. If the user has not setup an OTP yet, they will be directed to a different screen for them to scan a QR code or copy and past the image for them to generate the proper secret key for them to enter. Once this all happens, the user is finally authenticated and can begin using the system. This is all there is for the registration/login process of 2fa. Below is a snippet from the enabletwofactorauth action that generates the QR code for the user and the post method which reads the secret key and validates it against the TOTP.
[HttpGet]
        public ActionResult EnableTwoFactorAuth()
        {
            byte[] secretKey = KeyGeneration.GenerateRandomKey(20);
            string userName = User.Identity.GetUserName();
            string issuer = SiteDefinition.Current.Name;
            string issuerEncoded = HttpUtility.UrlEncode(issuer);
            string barcodeUrl = KeyUrl.GetTotpUrl(secretKey, userName) + "&issuer=" + issuerEncoded;

            var model = new TwoFactorAuthenticatorViewModel
            {
                SecretKey = Base32Encoding.Standard.GetString(secretKey),
                BarcodeUrl = barcodeUrl
            };

            return View("~/TwoFactorAuth/Account/EnableTwoFactorAuth.cshtml", model);
        }

        [HttpPost]
        public async Task<ActionResult> EnableTwoFactorAuth(TwoFactorAuthenticatorViewModel model)
        {
            if (ModelState.IsValid)
            {
                byte[] secretKey = Base32Encoding.Standard.ToBytes(model.SecretKey);

                var otp = new Totp(secretKey);
                if (otp.VerifyTotp(model.Code.Trim(), out long timeStepMatched, new VerificationWindow(2, 2)))
                {
                    var user = UserManager.FindById(User.Identity.GetUserId());
                    user.IsTwoFactorAuthenticatorEnabled = true;
                    user.TwoFactorAuthenticatorSecretKey = model.SecretKey;
                    user.TwoFactorEnabled = true;
                    await UserManager.UpdateAsync(user);

                    return RedirectToLocal(UrlResolver.Current.GetUrl(SiteDefinition.Current.StartPage));
                }
                else
                {
                    ModelState.AddModelError("Code", "The Code is not valid");
                }
            }

            return View("~/TwoFactorAuth/Account/EnableTwoFactorAuth.cshtml", model);
        }
This really is what starts the whole 2fa sequence moving. Once they have a code, they are redirected to the start page where they should be able to get to edit or admin mode straight away.
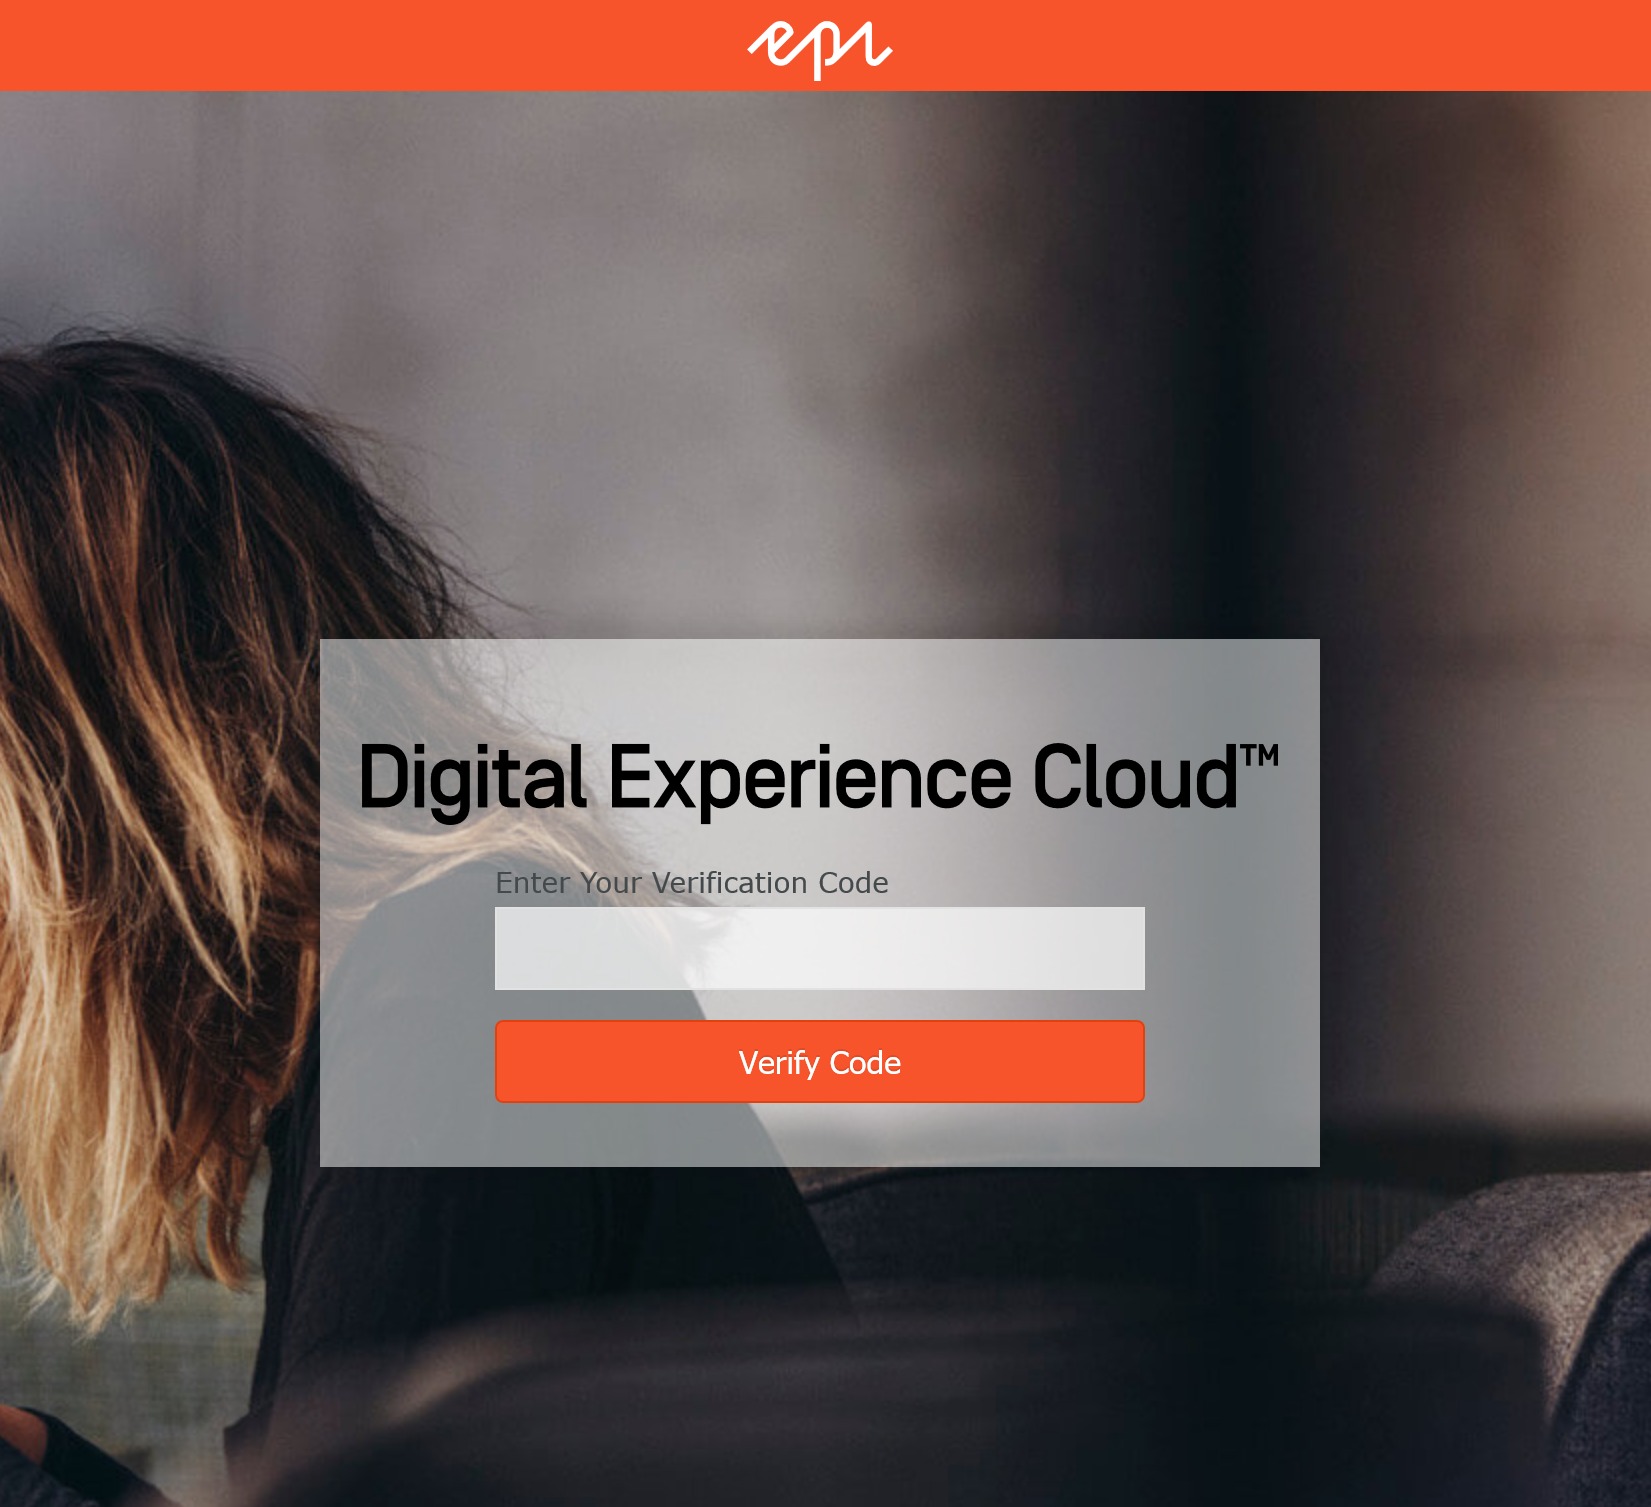
For users that already have 2fa enabled on their identity account, they will be taken to the verify code page that will ask the user to enter their 2fa 6 digit code. Below it should looks something like this.
[AllowAnonymous]
        public async Task<ActionResult> VerifyCode(string provider, string returnUrl, bool rememberMe = false)
        {
            // Require that the user has already logged in via username/password or external login
            if (!await SignInManager.HasBeenVerifiedAsync())
            {
                return View("Error");
            }

            if (string.IsNullOrWhiteSpace(provider))
                provider = "TwoFactor Authenticator"; // Name of your provider registered in ApplicationBuilderExtensions

            return View("~/TwoFactorAuth/Account/VerifyCode.cshtml", new VerifyCodeViewModel { Provider = provider, ReturnUrl = returnUrl, RememberMe = rememberMe });
        }

        [HttpPost]
        [AllowAnonymous]
        [ValidateAntiForgeryToken]
        public async Task<ActionResult> VerifyCode(VerifyCodeViewModel model)
        {
            if (!ModelState.IsValid)
            {
                return View("~/TwoFactorAuth/Account/VerifyCode.cshtml", model);
            }

            // The following code protects for brute force attacks against the two factor codes.
            // If a user enters incorrect codes for a specified amount of time then the user account
            // will be locked out for a specified amount of time.
            // You can configure the account lockout settings in IdentityConfig
            var result = await SignInManager.TwoFactorSignInAsync(
                model.Provider,
                model.Code,
                isPersistent: model.RememberMe,
                rememberBrowser: model.RememberBrowser);

            switch (result)
            {
                case SignInStatus.Success:
                    return RedirectToLocal(model.ReturnUrl);

                case SignInStatus.LockedOut:
                    return View("Lockout");

                case SignInStatus.Failure:
                default:
                    ModelState.AddModelError("", "Invalid code.");
                    return View("~/TwoFactorAuth/Account/VerifyCode.cshtml", model);
            }
        }
Here they are redirected to the start page or the return url that we are passing through just as asp.net membership provider does. Having described all this, this is just a simple working copy in the Alloy sample website. You can change it to fit your business requirement needs but this is more for getting you started with 2 Factor Authentication.
Before you begin, one thing to note is the registration has been modified and once you register a new user with Alloy, you will need to logout and log back in. The login url should resolve to “/account/login”. This will now force you to enter your verification information. I have added a url redirect to handle the util/login.aspx for some reason, I can not tie into the submission event. If you all know of a way, I am all ears.
After you login, you will be presented with the following screen. This action resolves to “/account/enabletwofactorauth”. This is where you scan the code and set the the 6 digit code to create the secret.
Once you enable by clicking the button, you will be logged in. If you logout and log back in, you are presented with the following screen which will ask you for your 6 digit code.
Nice and simple solution, Joshua. Thanks for sharing. 👍
I have mostly achieved this as part of Azure AD authentication. Or SMS-based customer authentication as a custom OAuth extension.
Nice post 👍 and thanks for sharing this with Epi community
>If you do not have a table, I have included them in the link below in github under the TwoFactorAuth folder.
Hi, there's no actual github repo or link available, as far as I can tell. Can you update this blog to point it out, please?
ping please post a github repo or link, please?
Maybe these 2 issues are glaringly obvious to others and I'm missing them.
1. So in Startup.cs I have added the three lines as per the blog post:
But in Visual Studio <SiteApplicationUser> is being red-underlined with the following message:
The type or namespace name 'SiteApplicationUser' could not be found (are you missing a using directive or an assembly reference?)
Now as far as I understood from the post, we are setting up a new user store here. But there is no mention of any other steps required for this user store in the post. Any idea what the issue here is?
2. Again, as per the post, I have added the following:
I have added this into an existing file called AdministratorRegistrationPage.cs (perhaps this is the wrong file and I am supposed to add the above snippet into a different file or new file altogether?).
And here in this line:
The TwoFactorAuthenticatorTokenProvider is being red-underlined with the following message:
The type or namespace name 'TwoFactorAuthenticatorTokenProvider' could not be found (are you missing a using directive or an assembly reference?)
Again, no mention of any related steps in the blog post, any idea what the issue here is?
Hi @EPiNewbie,
without an available repo, you're not going to solve anything with this blog.
I went and created a solution using AzureAD and OpenID Connect, alluded to via this forum post.
Hi George,
Thanks for your input. Sorry if this is a silly question but what do you mean "without an available repo"?
And another question, any guide/resources on your approach?
EPiNewbie,
i'm talking about a GitHub repository, which the author of this blog said would be attached at the end of this blog post. This would theoretically include the solution as a deployable package which you could easily rewrite and repurpose for your own ends. Ultimately there were too many unknowns without recourse to the source code to infer what the author is talking about. You really have to go back to EPiServer's own blog posts to figure this one out, as it appears to be some kind of closely-guarded secret.
Hi
Does somebody iplemented a functional solution for 2FA in EPi?
@Joshua do you have the full solution somewhere? Can I have the link or repo to can download it?
Regards
Botond