")
Resource Editor - A localization management tool for Optimizely CMS
If you have worked with Optimizely CMS for any amount of time you know that managing localization through XML files can be tedious. Content type names, property captions, tab names, editor hints - they all need translations, and keeping those XML files organized across multiple languages is not fun.
I am a firm believer that translations should be owned by the partner and managed in source control. That said, I fully understand the need to fix localization quickly in a DXP environment without having to deploy code. The Resource Editor was built to handle both scenarios - edit and save to XML files during development, and apply runtime overrides via DDS (Dynamic Data Store) when you need a quick fix in production.
This tool started as a smaller idea but grew quite a bit as I kept adding features. It is built with Blazor Server and MudBlazor, packaged as a Razor Class Library that you can reference in your Optimizely project.
TL;DR: The Resource Editor is a Blazor-based admin tool for Optimizely CMS that replaces manual XML editing for localization. It provides visual editors for content type names, properties, tabs, display channels, editor hints, and frontend translations — all with multi-language support. Features include a completeness dashboard, runtime overrides via DDS (no deploy needed), DeepL-powered automated translation at field/item/bulk level, CSV import/export, and a guided migration from legacy XML formats.
Getting started
The Resource Editor is distributed as a Razor Class Library. Add a project reference and register the services in your `Startup.cs`:
public void ConfigureServices(IServiceCollection services)
{
    services.AddServerSideBlazor();
    services.AddMudServices();

    // Optional: Add DeepL translation (must be registered before AddResourceEditor)
    services.AddDeepLTranslation(_configuration);

    // Register Resource Editor services
    services.AddResourceEditor(_configuration);
}
Configuration is done through `appsettings.json`:
{
  "ResourceEditor": {
    "TranslationFolder": "Resources/Translations",
    "EnableFileSaving": true,
    "EnableOverrides": true,
    "ShowOverridesUI": true,
    "EnableAutomatedTranslation": true,
    "DeepL": {
      "ApiKey": "your-api-key",
      "UseFreeApi": true
    }
  }
}
Depending on how you want to render the tool you also need a CSHTML page to host the Blazor component. The tool runs as a full-page Blazor application without the standard Optimizely layout:
@using Nergard.ResourceEditor.Components
@using Microsoft.AspNetCore.Components.Web
@model PageViewModel<BlazorToolResourceEditor>

@{ Layout = null; }

<!DOCTYPE html>
<html lang="en">
<head>
    <meta charset="UTF-8" />
    <meta name="viewport" content="width=device-width, initial-scale=1" />
    <base href="~/" />
    <title>Resource Editor</title>
    <link href="https://fonts.googleapis.com/css?family=Roboto:300,400,500,700&display=swap"
          rel="stylesheet" />
    <link href="_content/MudBlazor/MudBlazor.min.css" rel="stylesheet" />
    <component type="typeof(HeadOutlet)" render-mode="Server" />
</head>
<body>
    @Html.AntiForgeryToken()

    <component type="typeof(ResourceEditorHost)"
               render-mode="Server"
               param-IsDarkMode="false" />

    <script src="_framework/blazor.server.js"></script>
    <script src="_content/MudBlazor/MudBlazor.min.js"></script>
</body>
</html>
Create a page type in Optimizely, set up a controller and view, and you are good to go.
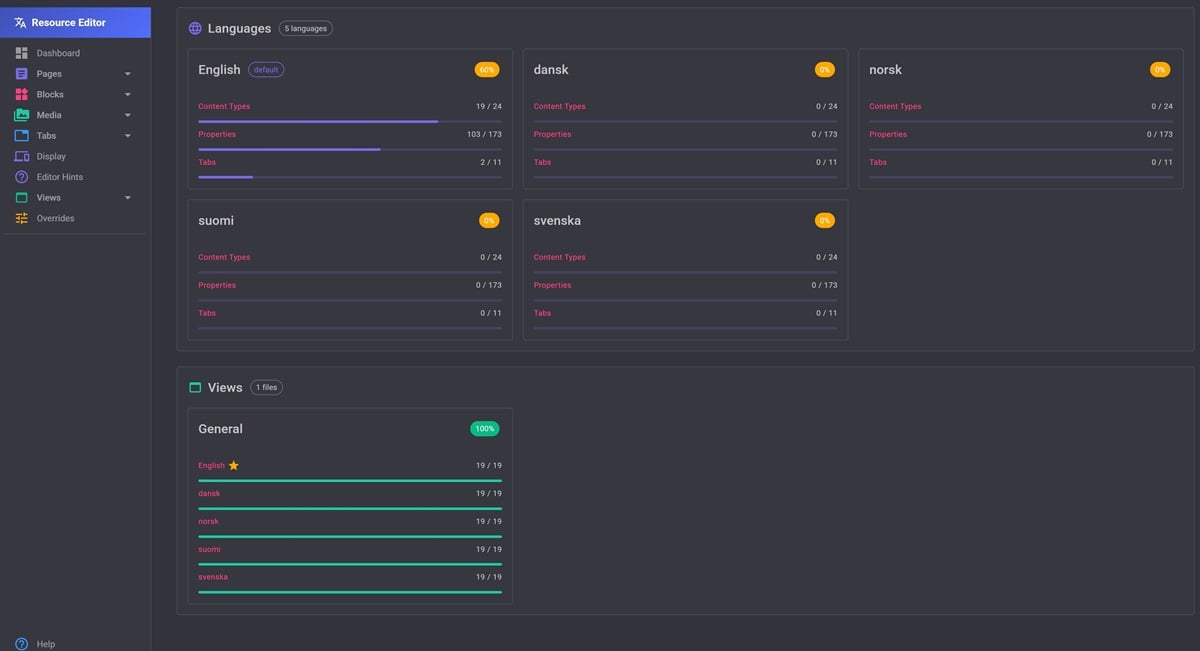
Dashboard
When you open the Resource Editor you land on the dashboard. It gives you an overview of translation completeness across all your configured languages. Each language card shows progress for content types, properties and tabs so you can quickly see where translations are missing.
The dashboard also shows your view/frontend translation files with their own completion status.
Clicking a language card takes you directly to the Language Overview for that language. More on that further down in the post.
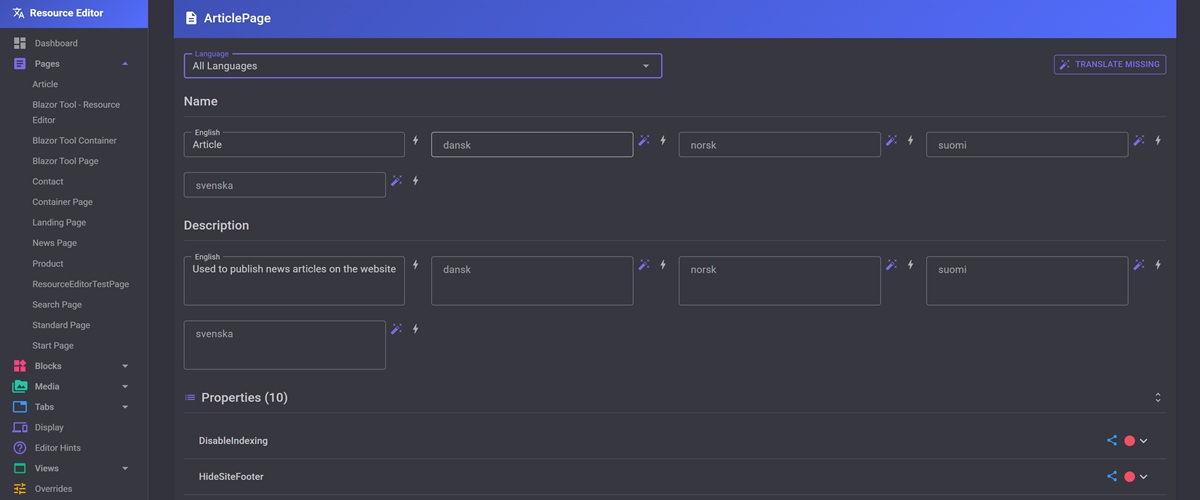
Content type editor
This is where you probably will spend most of your time. The editor lets you manage translations for all your content types, organized in three sections: Pages, Blocks and Media.
For each content type you can edit the name and description across all languages. Expand a content type and you get access to all its properties where you can edit both the caption (label) and help text.
The editor detects shared properties - properties that exist on multiple content types - and highlights them. This is useful because shared properties in Optimizely use a fallback mechanism through `icontentdata`, so changing a shared property translation can affect multiple content types. The base type in the saved xml-files will be icontentdata since I believe that same named properties should be consistent throughout the solution.
You can filter by language if you only want to focus on one language at a time. The tool has support for automatic translations but not for the master language which must be managed manually.
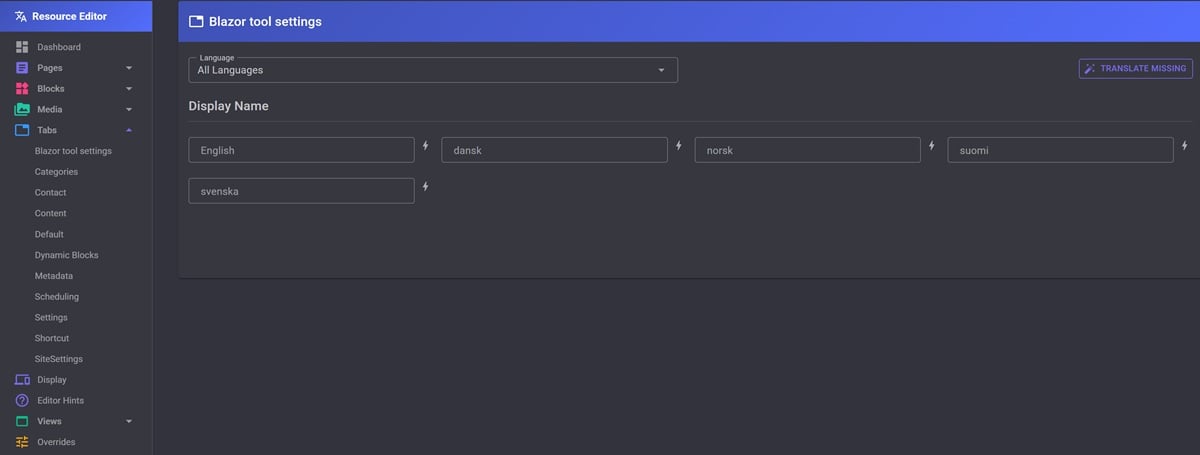
Tab editor
The Tab Editor handles localization of property group names (tabs). These are the tab labels editors see in the content editing UI.
It works the same way as the content type editor - select a tab, edit the name across all configured languages, save.
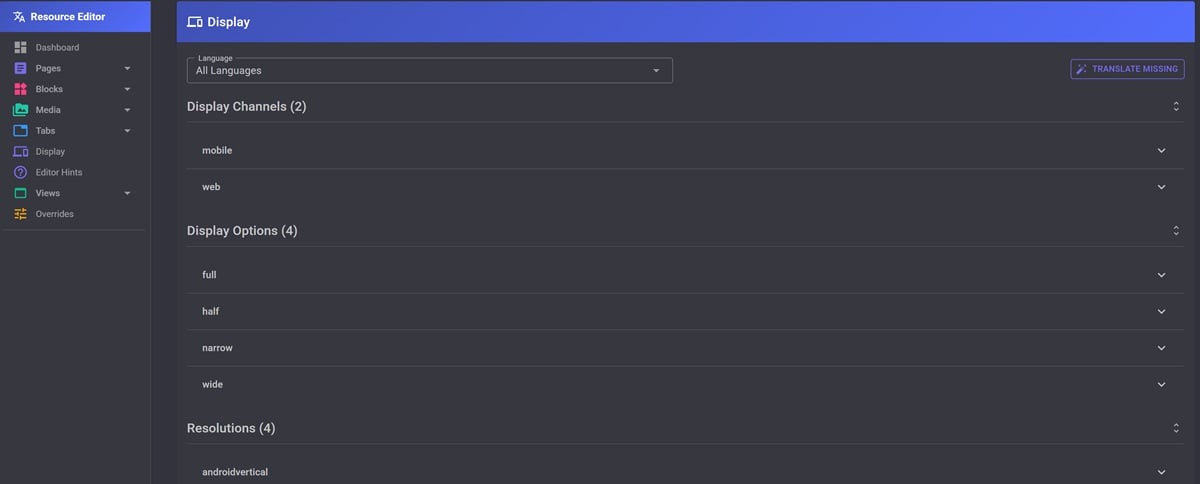
Display Channels and Editor Hints
Two smaller editors handle display channel names and editor hint names. Same pattern - select an item, edit translations, save. These are less commonly needed but nice to have covered.
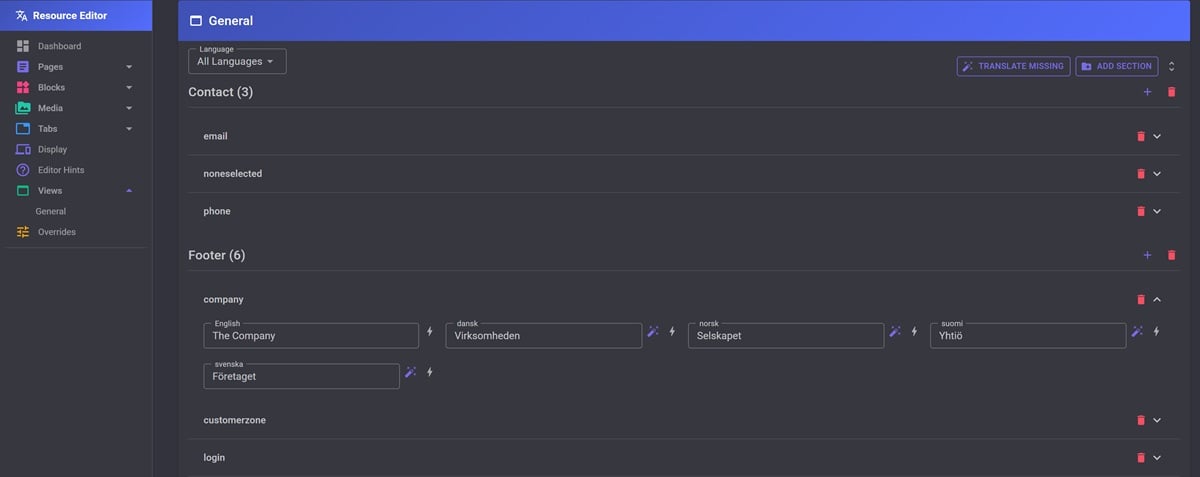
View / Frontend Translations
The Resource Editor also handles view translation files.
These files use a multi-language format where all languages are in a single XML file. The editor presents them as a navigable tree structure where you can edit values per language, add new sections and add new keys.
The file pattern is configurable via the `ViewFilePattern` option (defaults to `views_*.xml`).
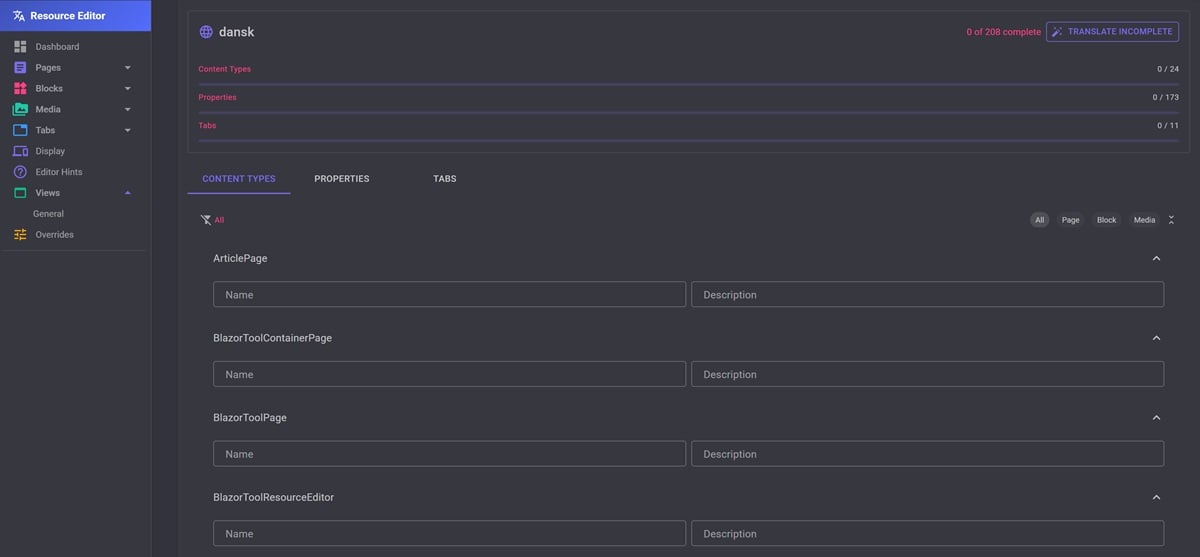
Language overview
The Language Overview gives you a focused view of a single language. It shows all content types and their properties with translation status indicators so you can work through missing translations systematically.
This is also where the bulk translate button lives - translate all incomplete fields for a language in one click.
Note! The automatic translations are only for the non master languages. So put in the effort for good localization texts for the master language you can reap the benefits for the other languages.
Overrides
This is the feature that makes the Resource Editor work well in DXP environments. Overrides are stored in the Dynamic Data Store and take precedence over XML translations at runtime - no deployment needed.
The override system works through a custom `LocalizationProvider` that is automatically registered at position 0 in the provider chain. When Optimizely resolves a localization key, the override provider checks DDS first. If no override exists, it falls through to the standard XML-based providers.
**Known issue:** There is currently a known issue where overridden content type captions (names) may not be picked up correctly by Optimizely, while help text overrides work as expected. I have an ongoing support ticket with Optimizely for investigation.
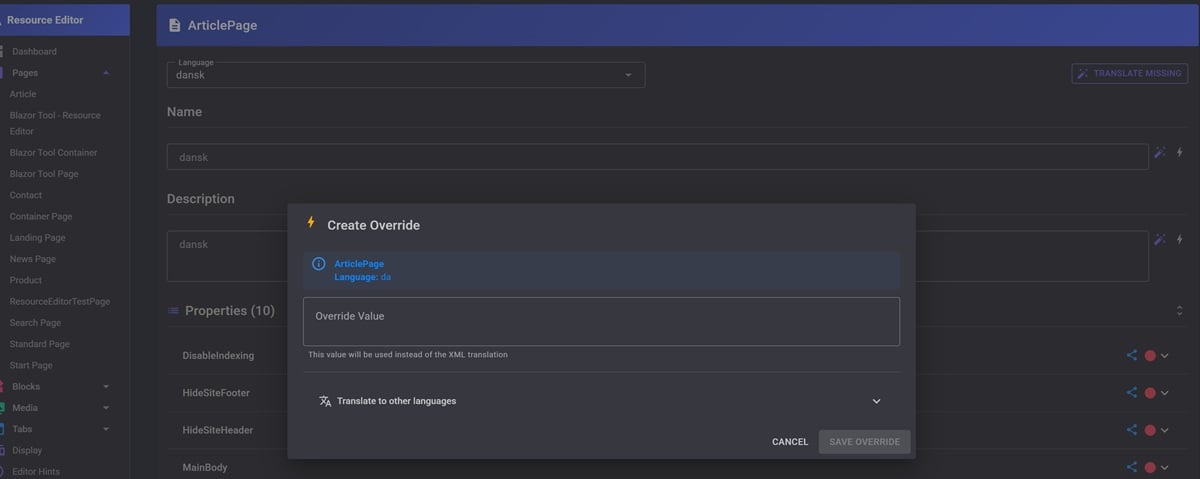
Inline overrides
When `ShowOverridesUI` is enabled, every text field in the editors gets a small override button. Click it and you can create an override for that specific field and language. The override is stored in DDS and takes effect immediately.
Override manager
- View all active overrides with language and value
- Filter by language and search by property name
- Add, edit and delete individual overrides
- **Export to CSV** for documentation or backup
- **Import from CSV** for bulk operations
- **Save to XML** to migrate an override into a permanent translation file
- Clear all overrides

Automated translations with DeepL
If you enable automated translation and register the DeepL service, the Resource Editor gives you translation assistance at three levels:
1. **Field level** - Each text field gets a translate button that translates from the default language
2. **Item level** - A "Translate Missing" button in each editor header translates all empty fields for the current item
3. **Bulk level** - In the Language Overview, translate all incomplete fields for an entire language
The translations populate the fields but are not saved automatically - you review and save when you are happy with the results.
To enable it, signup for the free tier of DeepL and then register the DeepL service before the Resource Editor:
services.AddDeepLTranslation(_configuration);
services.AddResourceEditor(_configuration);
The translation service is pluggable. If you want to use a different provider than DeepL, implement `ITranslationService` and register it before calling `AddResourceEditor()`.
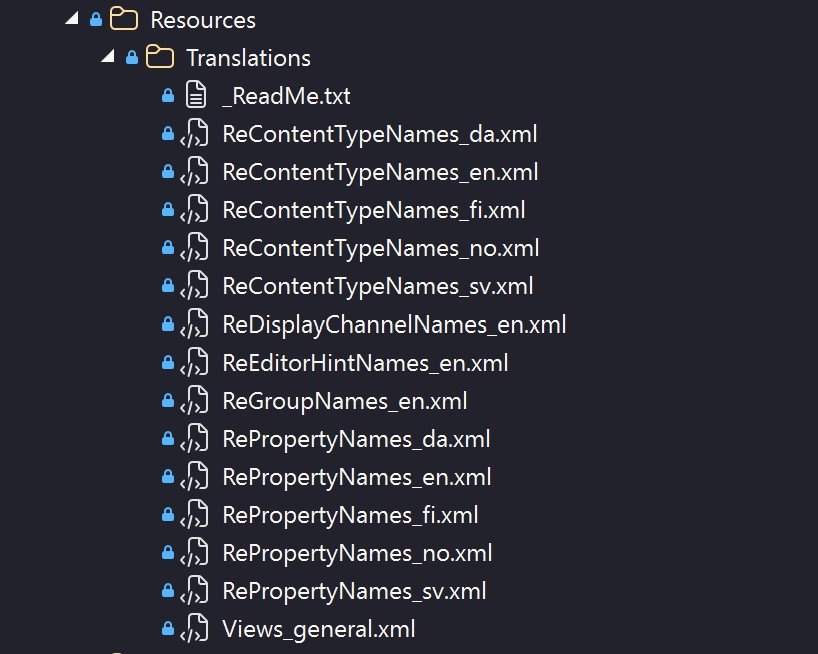
XML Migration
If you have an existing site with translations in the classic Alloy XML format (separate files like `ContentTypeNames.xml`, `PropertyNames.xml`, `GroupNames.xml`), the Resource Editor detects this automatically and offers a guided migration to its own format. The migration runs step by step with progress tracking and error reporting.
Configuration options
Here is a quick overview of all the configuration options:
| Option | Default | Description |
|--------|---------|-------------|
| `TranslationFolder` | `Resources/Translations` | Path to translation XML files |
| `EnableFileSaving` | `true` | Allow saving to XML files. Set to `false` on DXP |
| `EnableOverrides` | `true` | Enable DDS-based runtime overrides |
| `ShowOverridesUI` | `true` | Show inline override buttons in editors |
| `EnableAutomatedTranslation` | `false` | Enable automated translation features |
| `ViewFilePattern` | `views_*.xml` | Glob pattern for view translation files |
A typical DXP configuration would look like this:
{
  "ResourceEditor": {
    "EnableFileSaving": false,
    "EnableOverrides": true,
    "ShowOverridesUI": true
  }
}
Source code and license
The full source code is available on GitHub: Resource Editor GitHub
This tool grew organically and while I have been testing it using a Alloy demo template, I would still recommend using it with some care - especially the save operations. Back up your XML files before making large changes. I am happy to receive feedback, bug reports and pull requests.
Feb 23, 2026
Comments