
Getting Started with CMS 12 and Commerce 14: A Beginner’s Guide to Creating CMS and Commerce Projects
Getting started with Optimizely can sometimes be confusing. I realized that a clear, step-by-step guide to creating a solution with separate CMS 12 and Commerce 14 projects is hard to find. So, here’s a detailed walkthrough to help you implement it smoothly.
Get your Visual Studio 2022, SQL Server Management Studio, and a PowerShell terminal ready and let’s get started!
1. Install all the Optimizely necessary tools first
First of all, as usual, you need to install all the required tools as described here and here , if you are all set up ignore this step
- Install templates =>
dotnet new -i EPiServer.Templates - Install CLI =>
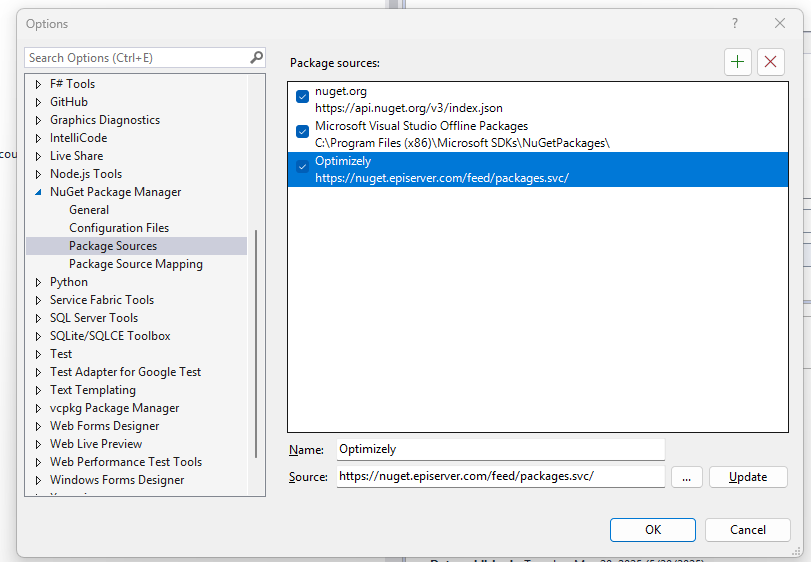
dotnet tool install EPiServer.Net.Cli --global --add-source https://nuget.optimizely.com/feed/packages.svc - Add Nuget source "https://api.nuget.optimizely.com/v3/index.json" in Visual Studio > Tools > Options > NuGet Package Manager > Package Sources. Note: For some reason, Optimizely’s documentation doesn’t clearly state that this step is necessary (at least at the time of writing). However, if you skip it, you won’t be able to manage NuGet packages correctly. The only place that mentions it still refers to the old source "https://nuget.episerver.com/feed/packages.svc/", both sources work
2. Create the Solution and Projects
Navigate to the folder where you want to create the entire project. From there, we’ll run the necessary commands to create the solution, a project for Commerce, and another for the CMS.
- Create the solution =>
dotnet new sln -n MyEcommerce -o MyEcommerce - Move into the created folder =>
cd MyEcommerce - Create the CMS project =>
dotnet new epi-cms-empty -n MyEcommerce.Web -o MyEcommerce.Web - Create the commerce project =>
dotnet new razorclasslib -n MyEcommerce.Commerce -o MyEcommerce.Commerce, there is a template for empty commerce project but sometimes the commerce project must be installed after the CMS project so I want to show this way as well - Add the CMS project to the solution =>
dotnet sln add .\MyEcommerce.Web\ - Add the Commerce project to the solution =>
dotnet sln add .\MyEcommerce.Commerce\
-n Project name
-o Output directory
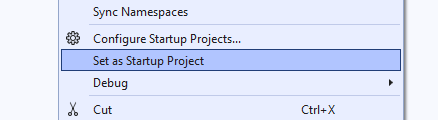
Now you can open the solution in visual studio 2022, right click on MyEcommerce.Web and set it as startup project
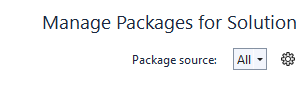
Then right click on the solution and select "Manage Nuget packages for Solution" and ensure Package source is "All" in the top right corner
Check that both project "MyEcommerce.Commerce" have the same .Net version as "MyEcommerce.Web", For example, in the image bellow I have to change the target framework from net9.0 to net8.0 and update Microsoft.AspNetCore.Components.Web package from 9.0.3 to 8.0.16

Right click on MyEcommerce.Web.csproj / Dependencies then select "Add project reference" and choose "MyEcommerce.Commerce" to add it as a reference
3. Configure the projects to use Optimizely Commerce
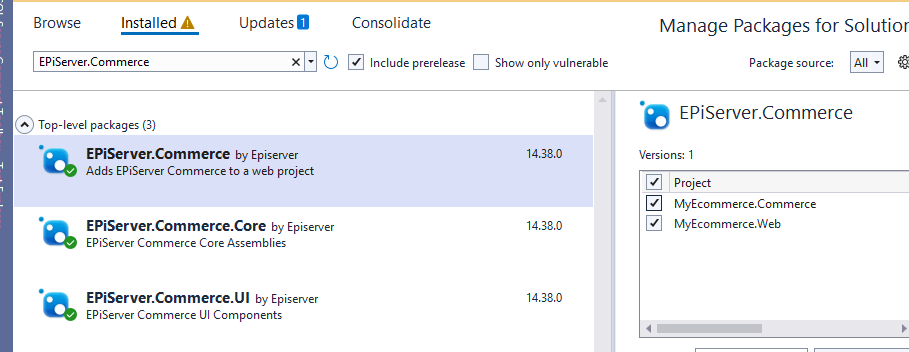
First, Check if "EPiServer.CMS" is installed in "MyEcommerce.Web" using Nuget Manager, if it's not the latest version then update it. Then search "EPiServer.Commerce" in the nuget package manager and install the latest version in both projects
Go to "MyEcommerce.Web" project and open Startup.cs, replace the call to ".AddCms()" with ".AddCommerce()" (this method internally implements AddCms())

Update appsettings.Development.json to include commerce virtual roles in MappedRoles:
"MappedRoles": {
  "Items": {

    "CmsEditors": {
      "MappedRoles": [ "WebEditors", "WebAdmins" ]
    },
    "CmsAdmins": {
      "MappedRoles": [ "WebAdmins" ]
    },
    "Administrators": {
      "MappedRoles": [ "WebAdmins", "Admins" ]

    },
    "CommerceAdmins": {
      "MappedRoles": [ "WebAdmins" ]
    },
    "CatalogManagers": {
      "MappedRoles": [ "WebAdmins" ]
    },
    "CustomerServiceRepresentatives": {
      "MappedRoles": [ "WebAdmins" ]
    },
    "MarketingManagers": {
      "MappedRoles": [ "WebAdmins" ]
    },
    "OrderManagers": {
      "MappedRoles": [ "WebAdmins" ]
    },
    "ReportManagers": {
      "MappedRoles": [ "WebAdmins" ]
    }
  }
}
4. Configure the databases
When Optimizely creates a project using the CLI or the graphical interface, it creates the database in MyEcommerce.Web/App_Data folder as .mdf files, but that's not going to work properly when creating a project for development, so we will switch that to use Sql Server
Go to MyEcommerce.Web/App_Data folder and delete any files created there, then open appsettings.Development.json and remove the ConnectionStrings section
Open powershell and navigate to the MyEcommerce.Web project cd .\MyEcommerce.Web\ Now create the cms database using the CLI, so first copy the server name from Sql Server Management Studio and replace it in next command, this will create the database and the connection string in appsettings.json
dotnet-episerver create-cms-database MyEcommerce.Web.csproj -S <ReplaceWithServer> -E -dn MyEcommerceCMS
-S Server name
-E Create the connection string as integrated security
-dn Database name
Now we can run the project and it will ask you to create the Admin user, if for some reason it doesn't ask you to create it then use this command to create the admin user replacing the username, email and password
dotnet-episerver add-admin-user MyEcommerce.Web.csproj -u MyUSer -e myuser@email.com -p MyUser123* -c EPiServerDB
-u User
-e Email
-p password
-c Connection string
Test that you can now run the project and login in the backoffice in https://localhost:5000/episerver/cms or whaterver is your localhost
Now let's create commerce database
dotnet-episerver create-commerce-database MyEcommerce.Web.csproj -S <ReplaceWithServer> -E -dn MyEcommerceCommerce
5. Add Cms Content types
Here I will add only the basic Page and block content types, note that several content types are missing here, add each one of them in a class on its own in MyEcommerce.Web > Models
    [ContentType(
        DisplayName = "Block Base",
        GUID = "{E81F6E18-B49D-472D-9504-6FBE4DF8C631}"
        )]
    public class BlockBase: BlockData
    {
    }

[ContentType(
    DisplayName = "Page Base",
    GUID = "{8C654336-F62A-46A4-9E62-F7456DD4D32E}"
    )]
public class PageBase: PageData
{
    [Display(
        Name = "Heading",
        Description = "The main heading of the page."
        )]
    public virtual string Heading { get; set; }
}
6. Add basic Commerce Content Types
Add these classes in MyEcommerce.Commerce > Models, each in its own class file, note that I have included only one property per class as an example, you should customize it as per your specific requirements
CatalogContentType(
    DisplayName = "Bundle Base",
    GUID = "{CCF26036-A7EF-40F2-8E69-AFB57BE00902}"
    )]
public class BundleBase: BundleContent
{
    [Display(
        Name = "Bundle description"
        )]
    [UIHint(UIHint.Textarea)]
    public virtual string Description { get; set; }
}

[CatalogContentType(
    DisplayName = "Catalog Base",
    GUID = "{31B74E5C-7B0C-4538-A311-B30325AF27B2}"
    )]
public class CatalogBase: CatalogContent
{
    [Display(
        Name = "Catalog Description"
        )]
    [UIHint(UIHint.Textarea)]
    public virtual string Description { get; set; }
}

[CatalogContentType(
    DisplayName = "Category Base",
    GUID = "{C310EC9C-F987-48ED-931F-285229743089}"
    )]
public class CategoryBase: NodeContent
{
    [Display(
        Name = "Category description"
        )]
    [UIHint(UIHint.Textarea)]
    public virtual string Description { get; set; }
}

[CatalogContentType(
    DisplayName = "Package Base",
    GUID = "{8CFE8AAC-F359-4B8C-8D9E-98BCA64F166D}"
    )]
public class PackageBase: PackageContent
{
    [Display(
        Name = "Package description"
        )]
    [UIHint(UIHint.Textarea)]
    public virtual string Description { get; set; }
}

[CatalogContentType(
    DisplayName = "Product Base",
    GUID = "{085AFC91-E49A-42E8-A146-4E8F7FBBD43A}"
    )]
public class ProductBase: ProductContent
{
    [Display(
        Name = "Product description"
        )]
    [UIHint(UIHint.Textarea)]
    public virtual string Description { get; set; }
}

[CatalogContentType(
    DisplayName = "Variant Base",
    GUID = "{BEB277AE-D586-4CC1-ACCF-0A47855FCFC6}"
    )]
public class VariantBase: VariationContent
{
    [Display(
        Name = "Variant description"
        )]
    [UIHint(UIHint.Textarea)]
    public virtual string Description { get; set; }
}
7. Do the Migration
If you navigate now to the Commerce edit mode at https://localhost:5000/EPiServer/Commerce/catalog you may see this error:
"Failed loading content with the url/uri: epi.cms.contentdata:///-1073741823__CatalogContent"
This happens because migration step which creates the catalog root is still missing

It's possible that when you started the project you were redirected to a url like https://localhost:5000/EPiServer/Commerce/EPiServer/Commerce/Migrate?autoMigrate=true,
However, for some reason Optimizely is redirecting to the wrong url, so if you take a look in detail you will see that EPiServer/Commerce is twice, to fix this change the url to https://localhost:5000/EPiServer/Commerce/Migrate?autoMigrate=true , you should then see this migration page:
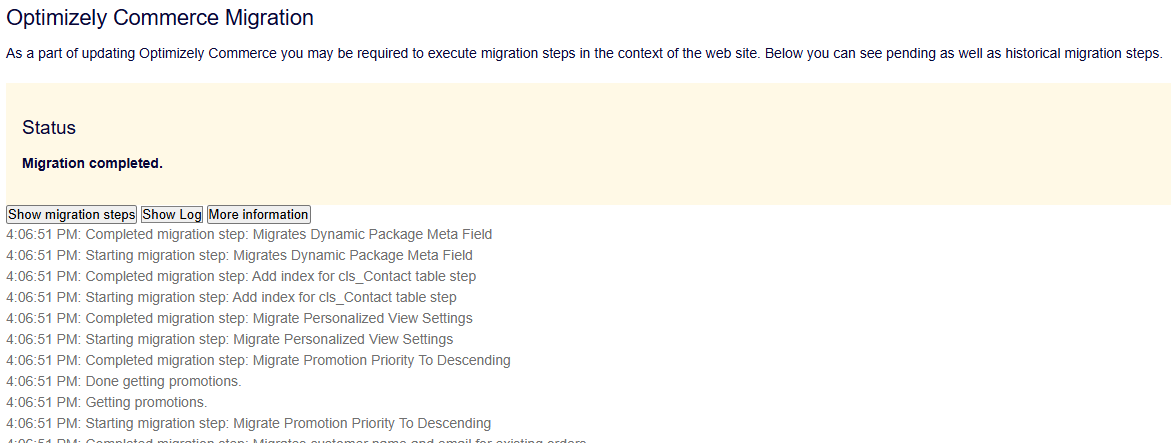
If you see migration completed then this step is finished
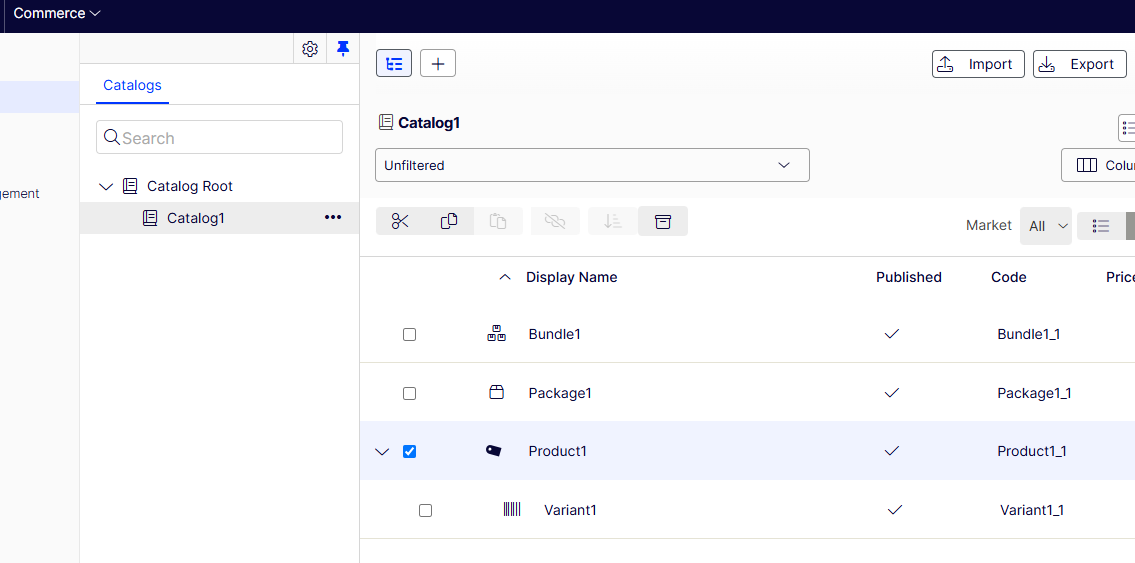
8. Create Commerce content
And voilà! The setup is complete, you can go now to edit mode at https://localhost:5000/EPiServer/Commerce/catalog to Create new Catalogs, inside each catalog you can create Products with variants, bundles, packages, categories
Now you a have a project to handle CMS "MyEcommerce.Web" and another to handle Commerce "MyEcommerce.Commerce" both in the same solution.
Comments