
How to write a bespoke notification management system
Websites can be the perfect vehicle for notifying customers of important information quickly, whether it’s the latest offer, an operational message, or an informative alert.
Customers are used to seeing these messages at the top of web pages and companies find it an invaluable way to communicate with website visitors.
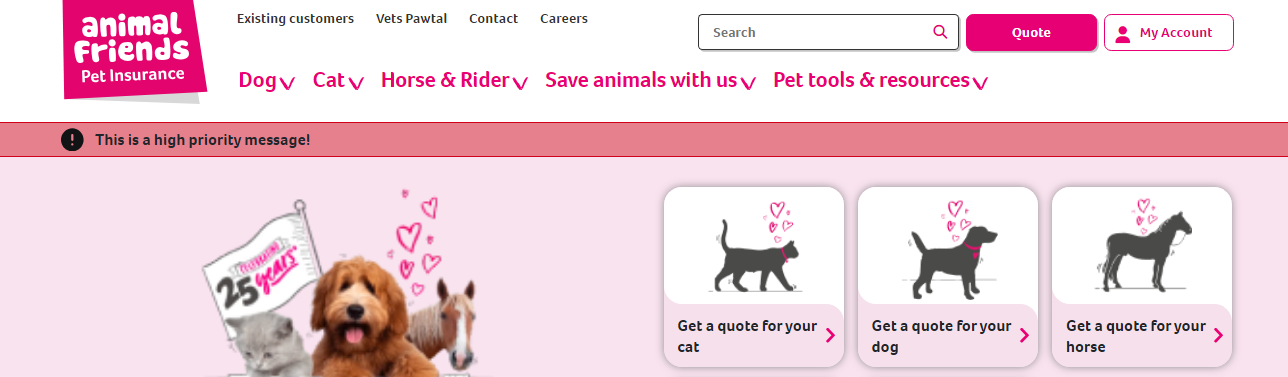
At Animal Friends Insurance, the company I work for, we already had rudimentary notification capability on our site. We wanted to take it a step further by classifying these messages red, amber or green and managing them in the CMS by building a bespoke notification management page. Here editors could manage the editing and expiring of notifications, and additionally see their publication status.
When deciding how to tackle this requirement, I made the decision early on that the most efficient way would be to create a notification block that used the inbuilt scheduling, publishing, and expiring of blocks and pages already provided by the CMS.
These blocks can be viewed, in their correct state, on the management page to give editors a simple overview.
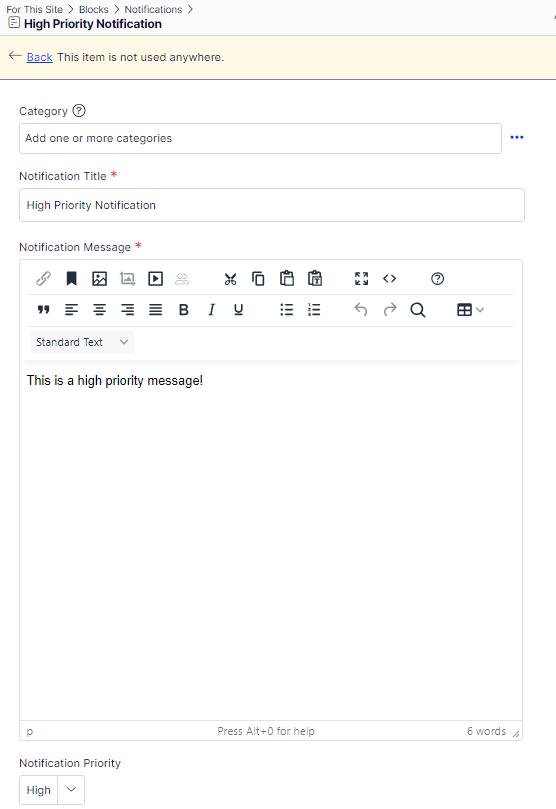
First, I created a notification block, with all the attributes needed. Simple enough!
Next, I created a custom page that would be accessible from the Settings tab in the CMS backend. This page was divided into the following sections:
- Published
- Not Published Yet
- Scheduled
- Expired
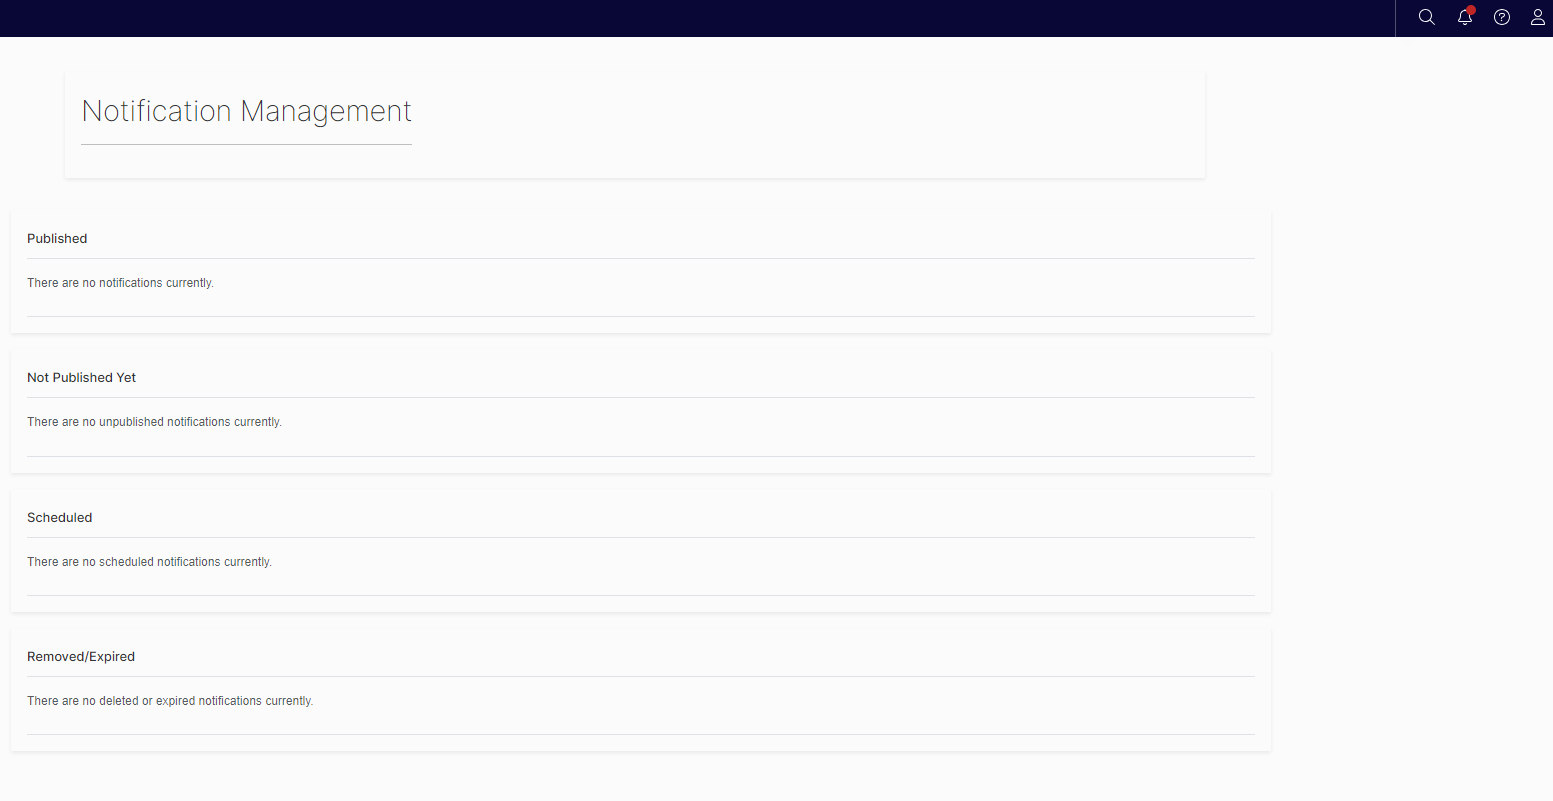
I made use of Optimizely’s publishing flow to display the notifications in the correct place on the page.
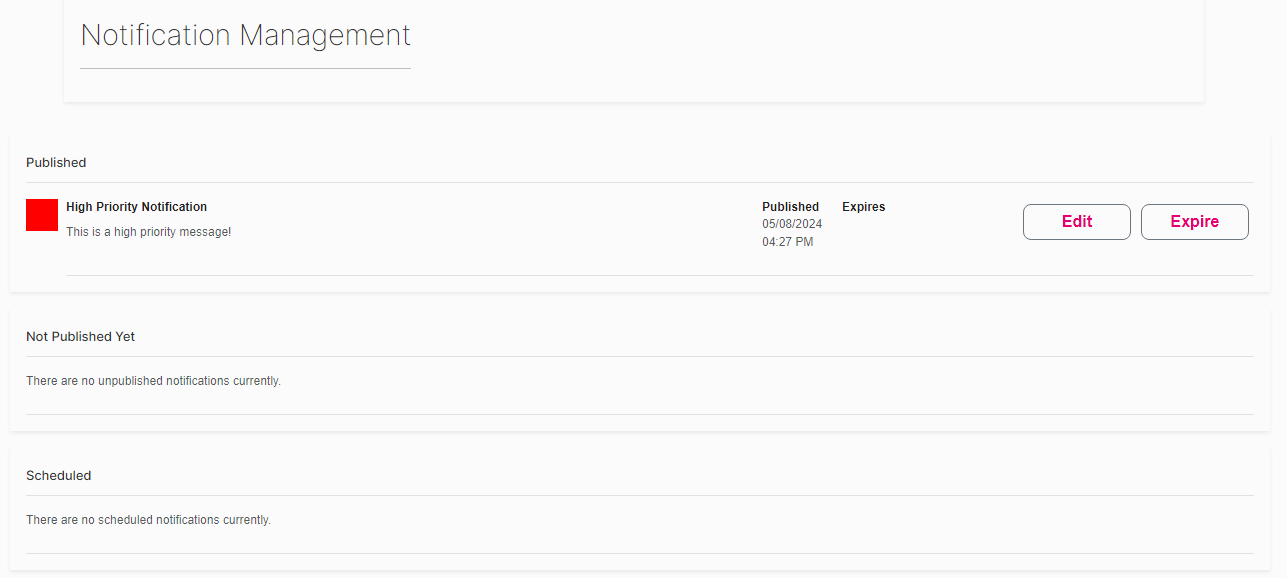
Published
Once my test notification was created and published, I used IVersionable to get the published date, which also helped to decide where this notification should sit within the sections on the notification management page.
public DateTime? GetStartPublishDateTime(ContentReference content)
{
	var notificationBlock = _contentRepository.Get<NotificationBlock>(content);
	var startPublishDate = (notificationBlock as IVersionable).StartPublish;
	return startPublishDate;
}
As it appears at the top of the website.

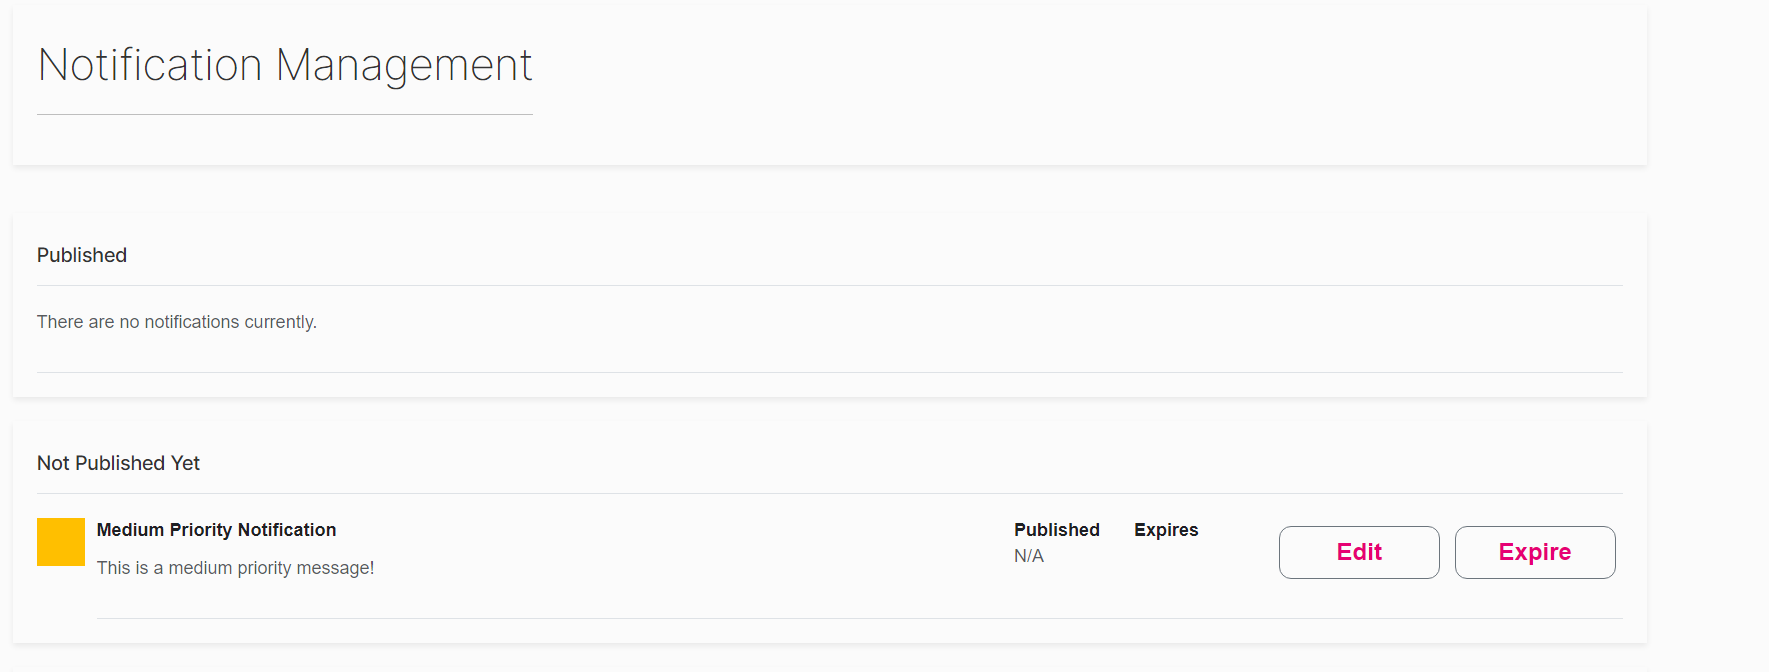
Not Published Yet
Whilst there is no specific attribute to be able to determine if content is scheduled to be published, it can be deduced by what it is not. My logic went something like this…
If the notification is not:
- Deleted
- Published
- Previously Published
- Scheduled to be published
then it must be unpublished.
With the exception of the ‘deleted’ state, I used the version status to find this information. So, for example, for ‘previously published’ the code looked like this:
public static bool HasBeenPreviouslyPublished(ContentReference content)
{
    if (content != null)
    {
        var contentVersion = ContentVersionRep.Load(content);
        if (contentVersion != null)
        {
	        if (contentVersion.Status == VersionStatus.PreviouslyPublished)
	        {
		        return true;
	        }
        };
    }
    return false;
}
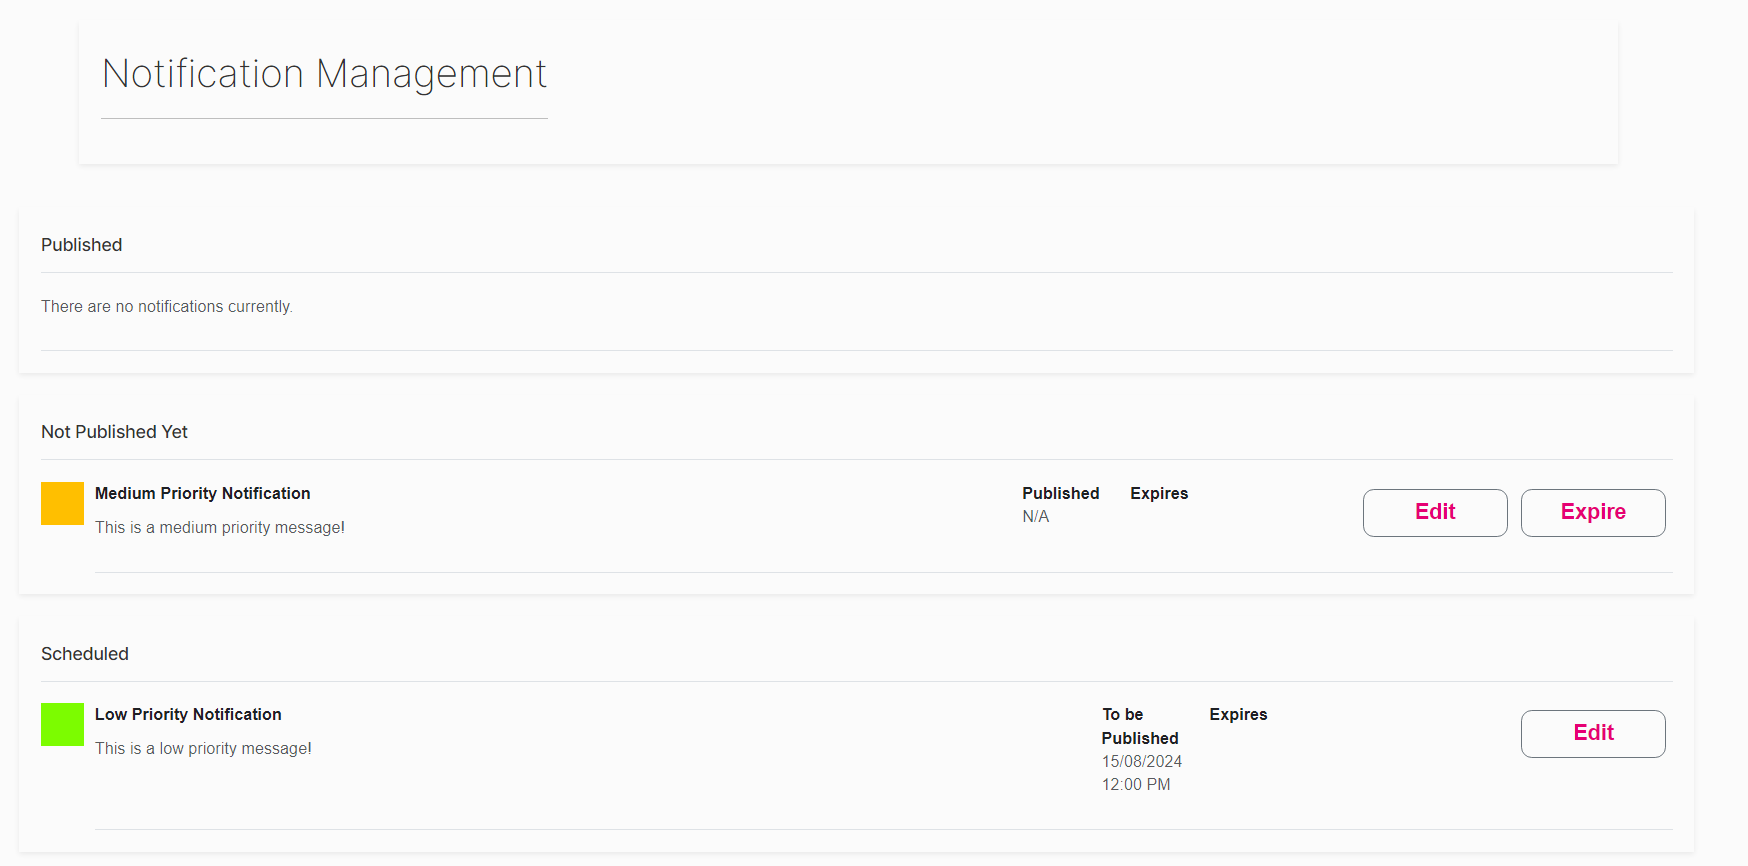
Scheduled
To find out if a notification is scheduled to be published, I used the DelayPublishUntil attribute.
public static DateTime? GetDelayPublishUntil(ContentReference content)
{
    DateTime? delayPublishUntil = null;
    if (content != null)
    {
        var contentVersion = ContentVersionRep.Load(content);
        if (contentVersion != null)
        {
	        delayPublishUntil = contentVersion.DelayPublishUntil;
        }
    }
    return delayPublishUntil;
}
Expired/Removed
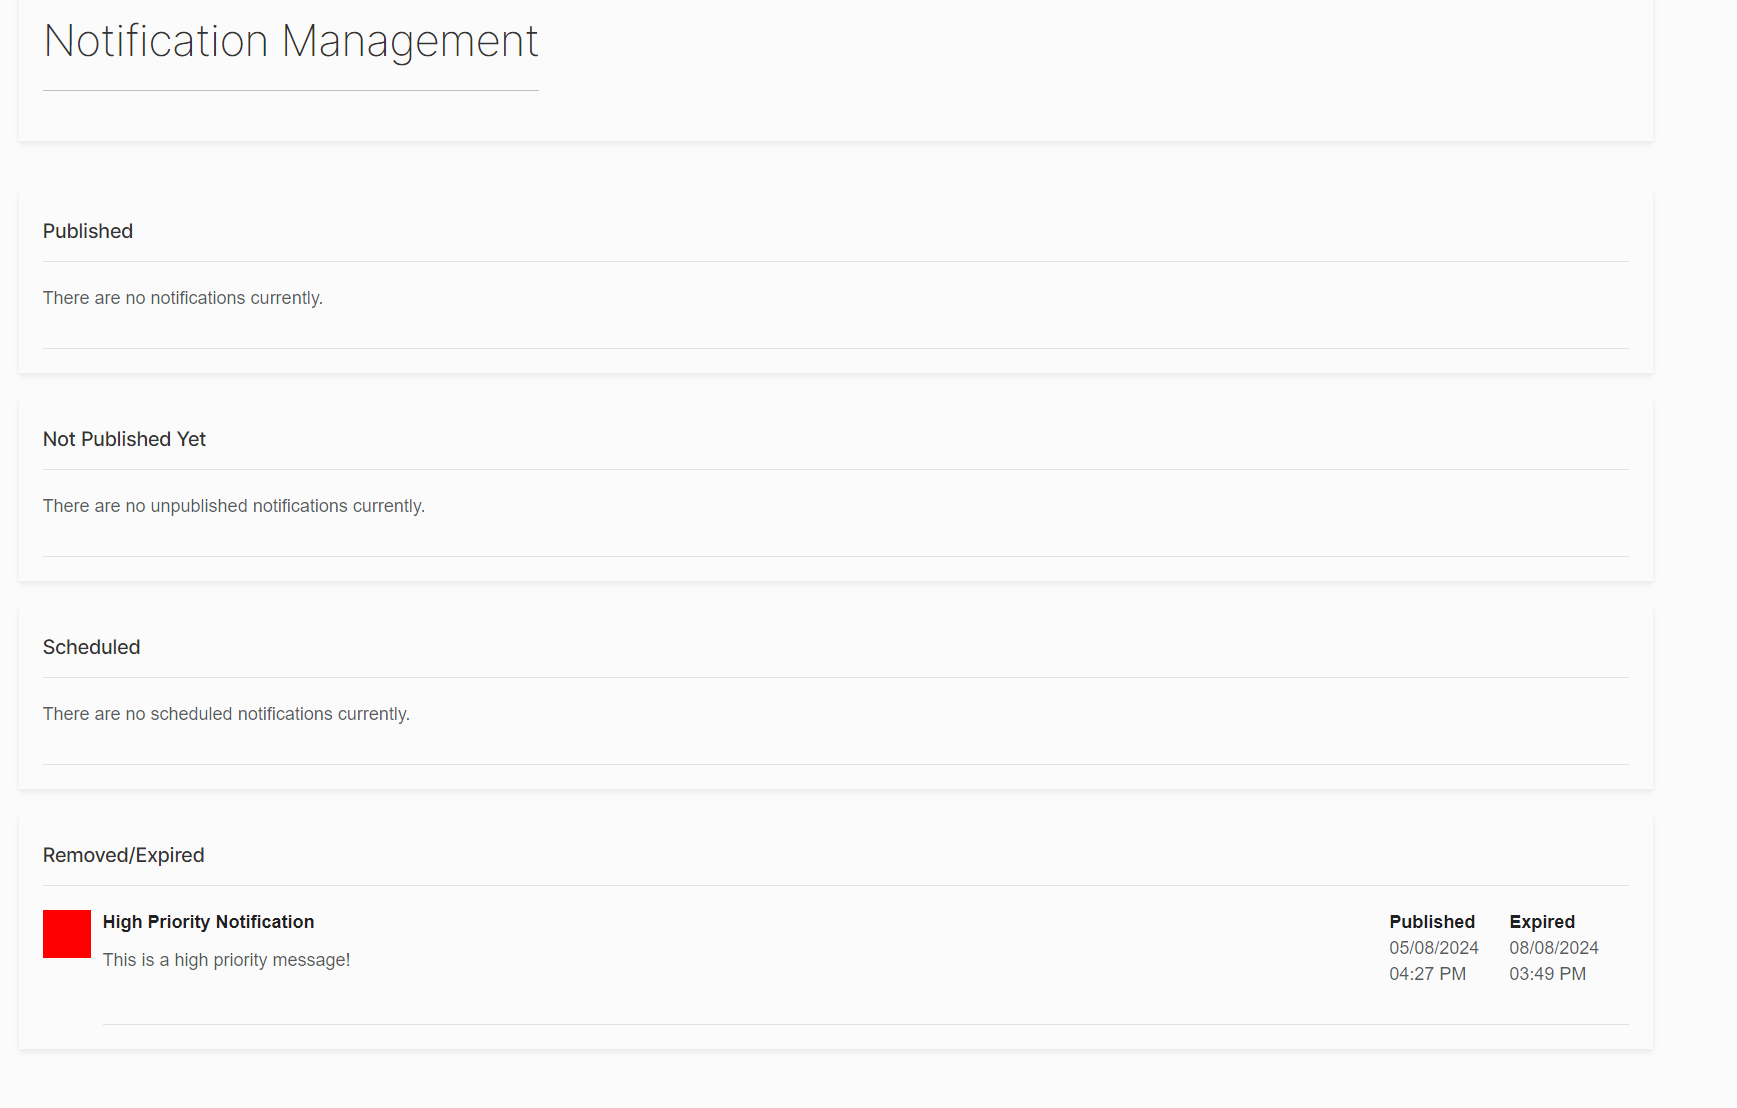
To expire a notification, I first had to create a clone of the notification and then used the IVersionable class stopPublish function to expire the clone.
It’s important to note, you cannot expire the original block from the content repository, you must create a clone and then save and publish the cloned version with the new expired state.
public void ExpireNotification(string contentRef)
{
	var notificationBlock = _contentRepository.Get<NotificationBlock>(ContentReference.Parse(contentRef));
	var notificationToExpire = notificationBlock.CreateWritableClone() as NotificationBlock;
	(notificationToExpire as IVersionable).StopPublish = DateTime.Now;
	_contentRepository.Save(notificationToExpire as IContent, SaveAction.Publish, AccessLevel.NoAccess);
} 
The final task was to add the notification management page to the CMS menu structure. This was done by extending the menu section using the [MenuProvider] decorator. Details of how to do this can be found here - Add and configure menu items (optimizely.com) and would look something like the code below.
public IEnumerable<MenuItem> GetMenuItems()
   {
      var notificationManagement = new UrlMenuItem(
           "Notification Management",
           MenuPaths.Global + "/cms/admin/notificationmanagementplugin",
           $"/{ConfigurationConstants.BaseAdminUrl}/{ConfigurationConstants.CmsPath}/notificationmanagementplugin/index")
       {
           IsAvailable = _ => true,
           SortIndex = 80,
          AuthorizationPolicy = CmsPolicyNames.CmsAdmin
      };

      return new List<MenuItem>(1)
      {
          notificationManagement
      };
  }
Any Gotchas?
Daylight savings! This work was completed before the clocks went forward in spring consequently, timestamps on the ‘published’ and ‘expired’ fields were showing the correct time. One of our eagle-eyed CMS admins noticed, however, in the summer that the timestamps on new notifications were out by an hour because the servers that host the website use UTC.
Of course, on my local version of the CMS the notification page showed the correct time because I run on Windows which uses ‘GMT Standard Time’, a Microsoft invention that works with daylight savings. However, since upgrading the CMS to version 12, the DXP servers are running on Linux which have no awareness of ‘GMT Standard Time’. So, to show the correct time, I added the following check:
var timeZone = TimeZoneInfo.FindSystemTimeZoneById("Europe/London");

DateTime dt = dateTime.Value;

var isDaylightSaving = timeZone.IsDaylightSavingTime(dt);
if (isDaylightSaving)
{
    dateTime = dt.AddHours(1);
}
And there you have it, a fully working notification management system powered by the CMS.
Really cool! I like the Notification Management admin settings page, great for editors.