Upgrading Episerver Commerce from version 1.0 SP1 to 1 R2 SP1
| Product version: | Episerver Commerce 1.0 SP1/1 R2 SP1 |
|---|---|
|
Document last saved: |
Introduction
This document describes the procedure for upgrading EPiServer Commerce from version 1.0 SP1 to 1 R2 SP1 (for EPiServer CMS 6 R2). NOTE that this procedure only supports upgrade from EPiServer Commerce 1.0 SP1, meaning that if you have version 1.0 of EPiServer Commerce, you must first install version 1.0 SP1.
Prerequisites
Check the following requirements and considerations before you start the upgrade:
- The database server must have full text search service enabled.
- After installing EPiServer Commerce 1.0 SP1, you need to open Commerce Manager from your browser and log in. When logging in to Commerce Manager the first time, the system will do some setup changes and generate new database tables. This step is necessary, otherwise the further upgrade process will fail.
- If you use DisplayTemplate on Commerce Manager 1.0 SP1, you need to update the template file path to the correct path in the new version. Refer to the EPiServer Commerce 1 R2 installation documentation for more information on display templates.
- If your site has Quartz Service installed, make sure to stop the service before upgrading.
- If your site has custom business foundation objects, refer to the section "Import and Export Business Foundation Objects" below.
- If your order system has existing orders before the upgrade, refer to the section "Managing Existing Orders After the Upgrade" below.
Upgrading Procedure
Follow these steps to upgrade.
- Install EPiServer Commerce 1.0 SP1.
- Install the EPiServer Commerce 1.0 SP1 sample package.
- Browse to the website and navigate to Commerce Manager. Log in to the system.
- Do all the configuration steps according to the installation instructions for EPiServer Commerce 1.0 SP1.
- Stop the Quartz Service if this is installed on your site.
- Upgrade EPiServer CMS 6 on your site to version 6 R2.
- Upgrade to EPiServer Commerce version 1 R2.

- If your site has the EPiServer Commerce Sample Package installed, upgrade this to the EPiServer Commerce 1 R2 Sample package.
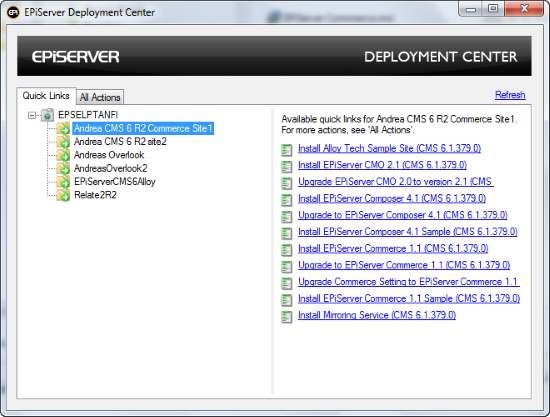
- From Deployment Center, execute the "Upgrade EPiServer Commerce Settings" feature.
- Clear the cache of your web browser.
- Browse to the site and verify the upgrade.
Import and Export Business Foundation Objects
Follow these steps to import/export customized business objects.
- Before the upgrade, navigate to Commerce Manager to export your custom business objects.

- Be sure to only export the custom object and NOT the system objects!

- Delete all of your custom business foundation objects by clicking the Delete button.
- After a successful upgrade, import the business foundation objects that you exported in the previous step.
- NOTE If your business objects have relations to other business objects, you must export the related objects as well.
Managing Existing Orders After the Upgrade
Read this section if you encounter problems with existing orders after upgrading to EPiServer Commerce 1 R2 SP1. This is a possible solution if you cannot release a shipment, if shipments do not appear in the pick list or cannot be completed.
- Open your order in Commerce Manager.

- Click Edit Information then click OK without any modification.
- Your order will be turned into Edit mode.

- Click Save to save your order.
Related Information
- For information about using the EPiServer Commerce Sample Package see the EPiServer Commerce 1 R2 SP1 User Guide.
- For developer information see the EPiServer Commerce 1 R2 SP1 Developer Guide.
- From the EPiServer Deployment Center under the All Actions tab, you can launch customized installations and delete existing websites. Find out more about how to work with Deployment Center in the installation instructions for EPiServer CMS.
