EPiServer CMS 4.62 Installation Instructions
|
Product version: |
EPiServer CMS 4.62 |
|
Document version: |
1.0 |
|
Document creation date: |
07-06-2006 |
|
Document last saved: |
04-10-2007 |
Purpose
Installation and upgrade of EPiServer CMS is carried out with EPiServer CMS Manager. This document describes how to install, upgrade and delete an EPiServer CMS installation and is based on installation with the most recently released version of EPiServer CMS Manager.
Table of Contents
Licensing
- MAC Address for Installation
Online Installation and Upgrade
- New EPiServer CMS Installation
- Upgrade EPiServer CMS Installation Online
Offline Installation and Upgrade
- Create Offline Installation
Installing/Upgrading Oracle Versions of EPiServer CMS
- Setting Up Oracle Server
- Setting Up Oracle Database
- Upgrading From Older Versions of EPiServer CMS
- Installation with Oracle Database Server
Deleting an EPiServer CMS Installation
Issues When Upgrading to EPiServer CMS 4.62
- Converting a Multi-Language Database
- Friendly URL
- Portal
- Delayed Loading of Strings
- Unified File System
- Simple Address
Installing ASP.NET 2.0 Templates
- Install EPiServer CMS with the Development Web Server
Introduction
Installation (both online and offline) and deletion of EPiServer CMS installations is done with EPiServer CMS Manager. The EPiServer CMS software installation program can be found at http://www.episerver.com/.
This document is based on installation with the most recent version of EPiServer CMS Manager.
NOTE: Only EPiServer CMS 4 installations can be upgraded offline. Use online installation to upgrade EPiServer CMS 3 installations.
NOTE: For information on installing EPiServer CMS Enterprise Edition, refer to the technical note, "Configuring EPiServer CMS Enterprise Edition".
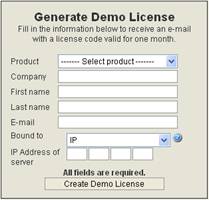
EPiServer CMS cannot be used without a valid license. If the EPiServer CMS installation is to be used for testing and evaluation purposes, a demo license can be created using the link in the installation program. Complete the Web form that appears. You can choose whether to bind the system to an IP address or to the MAC address of the network adapter.
MAC Address for Installation
If you are using dynamic allocation of IP addresses (DHCP), you might want to register EPiServer CMS to the MAC address instead of the IP address. The MAC address is a unique identifier for the network adapter and a common standard. To find the MAC address, open a command prompt in Windows and type: ipconfig /all.
Ethernet adapter Local Area Connection:
Connection-specific DNS Suffix . :
Description . . . . . . . . . . . : Network adapter
Physical Address. . . . . . . . . : 02-00-4C-4F-4F-50
Dhcp Enabled. . . . . . . . . . . : Yes
IP Address. . . . . . . . . . . . : 192.168.0.10
Subnet Mask . . . . . . . . . . . : 255.255.255.0
Default Gateway . . . . . . . . . : 192.168.0.1
The MAC address is found under Physical Address and is entered when generating the license.
New EPiServer CMS Installation
EPiServer CMS is installed using EPiServer CMS Manager. Follow the instructions below to install a new EPiServer CMS installation when your computer has access to Internet.
NOTE: See the "Installing/Upgrading Oracle Versions of EPiServer CMS" chapter for information on how to install Oracle versions of EPiServer CMS.
- Install EPiServer CMS Manager according to the installation wizard.
- Open EPiServer CMS Manager.
- Any existing EPiServer CMS sites are displayed in the folder list. Right-click the folder root and select Install…, or click
 in the toolbar. This opens the wizard that will guide you through your installation.
 - Browse to your license file and click Next. Alternatively, follow the link if you want to create a time-limited demo license.
- Click Online and select the version you want to install from the Install version list. The latest version appears at the top of the list. Click Next.
- Enter a name for the site to be installed in the Site name box and add a virtual directory name if you wish. Click Next.
- In the Database area, select a server that the database you intend using is installed on. If the database is local, i.e. on the same machine you intend installing EPiServer, select (local).
(default) in the Port field defines the database server's default port. If you wish to install to another database server port, change the value to the desired port number.
Select the name of the database you intend using from the Existing Database list or enter the name of a new database.
NOTE: The database must be installed and configured before you start installing EPiServer CMS. Make sure that the specified user has owner rights to the database. - In the User area, select an existing user or create a new user that has owner rights to the database specified above. In the Password box, type the password associated with the specified user.
- Select the Do not install database check box if you do not wish to install a database for the EPiServer CMS site (a case when this would be needed would be if you are installing EPiServer on an Oracle Database). Click Next.
- Create an administration account that you can later use for logging on to the Web site for the first time. You can simply delete this account later, if you want. Type the user name you want to use to log on to the Web site for the first time in the User name box. Type the password you want to associate with the user specified above in the Password box and confirm the password. Select Next.
- Create Edit and Admin paths. This section allows you to change the default folder paths for the edit and admin files. The reason for this is to make your site more secure from unwanted intrusion. You may also enter a port number for each of these sections. The installation will then create these ports for you. If you wish you can tell the installation to make the edit and admin parts of your site acceable through HTTPS as opposed to the standard HTTP for enhanced security.
- Check the settings that you have entered and click Finish to install EPiServer CMS. Click Previous to return to any dialogs to change the information you have entered.
When the installation procedure is complete, a folder has been created under "Program Files\EPiServer4" named Download. This folder contains files that have been downloaded to allow the tool to be installed. It also contains a text file, upgrade.log, which describes the installation procedure. This file can be sent to Support if an error that you require help with has occurred during the installation or upgrade procedure.
IMPORTANT! If there were no problems during the installation procedure, delete the file "Program Files\EPiServer4\Upgrade.log" from the computer for security reasons. This file contains sensitive information, such as information for connecting to the database.
Upgrade EPiServer CMS Installation Online
Follow the instructions below to upgrade an EPiServer CMS installation when your computer has access to Internet.
NOTE: See the "Installing/Upgrading Oracle Versions of EPiServer CMS" chapter for information on how to upgrade Oracle versions of EPiServer CMS.
- Install EPiServer CMS Manager according to the installation wizard.
- Open EPiServer CMS Manager.
- Any existing EPiServer CMS sites are displayed in the folder list. Right-click the site to be upgraded and select Upgrade..., or click
 in the toolbar. This opens the wizard that will guide you through your upgrade.
 - Click Online and select the version you want to install from the Install version list. The latest version appears at the top of the list. Click Next.
- Check the settings that you have entered and click Finish to install EPiServer CMS. Click Previous to return to any dialogs to change the information you have entered.
EPiServer CMS Manager enables offline installation, which means that EPiServer can be installed on machines that are located behind a firewall and do not, therefore, have access to Internet. Offline installation also allows installation on laptop computers that are not connected to Internet.
In order to install and upgrade EPiServer CMS offline, you must first use EPiServer CMS Manager to create a .zip file containing the appropriate files. This step is described in the "Create Offline Installation" chapter.
NOTE: Only EPiServer CMS 4 installations can be upgraded offline. Use online installation to upgrade EPiServer CMS 3 installations.
NOTE: See the "Installing/Upgrading Oracle Versions of EPiServer CMS" chapter for information on how to install and upgrade Oracle versions of EPiServer CMS.
Create Offline Installation
Follow the instructions below to create the .zip file that contains the files used to install and upgrade EPiServer CMS offline.
- Install EPiServer CMS Manager according to the installation wizard.
- Open EPiServer CMS Manager.
- On the Tools menu, click Create offline installation... This opens the wizard that guides you through the creation of your offline files.
- Browse to your license file and click Next. Alternatively follow the link if you want to create a time-limited demo license.
- Click New installation or Upgrade.
If you want to do a new installlation offline, select the EPiServer CMS version you want to install from the drop-down list.
If you want to upgrade an EPiServer CMS site, select the version to be upgraded in the From Version drop-down list and the version that you want to upgrade to in the To Version drop-down list. - Enter a destination where the .zip file will be saved. Click Create.
NOTE: Remember where the .zip file is saved. You cannot install or upgrade an EPiServer CMS installation offline without it.
Installing EPiServer CMS OfflineFollow the instructions below to install a new EPiServer CMS installation when your computer does not have access to Internet.
- Create an offline .zip file containing the installation files as described in the "Create Offline Installation" chapter.
- Open EPiServer CMS Manager.
- Any existing EPiServer CMS sites are displayed in the folder list. Right-click the folder root and select Install…, or click in the toolbar. This opens the wizard that will guide you through your installation.
- Browse to your license file and click Next. Alternatively follow the link if you want to create a time-limited demo license.
- Click Offline and browse to the folder that contains the .zip file that you have previously created containing the offline files.
- Enter a name for the site to be installed in the Site name box and add a virtual directory name if you wish. Click Next.
- In the Database area, select a server that the database you intend using is installed on. If the database is local, i.e. on the same machine you intend installing EPiServer, select (local).
(default) in the Port field defines the database server's default port. If you wish to install to another database server port, change the value to the desired port number.
Select the name of the database you intend using from the Existing Database list or enter the name of a new database.
NOTE: The database must be installed and configured before you start installing EPiServer CMS. Make sure that the specified user has owner rights to the database. - In the User area, select an existing user or create a new user that has owner rights to the database specified above. In the Password box, type the password associated with the specified user.
- Select the Do not install database check box if you do not wish to install a database for the EPiServer CMS site. Click Next.
- Create an administration account that you can later use for logging on to the Web site for the first time. You can simply delete this account later, if you want. Type the user name you want to use to log on to the Web site for the first time in the User name box. Type the password you want to associate with the user specified above in the Password box and confirm the password. Click Next.
- Check the settings that you have entered and click Finish to install EPiServer CMS. Click Previous to return to any dialogs to change the information you have entered.
When the installation procedure is complete, a folder has been created under "Program Files\EPiServer4" named Download. This folder contains files that have been downloaded to allow the tool to be installed. It also contains a text file, upgrade.log, which describes the installation procedure. This file can be sent to Support if an error that you require help with has occurred during the installation or upgrade procedure.
IMPORTANT! If there were no problems during the installation procedure, delete the file "Program Files\EPiServer4\Upgrade.log" from the computer for security reasons. This file contains sensitive information, such as information for connecting to the database.
Follow the instructions below to upgrade an EPiServer CMS installation when your computer does not have access to Internet.
NOTE: Only EPiServer CMS 4 installations can be upgraded offline. Use online installation to upgrade EPiServer CMS 3 installations.
- Create an offline .zip file containing the upgrade files as described in the "Create Offline Installation" chapter.
- Open EPiServer CMS Manager.
- Any existing EPiServer CMS sites are displayed in the folder list. Right-click the site to be upgraded and select Upgrade..., or click in the toolbar. This opens the wizard that will guide you through your installation.
- Click Offline and browse to the folder that contains the .zip file that you have previously created containing the offline files. Click Next.
- Check the settings that you have entered and click Finish to install EPiServer CMS. Click Previous to return to any dialogs to change the information you have entered.
Setting Up Oracle Server
The Oracle version of EPiServer CMS requires a few extra files and a special license file. You can request these from EPiServer Developer Support since these files are not included in the standard installation.
Setting Up Oracle Database
Follow the instructions below to set up the Oracle database.
- Log on to the Oracle database server with SQL*Plus, as the SYSTEM user.
- Create tablespace for the EPiServer database.
The following names and paths are just examples, adjust as suitable for your environment. The size specifications may need to be adjusted, but should be enough for a medium-sized Web site.
CREATE TABLESPACE EPISERVER_DATA1
LOGGING DATAFILE '/oracle/oradata/epdev/EP_DATA1.ora'
SIZE 50M
EXTENT MANAGEMENT LOCAL; - Create a user and give the user basic rights.
CREATE USER EPISERVER IDENTIFIED BY PASSWORD
DEFAULT TABLESPACE EPISERVER_DATA1
TEMPORARY TABLESPACE TEMP;
GRANT CONNECT, RESOURCE TO EPISERVER; - Logout from SQL*Plus.
- Load the database schema.
This assumes that the database host string is dbserver.company.com and user is defined as above. The SQL files referred to below are provided by EPiServer Developer Support .
sqlplus EPISERVER/PASSWORD@dbserver.company.com @EPiServerNET.sql > out.log - Verify that the out.log file does not indicate any errors.
Upgrading From Older Versions of EPiServer CMS
The files distributed with the Oracle version contain an Upgrade folder. This folder contains several files to upgrade specific versions of the EPiServer CMS database. Check the version number of your current EPiServer CMS installation (see the title bar of Internet Explorer when in Admin or Edit mode) and run the files consecutively to upgrade the database step-by-step to the most current version.
Finally you should run the oracle_proc.sql script to update all procedures and functions.
Installation with Oracle Database Server
Note For offline installations, EPiServer CMS Manager must also exist on the machine where EPiServer CMS will be installed.
Follow the instructions below to install EPiServer CMS with Oracle Database Server.
- Start the installation and proceed through the installation screens until you reach the Database setup/creation dialog.
- Select Do not install database. This will prevent any database installation to take place during installation, since the database has already been set up.
(default) in the Port field defines the database server's default port. If you wish to install to another database server port, change the value to the desired port number. - After the installation has completed, you need to make the following modifications to the web.config file:
- Change the database connection string. Data Source should correspond to the database host, User ID is the user and Password is the password.
<add key="EPsConnection" value="Data Source=dbserver.company.com;User Id=EPISERVER;Password=PASSWORD;" />
- Indicate that you are using the Oracle database driver by adding the following line to web.config
<add key="EPsDatabaseClient" value="Oracle" />
Follow the instructions below to delete an EPiServer CMS installation.
- Install EPiServer CMS Manager according to the installation wizard.
- Open EPiServer CMS Manager. All existing EPiServer sites are displayed in the folder list. Right-click the site to be deleted and select Delete, or click
 in the toolbar.
 - In the Remove Site Components window, select the parts of the installed site that you want to delete. The default setting is to delete all parts of the site. Clear the relevant check boxes if you do not want to delete the IIS data, database or file structure.
NOTE: If you select to delete a database, the database user will be deleted unless the user is a member of other databases on the server. - Click Delete when you have selected the parts of the site that you want to delete.
The following issues apply when upgrading EPiServer CMS sites before EPiServer CMS 4.60 to 4.62. These issues do not apply when upgrading from EPiServer CMS 4.60 or 4.61 to 4.62.
Converting a Multi-Language Database
Please contact EPiServer Developer Support for further information on converting an existing multi-language database.
Friendly URL
When upgrading a Web site to EPiServer 4.62, the friendly URL functionality will not function correctly until the following has been added to web.config.
<httpModules>
<add name="FriendlyUrl" type="EPiServer.Util.FriendlyUrlModule, EPiServer" />
</httpModules>
Add the following code to the header section of all the templates used in the site, normally located in /templates/units/header.ascx.
<%@ Register TagPrefix="EPiServer" Namespace="EPiServer.WebControls" Assembly="EPiServer" %>
...
<episerver:FriendlyUrlRegistration runat="Server" />
ASP.NET Development Server
The built-in Web server in .NET 2.0 (ASP.NET development server) does not support friendly URL in the default configuration. In order for this to work, you must have an extension that is mapped to ASP.NET for the URL. For example:
<add key="EPsFriendlyUrlExtension" value=".aspx" />
Portal
In order to register the EPiServerPersonalizationProvider you need to add the following sections to web.config. This will also give WebAdmins, WebEditors and Administrators permissions to enter shared personalization scope.
<connectionStrings>
<add name="EPiServerDB" connectionString="Data Source=SERVERNAME;Database=DATABASE;User Id=USER;Password=PWD;Network Library=DBMSSOCN;" providerName="System.Data.SqlClient" />
</connectionStrings>
…
<system.web>
…
<webParts>
<personalization defaultProvider="EPiServerPersonalizationProvider">
<providers>
<add name="EPiServerPersonalizationProvider" type="EPiServer.WebParts.Core.EPiServerPersonalizationProvider" connectionStringName="LocalSqlServer" />
</providers>
<authorization>
<allow verbs="enterSharedScope" roles="WebAdmins, WebEditors, Administrators" />
</authorization>
</personalization>
</webParts>
…
</system.web>
The web.config additions above define a connection string that preferably points to the EPiServer CMS database. In order to use your EPiServer database for WebPart personalization you need to update its scheme. Use the following command (available under \%windir% \Microsoft.NET\Framework\v2.0.50727) to update the database scheme.
aspnet_regsql.exe /S SERVER /d DATABASE -E -A mc
Sample templates can be imported from the <EPiServerSample dir>\Util\Setup\Portal Templates.ep4.
The delayed loading function is not activated by default, i.e. the previous behavior of loading all strings is still active. To activate delayed loading, add the following text to web.config:
<!--
The number of characters when delayed loading should be activated for large
strings in properties deriving from Long String.
A lower value will decrease memory usage but may increase database usage, the
optimial value depends on the amount of content.
Setting this value to 0 will disable delayed loading of strings.
Setting this value to 1 will effectively always use delayed loading.
-->
<add key="EPnStringDelayedLoadThreshold" value="100" />
For further information about the delayed loading functionality, see the EPiServer CMS 4.60 Release Notes.
Unified File System
From EPiServer CMS 4.60, the following registration in web.config is required for virtual unified file system handlers, i.e. those handled by EPiServer CMS. Registration is done automatically at installation and upgrade. This module is responsible, for example, for making sure that "Documents/MyDocument.doc" is mapped to a file in versioned file system. It should be placed after SpiderSupport, which was previously reponsible for this functionality.
<httpModules>
<add name="SpiderSupport" type="EPiServer.Util.SpiderSupport, EPiServer" />
<add name="UnifiedFileSystem" type="EPiServer.FileSystem.UnifiedFileSystemModule, EPiServer" />
Simple Address
From EPiServer CMS 4.60, the simple address functionality is managed by a separate module and is no longer part of SpiderSupport. In order for simple address to function as in EPiServer CMS versions prior to 4.60, add the following registration to web.config. Registration is done automatically at installation and upgrade.
<httpModules>
<add name="SpiderSupport" type="EPiServer.Util.SpiderSupport, EPiServer" />
<add name="UnifiedFileSystem" type="EPiServer.FileSystem.UnifiedFileSystemModule, EPiServer" />
<add name="ExternalUrl" type="EPiServer.Util.ExternalUrlModule, EPiServer" />
Installing ASP.NET 2.0 Templates
Visual Studio 2005, and Visual Studio 2005 Web Application Projects are required to install the templates for ASP.NET 2.0. The Web Application Project can be downloaded from the following site:
http://msdn.microsoft.com/asp.net/reference/infrastructure/wap/default.aspx.
In order for the EPiServer CMS Manager to handle projects compiled in ASP.NET 2.0, version 1.2 must to be installed.
- Make sure that the site is running ASP.NET 2.0 by selecting the ASP tab in the admin interface of IIS. Alternatively use the aspnet_regiis.exe tool to install the ASP.NET 2.0 script maps. Execute aspnet_regiis /? for information on usage.
- Download the ASP.NET 2.0 templates zip file.
- Make a backup of all files in the Web site folder.
- Unpack the zip file.
- Remove the templates folder and the EPiServerSample.csproj.webinfo file.
- Copy the unzipped files into the Web site folder.
- Add the following info to your web.config:
<pages validateRequest="false" enableEventValidation="false">
<controls>
<add tagPrefix="EPiServer" namespace="EPiServer.WebControls" assembly="EPiServer" />
<add tagPrefix="WebParts" namespace="EPiServer.WebParts.WebControls" assembly="EPiServer.WebParts" />
<add tagPrefix="WebParts" namespace="EPiServer.WebParts.WebControls.Wsrp" assembly="EPiServer.WebParts" />
</controls>
</pages>
- Open the Web Application Project in VS2005.
- Compile and run the project.
- If you are using the sample site you need to remove the old portal page (“Portal Framework” in the top menu) since it is not supported in ASP.NET 2.0.
Install EPiServer CMS with the Development Web Server
Follow the instructions below to install EPiServer CMS with the Development Web Server shipped with Visual Studio 2005.
- In EPiServer CMS Manager install a site accordin go the instructions in the next chapter and enter a name for the site to be installed in the Site name box. Point it to a physical directory and append a port number of your choice in the Site URL field, e.g. http://localhost:1020.
- Complete the installation as usual.
- Install the 2.0 templates as described in the previous chapter.
- Open the project file in Visual Studio 2005 and go to the property pages for the project file.
- Open the Web tab and type the port number that you entered earlier in the installation process in the Servers area.
- Start a debugging session. The development Web server will start and load the setup page.
- Install the content and you're ready to work.