ARCHIVED This content is retired and no longer maintained. See the version selector for other versions of this topic.
Creating custom reports in Commerce Manager [Legacy]
Note: This functionality is retired, and the documentation is no longer maintained.
This topic describes how to add custom reports in Episerver Commerce Manager.
The built in reports are done with Microsoft SQL Server Reporting Services using local reports. You can create local reports and reports stored on a reporting services server. If you use the remote option, you can take advantage of the subscription services to distribute the reports automatically at a desired frequency.
Classes in this topic are available in the following namespaces:
Mediachase.Web.Console.Reporting
Mediachase.Web.Console.Reporting.DataSources
Adding custom reports
Create a new Web Application.
Remove the default.aspx page and web.config file. You can leave them if you want to test the project outside of Commerce Manager.
Copy the Apps/Reporting/Config folder and its content to the new project.
Copy Apps/Reporting/Reports into the new project, if you are using the SQL Reporting services.
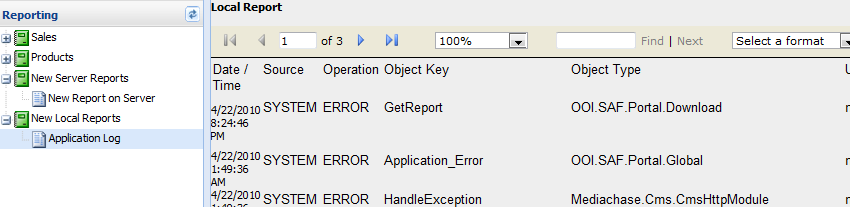
Edit the Config/Naviation/LeftMenu.xml file to include a new report. The following example adds two parent links New Local Reports and New Server Reports with a report for each one.
Edit the elements under the section Navigation/Commands/Add element. The following example shows two commands for the two new report links added. The second command passes a query string to the ChangeView method, which lets the view have parameters if needed.
Create a new ascx control using the name from the controlUrl in the previous step. Place it in the root of the new project. This ascx defines the appearance and functionality of the report when displayed.
If you are using SQL Reporting services, you can add the ASP.NET ReportViewer control to the ascx. If you use this control, you can add a LocalReport element with a ReportPath specified as Apps\Reporting\Reports[Your report name]. Or, if you have a server instance set up, point the report viewer control to the server.
Creating a local report
Follow the steps below to create a local report.
Add your the .rdlc file of your report to the Reports folder.
Create the code behind of the control to get the data set needed for the local report, and then add the data source to the control.
using System;
using System.Collections.Generic;
using System.Configuration;
using System.Data;
using System.Data.SqlClient;
using System.Linq;
using System.Web;
using System.Web.UI;
using System.Web.UI.WebControls;
using Microsoft.Reporting.WebForms;

namespace ReportingDeveloperGuide
  {
    public partial class LocalApplicationLog : System.Web.UI.UserControl
      {
        /// <summary>
        /// Handles the Load event of the Page control.
        /// </summary>
        /// <param name="sender">The source of the event.</param>
        /// <param name="e">The <see cref="System.EventArgs"/> instance containing the event data.</param>
        protected void Page_Load(object sender, EventArgs e)
          {
            if (!this.IsPostBack)
              {
                BindReport();
              }
          }
        /// <summary>
        /// Binds the report.
        /// </summary>
        private void BindReport()
          {
            string qry = @"SELECT TOP 100
              [LogId],
              [Source],
              [Operation],
              [ObjectKey],
              [ObjectType],
              [Username],
              [Created],
              [Succeeded],
              [IPAddress],
              [Notes],
              [ApplicationId]
            FROM [ooi_main].[dbo].[ApplicationLog]
            ORDER BY Created desc";

            SqlConnection connection = new
            SqlConnection(ConfigurationManager.ConnectionStrings["EcfSqlConnection"].ConnectionString);
            SqlCommand cmd = new SqlCommand(qry, connection);
            SqlDataAdapter da = new SqlDataAdapter();
            da.SelectCommand = cmd;
            DataSet ds = new DataSet();
            da.Fill(ds);

            MyReportViewer.LocalReport.DataSources.Clear();
            MyReportViewer.LocalReport.DataSources.Add(new ReportDataSource("Logging_ApplicationLog", ds.Tables[0]));
            MyReportViewer.LocalReport.ReportPath = this.MapPath("Reports\\rpt_ApplicationLog.rdlc");
            MyReportViewer.DataBind();
          }
      }
  }
Connecting a reporting services server
The following steps show how to connect to a reporting services server.
Create the code behind of the control to set the report path and report server URL.
using System;
using System.Collections.Generic;
using System.Configuration;
using System.Linq;
using System.Web;
using System.Web.UI;
using System.Web.UI.WebControls;

namespace ReportingDeveloperGuide
  {
    public partial class RemoteReportViewer : System.Web.UI.UserControl
      {
        protected void Page_Load(object sender, EventArgs e)
          {
            if (!this.IsPostBack)
              {
                BindReport();
              }
          }

        private void BindReport()
          {
            this.MyReportViewer.ServerReport.ReportServerCredentials = new
              ReportViewerCredentials(ConfigurationManager.AppSettings["ReportServerUsername"],
              ConfigurationManager.AppSettings["ReportServerPassword"], "");
            this.MyReportViewer.ServerReport.ReportServerUrl = new Uri(ConfigurationManager.AppSettings["ReportServerUrl"]);
            this.MyReportViewer.ServerReport.ReportPath = "/Reports/" + Request.QueryString["Report"];
            this.MyReportViewer.ServerReport.Refresh();
          }
      }
  }
Note: For the server report, you can reuse the same control and just pass the name of the report to be viewed by the report viewer control. In this way, you can add links, and the same control can be used for each link.
Deploying and testing
Do the following to deploy and test the reports.
Publish the new project to a new folder. Make sure to use the publishing option Only files needed to run this application.
Copy the new project dll from the publish folder's bin folder to the ConsoleManager bin folder.
Copy the remaining files and folders (excluding the bin folder) to the ConsoleManager\Apps\Reporting folder.
Reset IIS.
Reload Commerce Manager and navigate to Reporting.