Deploying from Development to Public Site
There are two basic installations of EPiServer CMS available today, the development installment and the public site (manager installation). The common practice is to work with EPiServer CMS from a developer installation with Visual Studio and continuously update the live site with new and reworked dll’s and templates. The process of deploying a Visual Studio project to a live site is not complicated, but a few steps need to be taken care of.
Contents
›› Installing the Development Environment
›› Deploying a Project to the Production Site
›› Exporting / Importing Templates and Content
Installing the Live Site
A basic manager installation of a live site is covered in the Installation Instructions (EPiServer CMS 5 SP2). Before installing the public site, make sure your server meets the requirements:
- .NET Framework 3.0
- SQL Server 2000 / 2005
- Windows 2003 Server / Windows XP
Installing the Developer Environment
The SDK installation of EPiServer CMS installs the framework as well as the EPiServer CMS specific tools for Visual Studio. When installing the SDK version you will also get the compiled SDK documentation file (which is also available online at http://sdk.episerver.com). Installation instructions for the development environment can be found in the EPiServer CMS 5 - Installation Instructions.
The following prerequisites are required of the server for the SDK installation:
- Windows XP or Windows 2003 Server
- Microsoft Visual Studio 2005 SP1 (Professional or "more")
- Microsoft SQL Express (Make sure TCP/IP and Named Pipes protocols are enabled in the SQL Server Configuration Manager)
- .NET Framework 3.0
Deploying a Project to the Production Site
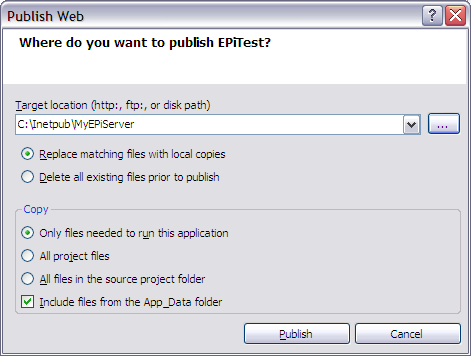
Open your EPiServer project in Visual Studio and right-click the project node. Find the option “Publish”. When you click publish Visual Studio will do a build of the project and export the necessary files to the supplied path (the path should point to your manager installed site).
1. Click “publish”.

2. Select the root folder of your site and click “Publish”.
Note: Remember to set Visual Studio to build Release versions of the dll's before publishing to a public site.

This will copy your .asp and dll files to the production site. Make sure you match the file structure in order for the template files to get exported to the appropriate folder.
Exporting / Importing Templates and Content
To deploy content and page types to a production site and have them registered automatically we recommend the export / import functionality of EPiServer CMS. Open your development site in a web browser and enter admin mode. On the Admin tab click Export Data. Check the options that are correct for you (in the sample image we are simply exporting a single page type, “MyPage”).

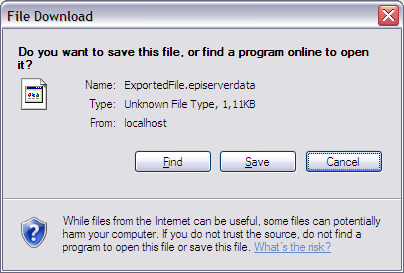
Chose a target location for your export file and click Save.

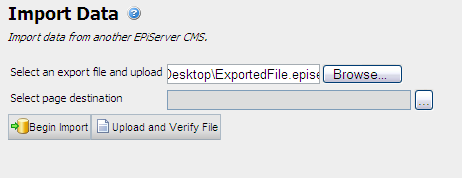
Open your production site and enter Admin mode. On the Admin tab, select Import Data and locate the file we you exported in the previous step.

Click Begin Import and the contents of the file will be imported to the production site.
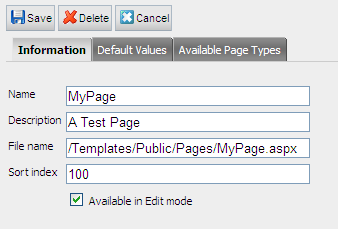
If you receive an error when trying to create a new page from one of the imported templates, check that the File Name property under the page settings in Admin mode points to the correct path. Commonly the path is set to the root folder during an import and the path might need to be changed so that it matches the templates actual placement in the folder structure.
Path issues might occur if you move files in Visual Studio after you have created and registered them. When a template is moved, the settings pointing out the path is not updated and need to be manually fixed after import.

