EPiServer CMS Site Performance Part 3: Optimizing images and using sprites
In the last post we looked at bundling and minifying JavaScript and CSS files on the demo site. This time we will take a look at the image files.
Web Essentials
The Web Essentials extension to Visual Studio is as the name says essential. If you haven’t already, you need to download it now
Optimizing images
Most often you will find that you can make image files even smaller without decreasing the image quality. With Web Essentials installed it is simply a matter of right clicking the image(s) in Visual Studio and select “Web Essentials –> Optimize images”.
The optimization shrank the file sizes between 3% to 95%. Here is one example:
Optimized triangle.png
Before: 3061 bytes
After: 303 bytes
Saving: 2758 bytes / 90,1%
Creating sprites
If you look in the header area of the demo site you will see that we have five share icons, each consisting of its own small image.
<ul class="follow_icon">
<li><a href="#"><img src="/img/follow_icon1.png" alt=""></a></li>
<li><a href="#"><img src="/img/follow_icon2.png" alt=""></a></li>
<li><a href="#"><img src="/img/follow_icon3.png" alt=""></a></li>
<li><a href="#"><img src="/img/follow_icon4.png" alt=""></a></li>
<li><a href="#"><img src="/img/follow_icon5.png" alt=""></a></li>
</ul>
One way to reduce the number of requests is to combine these five images into one sprite, and then use CSS to only show the part we need. To create the sprite we select the five images in Visual Studio, right click and select “Web Essentials –> Create image sprite…”.
This is what the sprite looks like:
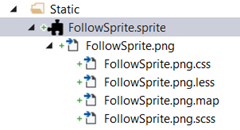
Not only will Web Essentials create a new image sprite file, but also the CSS code you need to use the sprite (as well as LESS and SASS code). All we have to do is to copy the CSS code to our style sheet and modify our HTML to use the sprite.
<ul class="follow_icon">
<li><a href="#"><div class="img-follow_icon1"></div></a></li>
<li><a href="#"><div class="img-follow_icon2"></div></a></li>
<li><a href="#"><div class="img-follow_icon3"></div></a></li>
<li><a href="#"><div class="img-follow_icon4"></div></a></li>
<li><a href="#"><div class="img-follow_icon5"></div></a></li>
</ul>
Result
Lets run YSlow again and see what impact our image optimizations have had.
Bytes transferred: 287.1KB down from 326.5KB (Step 1: 333.3KB)
Requests: 26 down from 30 (Step 1: 35)
Time: 1.09 seconds down from 1.16 seconds (Step 1: 1.27 seconds)


Where are the CDN part :-)