
Creating a custom property editor using only react
I recently held a presentation at Ascend Stockholm 2019 about how you can create a custom property editor using only react. That is to say, you don't need to write any dojo code. I started by asking the room if they had ever created a custom property editor and about half the crowd raised their hands. So it seems to me that this is a relevant topic and I hope you find it interesting at the very least.
About a year ago I blogged about how you could use react in the edit UI (https://world.episerver.com/blogs/ben-mckernan/dates/2018/11/a-react-gadget-in-episerver-cms-revisited). However, the biggest problem with that post is that it still required you to bootstrap your react component by writing dojo code. Which means that in order to integrate well with the edit UI you would need to have a pretty good understanding of what our code is doing since there isn't a clear API to work with. So when asked to present something at Ascend, I decided that I wanted to find and present a solution to this and I figured that the best scenario would be one where you didn't need to write any dojo code. Which is why I created the react-to-dijit-adapter (https://www.npmjs.com/package/@episerver/react-to-dijit-adapter).
How it works
The idea is pretty simple, the adapter will abstract away all the dojo parts. So you just create your editor as a react component and then in your entry point file, call the function provided in the node module, passing your component as an argument. You can then export the result of this function as the default export. Like this:
entry.js
import { asEditorWidget } from "@episerver/react-to-dijit-adapter";
import { MyComponent } from "./my-component";

export default asEditorWidget(MyComponent);
The asEditorWidget function will take care of mounting and unmounting your component at the correct time, as well as propagating props to your component from the edit UI. What is also nice about these props is that they form a very clear API for your component to interact with. Notably, value which contains the current value and onChange which is a callback that should be called when the value changes in your component. For example, if I wanted to create the textarea with statistics editor (https://gregwiechec.com/2016/05/textarea-with-statistics) that my colleague Grzegorz Wiecheć created a few years ago, it would look like this:
my-component.js
import React from "react";
const count = (value) => {
const original = typeof value === "string" ? value : "";
const trimmed = original.trim();
return {
paragraphs: trimmed ? (trimmed.match(/\n+/g) || []).length + 1 : 0,
words: trimmed ? (trimmed.replace(/['";:,.?¿\-!¡]+/g, "").match(/\S+/g) || []).length : 0,
characters: trimmed ? trimmed.replace(/\s/g, "").length : 0
};
};
export const MyComponent = ({ onChange, value }) => {
const result = count(value);
return (
<>
<textarea onChange={(e) => onChange(e.target.value)} value={value} style={{ width: "600px" }} />
<div>Characters: {result.characters}</div>
<div>Words: {result.words}</div>
<div>Paragraphs: {result.paragraphs}</div>
</>
);
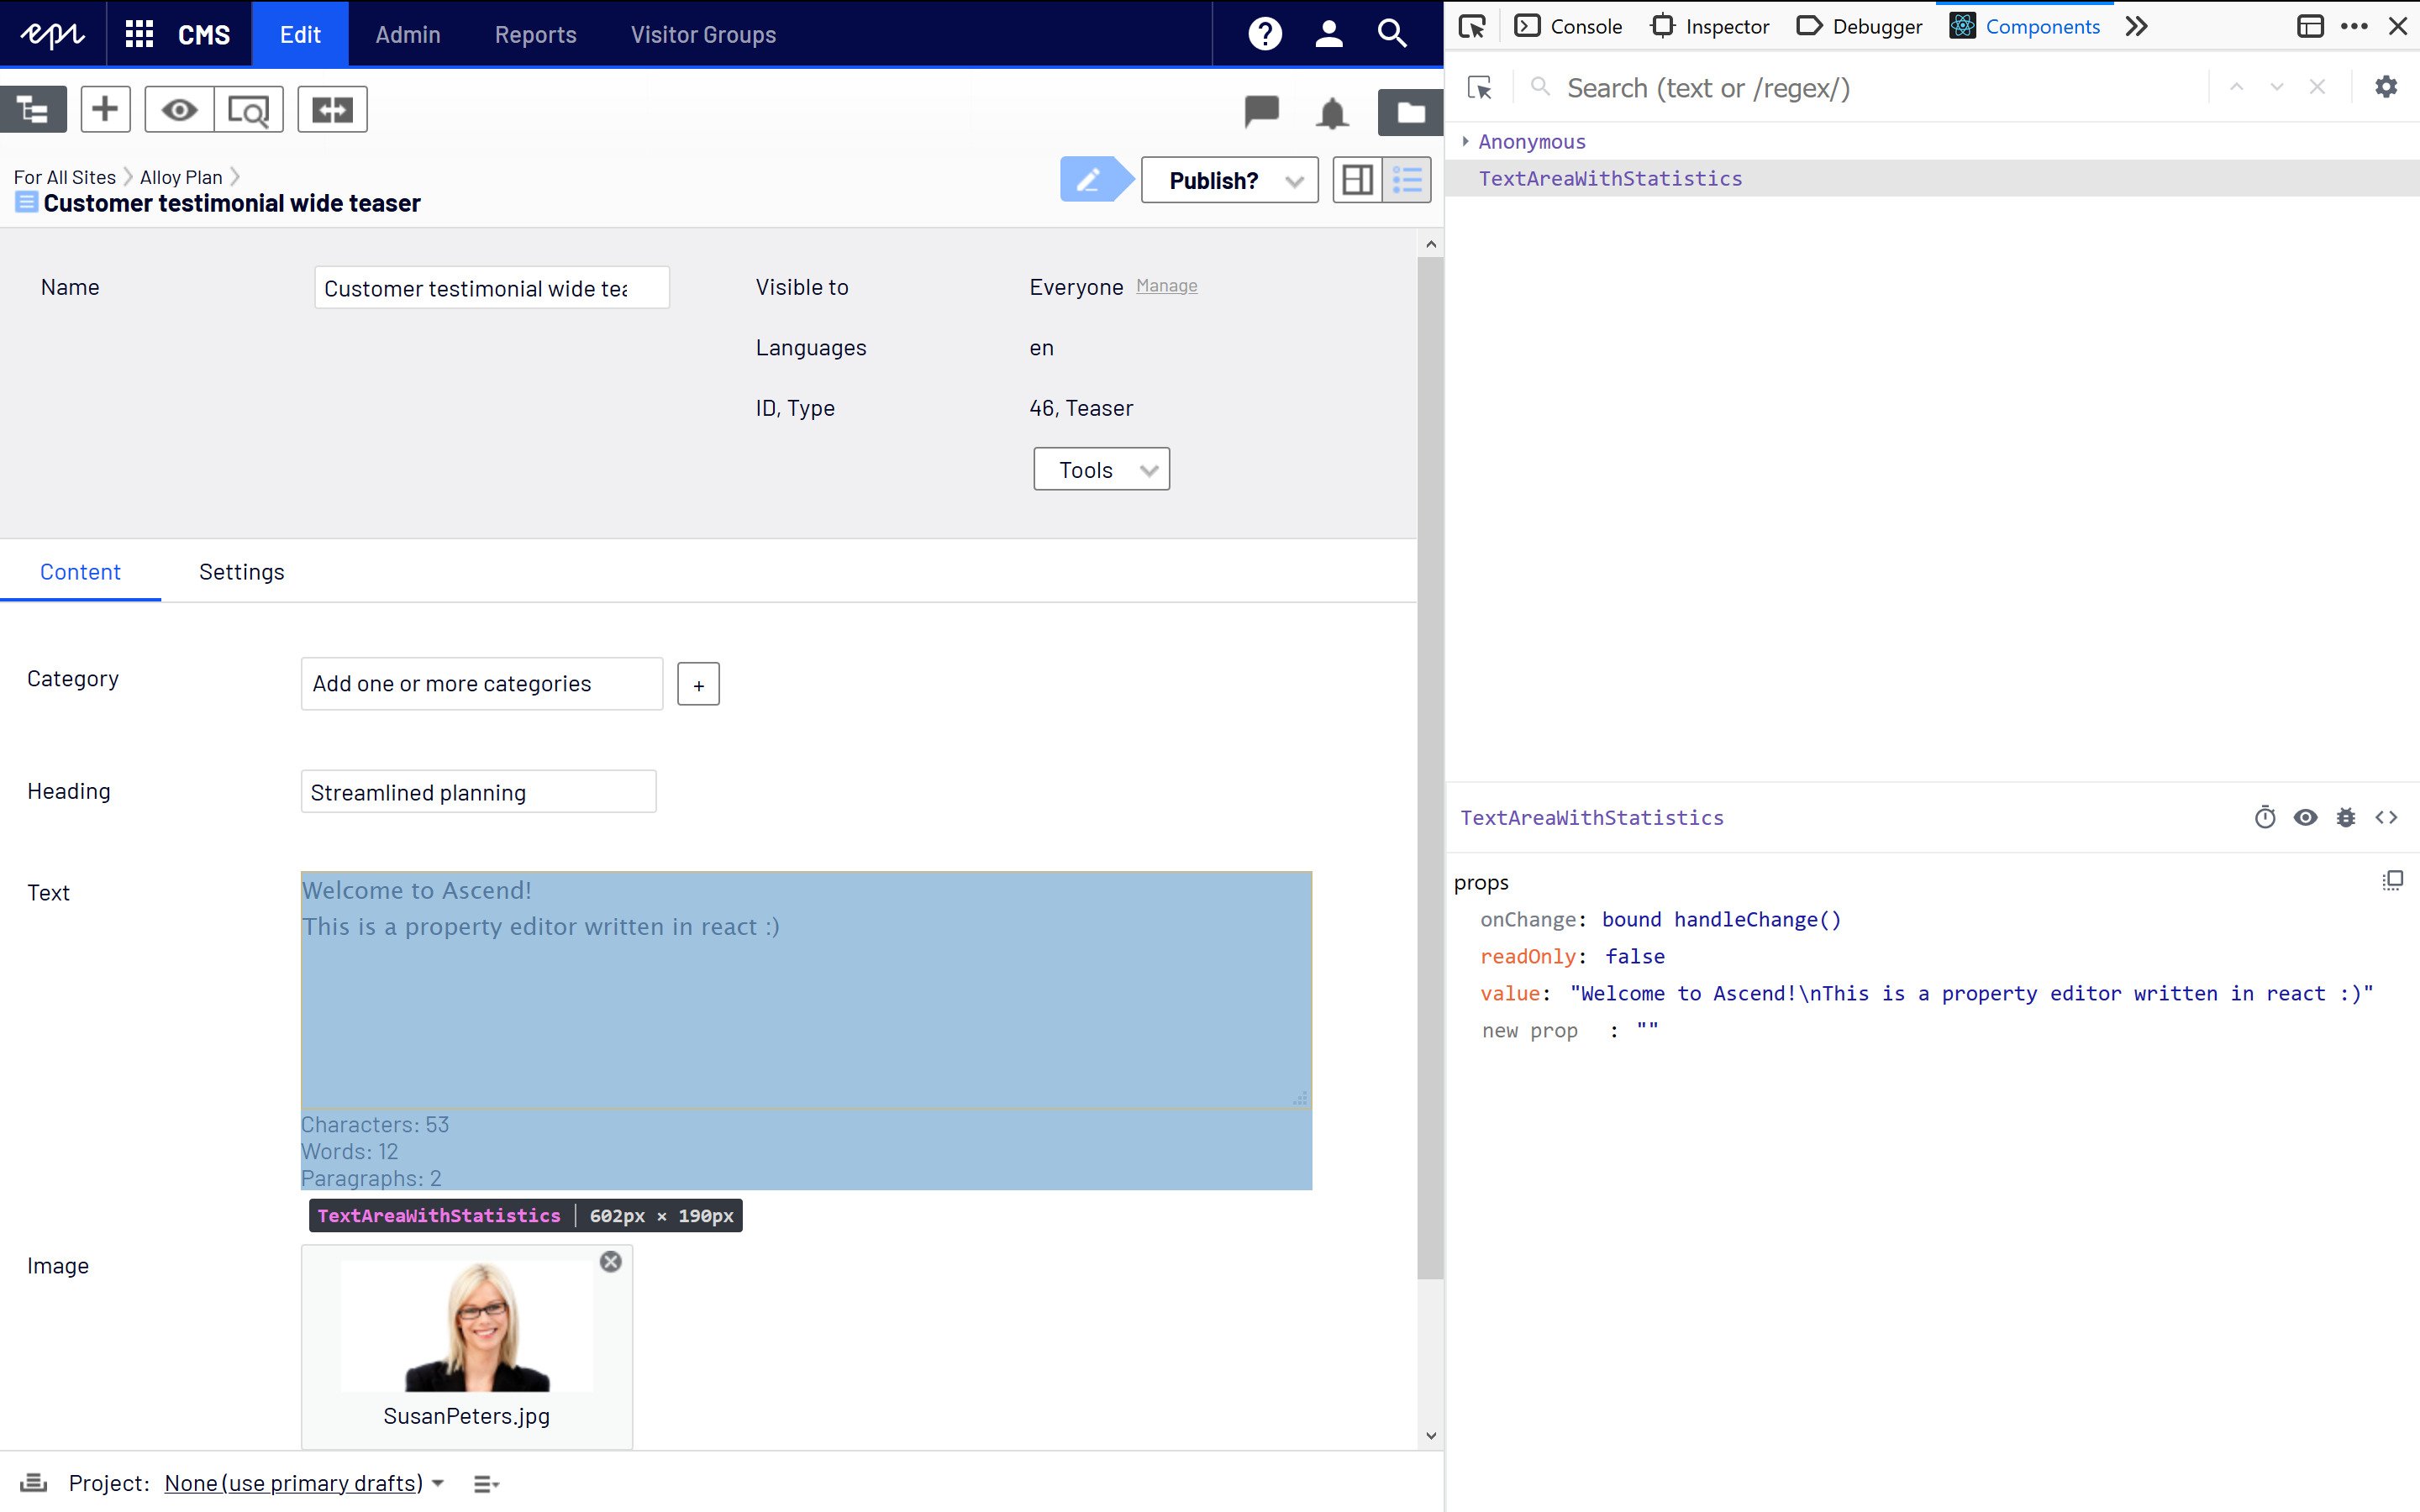
};And here is what it looks like in the edit UI and you can use the react devtools as usual.
You need to bundle
In its current form the code won't run in the UI since it has dependencies on node modules and it's using JSX, so there need to be a bundling step. This can be done with any of the popular bundling tools, webpack or rollup for example. There are two important settings that need to be configured in order for this to run in the UI:
- Format the bundle output as AMD
- Configure
dojo/_base/declareanddijit/_WidgetBaseas externals
The reasons for this are that the UI uses AMD for loading JavaScript modules and therefore also expects your module to be in this format. And because the react-to-dijit-adapter has dependencies on these dojo modules but they are something that will be available at runtime and shouldn't be pulled into your bundle. So a webpack configuration would look something like this:
webpack.config.js
const path = require("path");

module.exports = {
    entry: path.resolve(__dirname, "src/entry.js"),
    output: {
        filename: "TextAreaWithStatistics.js",
        libraryTarget: "amd",
        libraryExport: "default",
        path: path.resolve(__dirname, "ClientResources/Scripts/Editors/")
    },
    module: {
        rules: [
            {
                test: /\.js$/,
                exclude: /node_modules/,
                use: {
                    loader: "babel-loader",
                    options: {
                        presets: [
                            "@babel/env",
                            "@babel/react"
                        ]
                    }
                }
            }
        ]
    },
    externals: [
        "dojo/_base/declare",
        "dijit/_WidgetBase"
    ]
};
The output path and filename are what you would use when configuring the ClientEditingClass for your property in either an EditorDescriptor or ClientEditorAttribute.
Typescript
The react-to-dijit-adapter package includes typings. This will make it easier to see which props are available to your component when using typescript.
Contributing
The code for this adapter is open-source and you can find it on GitHub (https://github.com/ben-mckernan/react-to-dijit-adapter). Contributions are very welcome and if you have a scenario that doesn't work for you, please open an issue.
In terms of props that are passed to the react component, only the bare minimum are available currently. So if you have a use case where you need other props passed to your property editor, please open an issue describing your use case.
This is great work, but it would be incredibly helpful to be able to clone a repo based on Alloy where this is set up and working. Could you by any chance share the complete project from Ascend?
This is not mine and it's not an alloy site, but this project shows the setup that would match what you could have in an alloy site: https://github.com/z-iv/EpiMoreEditors