
Divider “Layout” Block
Based on EPiServer 7 and the Alloy Templates
The new Alloy templates released with EPiServer 7 are based on a grid layout. The grid contains a number of rows in which content blocks will automatically resize and fit on the same row or flow to different rows based on the space available. Ted Nyberg explains this concept well in his article on the template package. This is fantastic stuff, especially in the mobile world.
In some cases editors or marketers may want to create a page and have a little more control over this automatic flow. For example, if they were using the Alloy templates “Landing Page”. I’ve created a “Divider Block” for this exact case. It doesn’t really do anything other than what the title says, adds a divider.

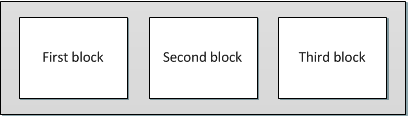
Let’s say, for example, you have three items in a row:
But you really wanted two items in the top row and the third block to push to the next row row similar to what’s pictured below:


No problem! Just add the divider block after the second block and that’s exactly what will happen!


If you’re wondering about mobile, well, everything will continue to flow as expected for mobile devices. Simple, yet effective in enabling an additional level of control for the layout. ![]()
Get the code here…
Enjoy!
- This is intended as a starting point for you to customize for your project needs. The code is provided “as is” without warranty or guarantee of operation. Use at your own risk.
- If you install on a site that does not include the Alloy Templates you should expect that you will need to make a few minor updates to get it working as desired.
- Block photos above (First block, Second block, Third block, etc) were taken from Ted Nyberg’s article on the Alloy Templates.
Cool. Just what the doctor ordered!
Does this give any padding in the final rendering?
The output HTML is:
The idea here was basic. You could customize it to add a height property and add any padding you want, change the color, add a horizontal rule, etc. I thought about adding some configurations and realized I better focus on some other things first. :)