


Creating a Dojo based component
In this second blog post in the series about how to extend the user interface in EPiServer 7 we will look how to add a component using the JavaScript framework Dojo. There are two parts needed to create a Dojo-based component. The first is a server side class with a component attribute.
using EPiServer.Cms.Shell;
using EPiServer.Shell.ViewComposition;
namespace CodeSamples
{
[Component(
//Auto-plugs in the component to the assets panel of cms
//(See EPiServer.Cms.Shell.PlugInArea
//in the EPiServer.Cms.Shell.UI assembly for CMS constants)
PlugInAreas = "/episerver/cms/assets",
Categories = "cms",
WidgetType = "alloy.components.CustomComponent",
//Define language path to translate Title/Description.
//LanguagePath = "/customtranslations/components/customcomponent";
Title = "My custom component",
Description = "Shows information about the current content item.")]
public class CustomComponent { }
}
This will plug in a component to the EPiServer CMS assets panel. The actual logic for this UI component is located in something called a widget, which is an abstraction layer on top of the browser DOM (There are some similarities with web controls: they both abstract the DOM and they both have a life cycle). The base functionality for every widget is defined within Dijit which is Dojo’s system for creating user interface “classes”. In this first example we’ll just scratch the surface by creating a simple widget that shows the name of the current content item (page, block etc.) in a div.
On the server side plug-in we defined WidgetType = “alloy.components.CustomComponent”, which is the name of the client side widget used for rendering the UI. In this example we also have a module.config file in the site root that defines a new root namespace for Dojo called “alloy” that corresponds to the “ClientResources/Scripts” folder. Since we have added the namespace “components” to our widget definition we add our widget here: “[siteroot]/ClientResources/Scripts/Components/CustomComponent.js”.
define([
// Dojo
"dojo/_base/declare",
"dojo/html",
// Dijit
"dijit/_TemplatedMixin",
"dijit/_WidgetBase",
//CMS (use epi/cms if you are running EPiServer 7.0, epi-cms if you are running 7.1 or above)
"epi-cms/_ContentContextMixin"
], function (
// Dojo
declare,
html,
// Dijit
_TemplatedMixin,
_WidgetBase,
//CMS
_ContentContextMixin
) {
//We declare the namespace of our widget and add the mixins we want to use.
//Note: Declaring the name of the widget is not needed in EPiServer 7.1
//but the release version of EPiServer 7 uses Dojo 1.7 and still needs this.
return declare("alloy.components.CustomComponent",
[_WidgetBase, _TemplatedMixin, _ContentContextMixin], {
// summary: A simple widget that listens to changes to the
// current content item and puts the name in a div.
templateString: '<div>\
<div data-dojo-attach-point="contentName"></div>\
</div>',
contextChanged: function (context, callerData) {
this.inherited(arguments);
// the context changed, probably because we navigated or published something
html.set(this.contentName, context.name);
}
});
});
Let’s dissect the contents of the widget to get an understanding of what it contains:
“define” is one of few variables that DOJO adds to the global namespace and is used when declaring AMD modules. Define takes three arguments, a module name, an array of dependencies and the module factory. The module name and dependencies are optional, and in this example the optional module name has been omitted since it will be resolved automatically by the loader. So the first parameter in this example is an Array of strings that defines all dependencies that this class needs to work. The second parameter is a function, the factory, which gets passed all dependencies and returns the resulting module class. When using this pattern all variables will be declared in the local scope of your widget or class and don’t have to resort to using global variables.
Note: Defining modules and classes using this pattern in not specific to Dojo but part of the AMD pattern (Asynchronous Module Definition). More information about the AMD pattern is available here: https://github.com/amdjs/amdjs-api/wiki/AMD
Inside the factory function with the dependencies we call the declare function (which is taken in as a dependency) which returns a definition of our class. The declare states the class name including namespace, a base class and additional mixins that the class wants to inherit from. Since JavaScript has no class system Dojo provides the possibility to mix in any number of classes and you will inherit all methods and properties from the mixin-classes. Our widget uses the following:
- WidgetBase: The base class used to implement widgets. There are many derived classes that you can inherit from but in this sample we just want to have a plain vanilla widget.
- _TemplatedMixin: This mixin gives the possibility to add an HTML template to the widget by setting the templateString property.
- _ContentContextMixin: This is a class defined in EPiServer CMS that gives you some methods and events to keep track of the currently selected content item, for instance getCurrentContent and contentContextChanged.
We add a simple html string to the templateString property and in the template we add a div with the attribute data-dojo-attach-point="contentName". This enables us to interact with this node through a property with the same name as the value of the attribute, in our case “contentName”.
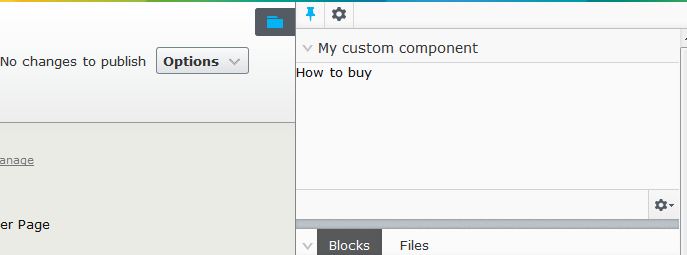
In our class we also implement the contentContextChange event and use the “dojo/html” class to set the inner html of our div to the name of the current content item. The result is pretty similar to the web forms sample in the first blog in this series:
This is part of a blog post series to extend the user interface in EPiServer 7:
Extending the User Interface of EPiServer 7
Plugging in a Dojo based component
Creating a content search component
Adding a more advanced property editor
Good post and perfect timing as I started exploring this area today.
Good information Linus. Thanks!
Updated the blog post with work with EPiServer 7.1