
Smooth Publish Using JQuery and EPiServer Quick Publishing
One of the new features in EPiServer CMS 6 is Quick Publishing (previously called Content Guides). This is a great way of letting users create and publish content without touching edit mode. To read more about Quick Publishing, see the ‘Let Those Users in’ section in this article.
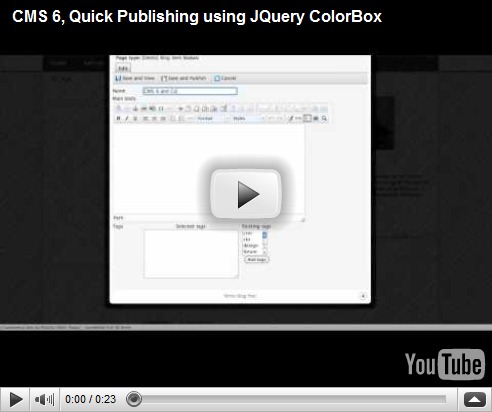
I wanted to take this one step further, I wanted certain users to be able to create and edit pages directly from view mode (i.e. “hide” edit mode from the user). At the same time I wanted to avoid coding a custom “create view”, but instead use built in EPiServer edit templates.
Using the JQuery ColorBox Plugin together with Quick Publishing gave me a the result I was looking for (I’ll explain in detail how it works below).
How does it work?
First you need to configure the page guides:
<pageGuides>
<pageGuide destinationPageId="394"
name="PersonalBlogStart"
pageTypeName="[Demo] Blog personal start"
title="Edit Personal Blog">
<visibleProperties>
<pageProperty propertyName="PageName" />
<pageProperty propertyName="Details" />
<pageProperty propertyName="Writer" />
<pageProperty propertyName="Image" />
<pageProperty propertyName="ListCount" />
</visibleProperties>
</pageGuide>
<pageGuide destinationPageId="394"
name="BlogItem"
pageTypeName="[Demo] Blog item"
title="Create Blog">
<visibleProperties>
<pageProperty propertyName="PageName" />
<pageProperty propertyName="MainBody" />
<pageProperty propertyName="Tags" />
</visibleProperties>
</pageGuide>
</pageGuides>
For more information on Quick Publishing configuration visit this document.
I added two links at the top of the Personal Blog Start Page Template (only visible on the user’s own blog start page) – one for editing the current page and one for creating a new Blog post.

<asp:PlaceHolder runat="server" ID="plhEditAndCreate">
<div id="EditCreatePanel">
<a href="<%= EditUrl %>" class="popupCustom edit" title="Edit your settings">
Edit my settings</a>
<a href="<%= NewBlogUrl %>" class="popupCustom create" title="Write Blog Post">
Write Blog</a>
</div>
</asp:PlaceHolder>
Where the “NewBlogUrl” property would return
string.Format(
"{0}{1}edit/EditPanel.aspx?parent={2}&epslanguage={3}&mode=pageguide&type=4&guideName=BlogItem&pageGuideStartUrl={4}",
Settings.Instance.SiteUrl, Settings.Instance.UIUrl.ToString().Replace("~/", string.Empty),
CurrentPage.PageLink.ID, CurrentPage.LanguageBranch, CurrentPage.LinkURL);
A quick explanation of the query parameters:
parent: the parent page of the new page,
mode: set to ‘pageguide’,
guideName: set to the name of the guide (from config above),
pageGuideStartUrl: the url to load when guide is finished (user publish page or presses ‘Cancel’).
(The “EditUrl” is very similar, except for the id parameter replacing the parent parameter).
Next step is to active the light box functionality on these links:
<asp:Content ID="Content1" runat="server" ContentPlaceHolderID="ScriptContainer">
<script type="text/javascript" src="<%= ResolveUrlFromUI("JavaScript/edit.js")%>"></script>
<script type="text/javascript" src="<%= Page.ResolveClientUrl("~/Templates/Demo/Scripts/colorbox/jquery.colorbox-min.js") %>"></script>
<script type="text/javascript">
$(document).ready(function() {
//Examples of how to assign the ColorBox event to elements
$(".popupCustom").colorbox({ width: "50%", height: "80%", iframe: true });
});
</script>
</asp:Content>
See http://colorpowered.com/colorbox/ to learn about different colorbox options, view example code and download necessary files.
Hiding the right click menu
As I mentioned in the start of this post, I wanted to “hide” edit mode for a certain group of users, i.e. I wanted to remove the right click menu. I solved this by creating a custom base template class (which all templates inherits from), and adding the following code to the template’s OnInit() method:
if (PrincipalInfo.CurrentPrincipal.IsInRole("External"))
ContextMenu.Menu = null;
Important notes
- Notice the reference to EPiServer’s Edit.js in the JavaScript section above. Because of the use of window.top in EPiServer’s ClientScript SetupEvents() method, you will get a JavaScript error if you fail to add it. Thanks to Henrik Tengelin for solving that issue!
- In addition to the JavaScript files referenced above, you also need to add a reference to JQuery (I used version 1.3.2 of JQuery in this project) and the ColorBox css file.
- Remember to give the necessary access to users in question– since where using EditPanel.aspx inside EPiServer UI, they need access to edit mode (location setting in web.config). And off course, they need necessary access to the EPiServer page tree as well.
Thanks to Stein-Viggo Grenersen for creating the video!
Nice one Mari
Very cool. Bookmarked :-)
/ Jarle Friestad
How do I ad the correct user rights for the editpanel?
I have entered this location input to my webconfig:
But I still need to login to episerver CMS (as an administrator) to be able to enter the quickeditmode.
EditPanel resides inside the edit folder, here is a sample location tag:
Also, remember to give the myUsers group publish access in the edit tree.
Is there a way to set another returnUrl efter you Save/Publish the page, for instance if you would like to return to a searchResult?
I guess you could check on PostBack and newly published inside the OnLoad method?