


Redirect old site URLs to your new site with Mogul SEO Manager for Epi Server CMS
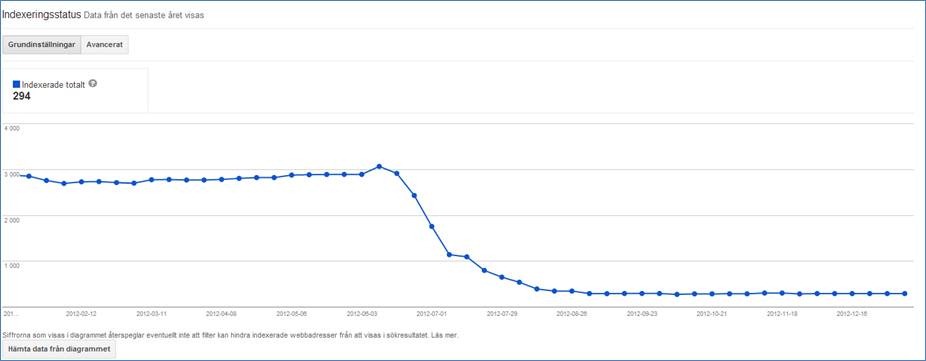
As you can see in the picture they lost almost all there indexed pages during start of the summer 2012. When I asked them what they did that June 2012 I got the answer that they launched their new site at that time. So what did go wrong? Well, none redirect the old sites URLs into the new site that is for sure. Most of the times when you create a new site all the URLs will look different and in this cases you need to redirect Google index, bookmarks and other external site links to the new site. To redirect the Google index is the most important because you want to move the existing pagerank to the new pages on the new site.
I will give you an example of how you can solve this problem. We will start to get the URLs for you old site. To make it fast and simple to get all URLs I will use a spider with the name “Screaming frog SEO spider”. In this program it is simple to spider a website and when done you can export all the URLs to a CSV file. The nice thing about that is that we can then import that file in the Mogul SEO Manager add-on for EPi Server CMS and use it as a tool to redirect old URLs to the new site.
If you have another spider tool or want to create this CSV file your self you can follow the example here:
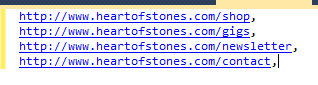
Now when we got a CSV file we could start with login to the EPi Server CMS admin.
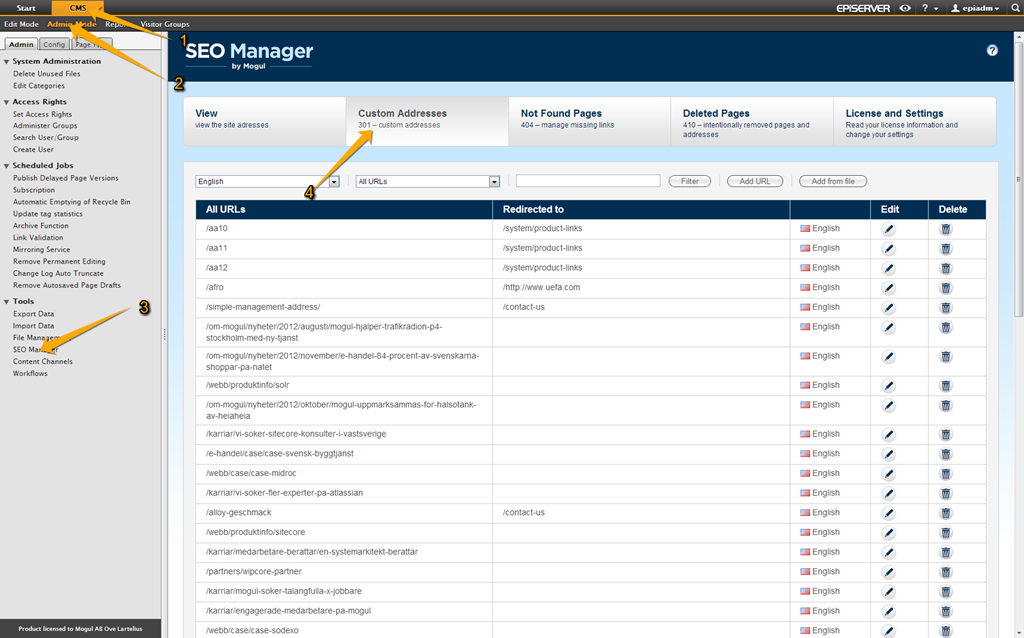
When you have login click “CMS” => “Admin mode” => “SEO Manager” => “Custom redirects”. You will see a list of all custom redirections that SEO Manager handles. Make sure that the language selected is correct. It should be the same as the default culture on your site.
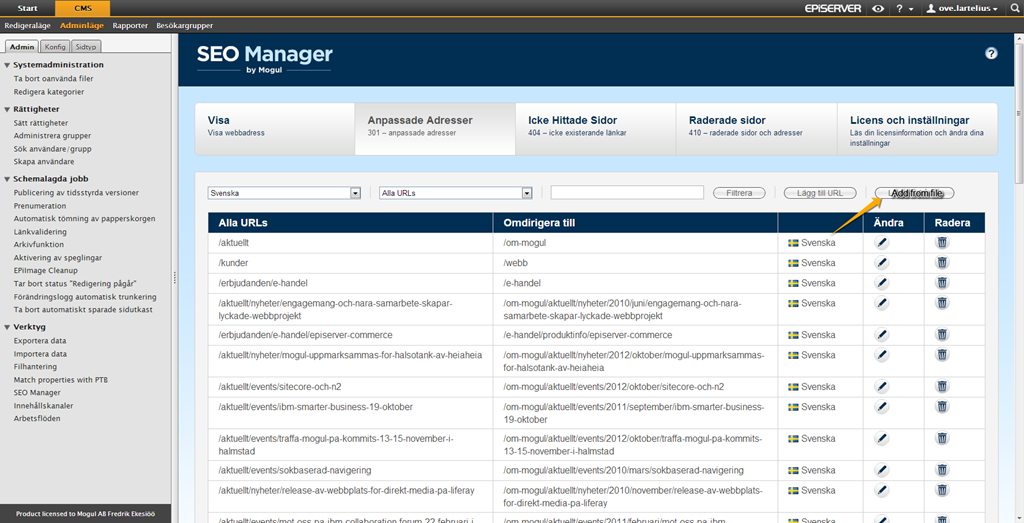
Click on the “Add from file”
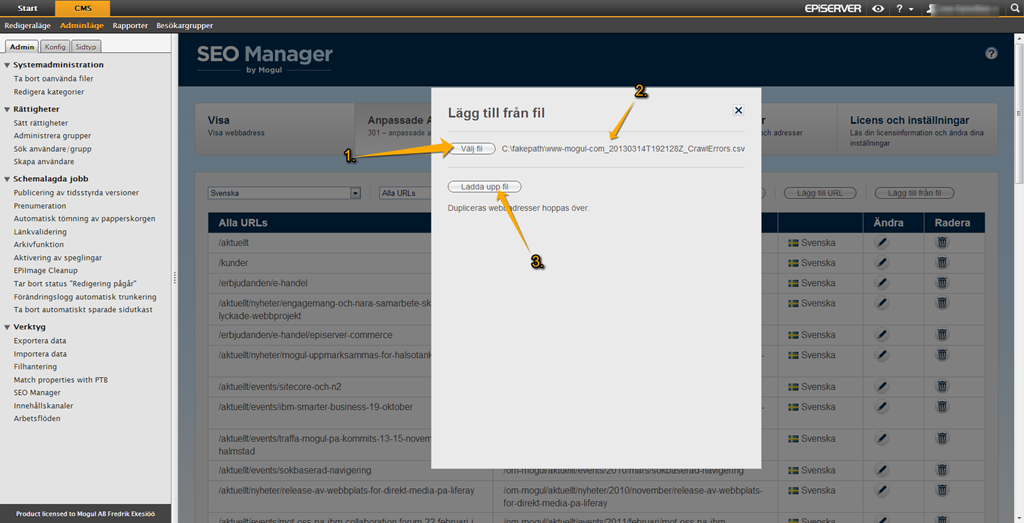
A popup window will be loaded. Click on “browse” and select the file that you just downloaded from Google webmasters tools. When you have selected the file to upload you click on “Upload”.
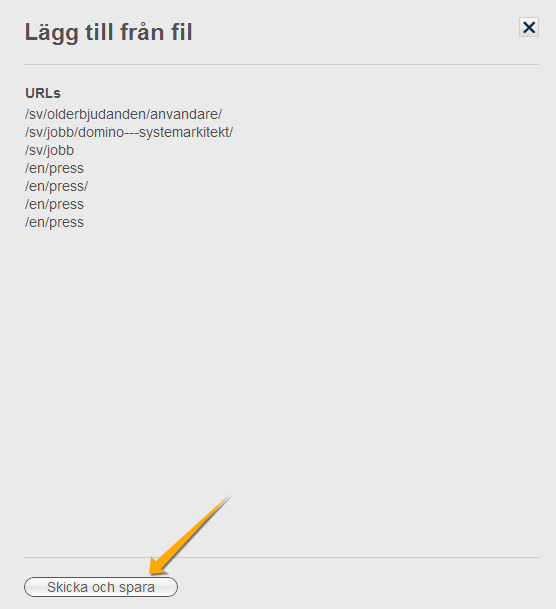
SEO Manager will now show you the URLs that you are about to import. You can now quickly look at the URLs and see if anything is strange/erroneous, and if so you could cancel. But this looks ok so I will click on “Send and save”.
The URL will now be added into SEO Manager but there are no redirections that is working yet. We need to specify where this URLs should be redirected.

To make this little simpler the SEO Manager has a filter in the list for custom redirects where you can say that you only want to work with “Non-redirected URLs”. The list will reload and only show you URLs that you need to specify redirection for.
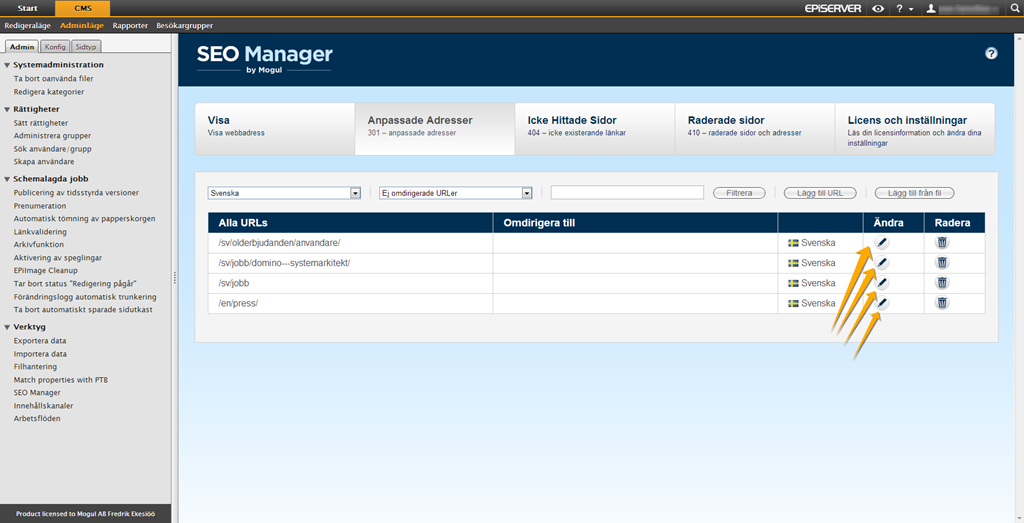
Click on the “Edit” button for each URL and point out the page on the new site that you want to redirect to.
There are cases when your old site contains a area that will not exist on the new site. In this case it will be annoying and take long time to take URL by URL. So in this cases you could use a Regex pattern to redirect all URLs matching to a pattern to a specific page on the new site.
Example: You old site contained a area handling about a service that you sold earlier but will stop selling. So you would like to redirect all request to “/oldarea%” to the startpage. To solve this we would add a URL and specify “Redirect from” = “^/oldarea(.*)$” and then select the startpage in the site tree. Now we are redirecting all requests that starts with “/oldarea” to the startpage.
Don´t forget redirect old URLs to the new site when launching a new site!
Comments