Continuous Integration & Deployment with VSTS & DXC (Azure Integration environment)
I recently implemented continous integration & deployment using Visual Studio Team Services in Epi's DXC environment. Though I now feel it's pretty simple, it can be a little tricky if you have no prior experience configuring it.
What is CI/CD?
For folks who are new to build & deployment process, Continuous Integration (CI) is a development practice that requires developers to integrate code into a shared repository several times a day. Each check-in is then verified by an automated build, allowing teams to detect problems early. Because you’re integrating so frequently, there is significantly less back-tracking to discover where things went wrong, so you can spend more time building features. Continuous Deployment (CD) is an extension of CI, where you can auto-deploy your integrated changes to the server (Integration environment in case of DXC). This significantly reduces the risks, costs and effort to deploy and allows you to deliver features to the clients sooner.
Publish Profile:
One important thing you need to get your head wrapped around is the concept of Publish Profile. If you are using Epi DXC service, you have azure portal access to the Integration environment (https://portal.azure.com). If you don't, you should ask Episerver managed services to give you the access you need. The publish profile allows you to publish your code to Azure/Integration environment from Visual Studio (by setting up publishing profile) or VSTS (by adding it to the build definition). I prefer using VSTS since there are a lot more configuration options avaialable to you.
Here's how you download the publishing profile from Azure (Integration environment).
App Services (left menu) > Select your App Service. You should see the "Get publish profile" button in your rightmost pane.

You will need this in order to integrate with VSTS for CI/CD.
Buid Definition:
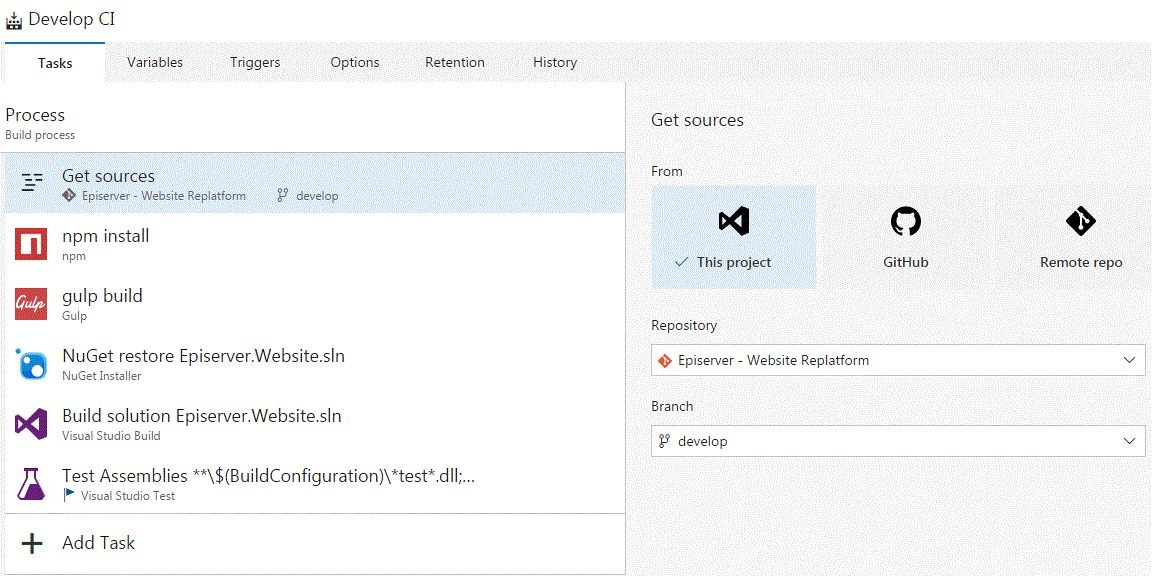
VSTS allows you to setup multiple build definitions.
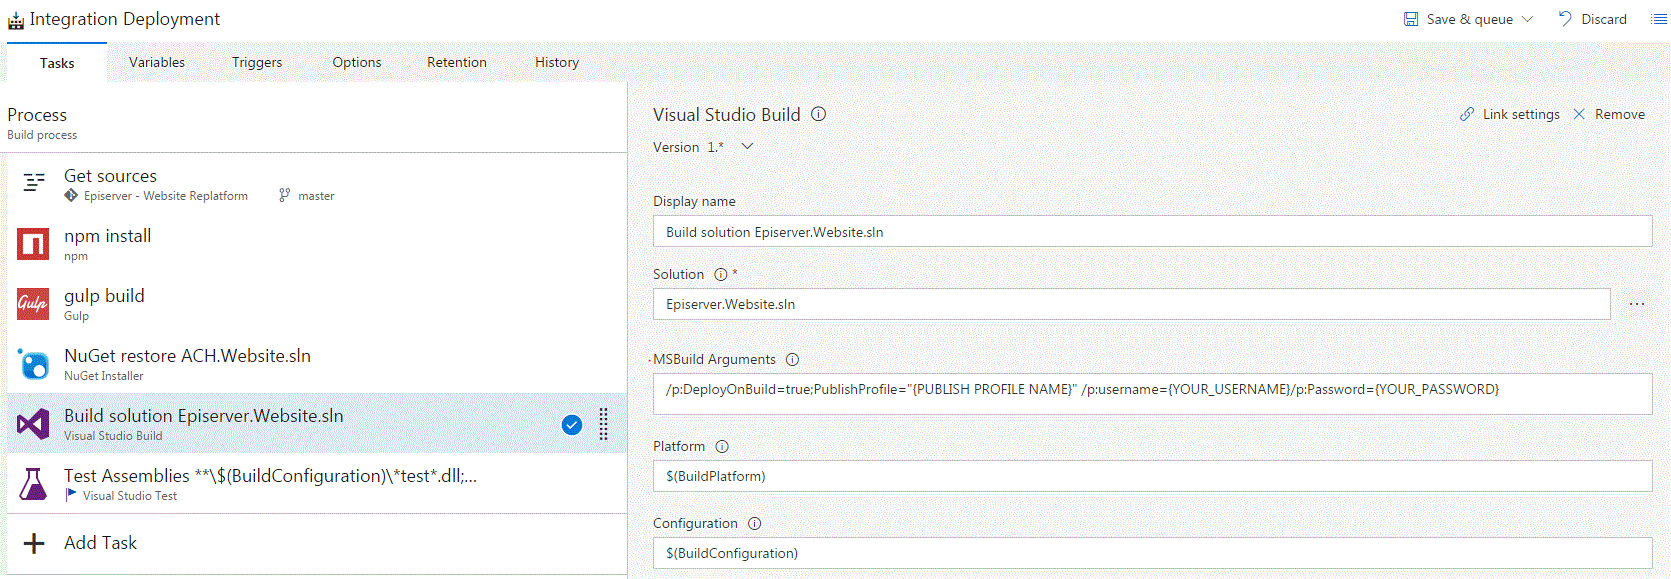
You can have one build definition called "Develop CI" (that builds the develop branch) & one for "Integration CI/CD" (that builds & also deploys the code from the master branch). By separating out these build definitions, you can make sure that only master branch code (that is final) gets auto-deployed to the the Integration environment.

For integration deployment under MSBuild Arguments you can provide details using the publishing profile you downloaded from Azure Integration environmnent. This will publish your changes after successfully building the "master" branch. If you see the "Get Sources" points to the master branch v/s develop branch as shown above.

You can also setup triggers to run a build on every check-in (or scheduled) for the master branch, so when someone (hopefully a team lead/architect) pushes to the mater branch VSTS builds the solution (including nuget, gulp processes) and publishes your changes to the Integration environment without any manual intervention.
This is just a basic process to setup CI/CD in the DXC environment. You can get get more creative with a lot of in-built features from VSTS.
Hope this helps! Comments are welcome...
AG

Comments