
Optimizely PIM - How to Auto-Assign Assets to Products During Import
Assets can be assigned to products manually, via spreadsheet import, and during initial import leveraging the auto-assignment option. This article will go into detail on how the auto-assignment functionality can work with several use cases.
When to use the auto-assignment functionality
In order for the auto-assignment functionality to work, the following must be true:
- The products must already exist in PIM
- The file names of the assets you're importing must at least partially match some existing product data (such as product number)
Auto-assignment overview
To access the auto-assignment functionality, you must choose the advanced import option from the asset list page by clicking the import button. After selecting your files, you will see several several options that you can configure before initiating the import including the auto-assign toggle. Once you enable auto-assignment, you will choose a property that the file names will be matched with for auto-assignment. In cases where you will match on a partial file name, you will toggle the match partial file name option on and then configure the exact matching logic, which will be further outlined in use cases below.
Use Case 1: Auto-assigning with exact file name match
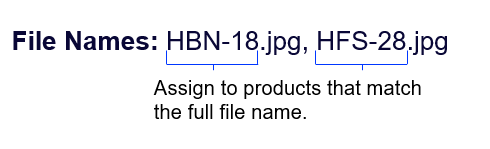
For this scenario, you only have a single image for each product and the file name matches the product number exactly.
- Click the import option and select the assets you want to import.
- Enable the auto-assignment toggle.
- Select product number as the "auto assign based on" property.
- Proceed with the import.
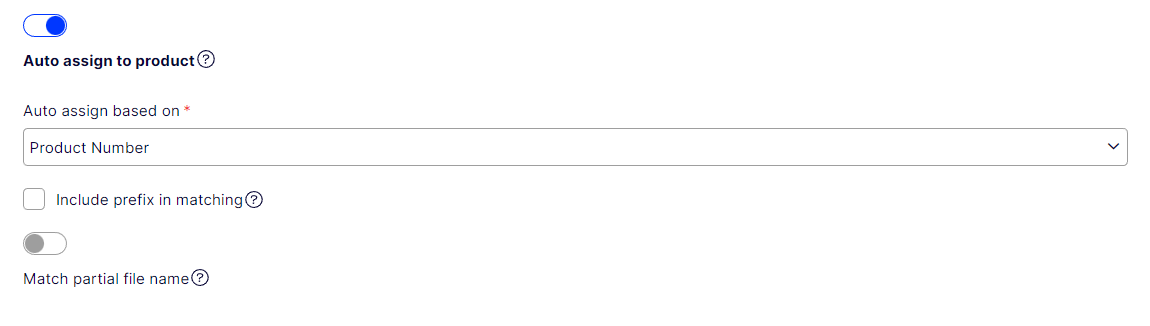
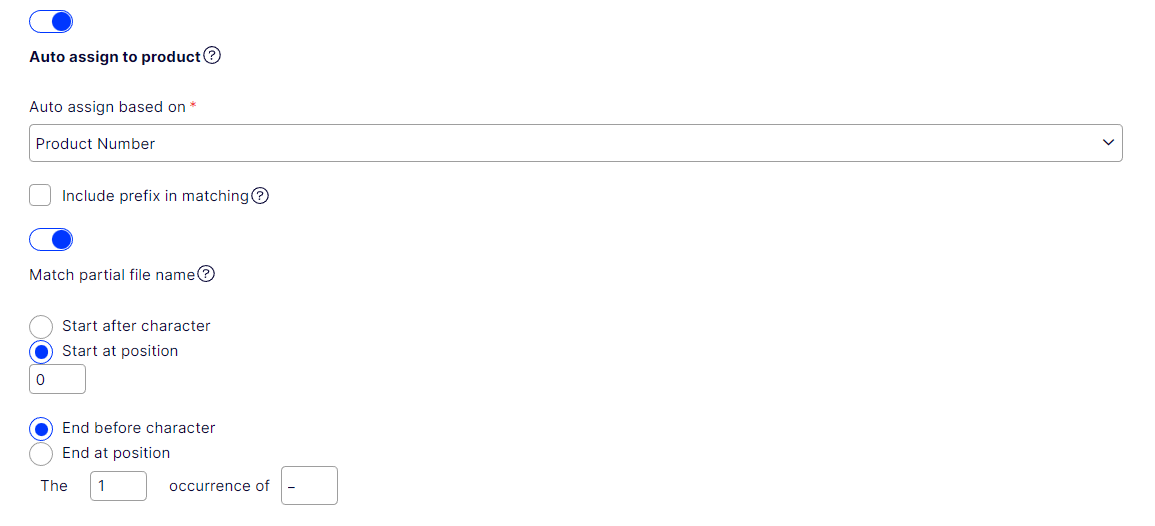
Use Case 2: Auto-assigning with partial match for multiple images per product
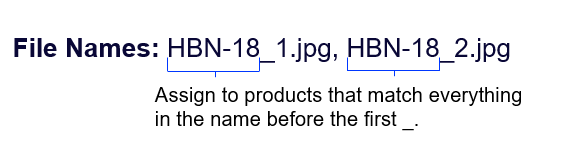
In this scenario, you have multiple assets that will be assigned to the same product, and the file name includes the product number plus an incrementing number.
- Click the import option and select the assets you want to import.
- Enable the auto-assignment toggle.
- Select product number as the "auto assign based on" property.
- Toggle the "Match partial file name" option on.
- Set the starts with option to start at position 0.
- Update the ends with options to end before the 1st occurrence of _.
- Proceed with the import.
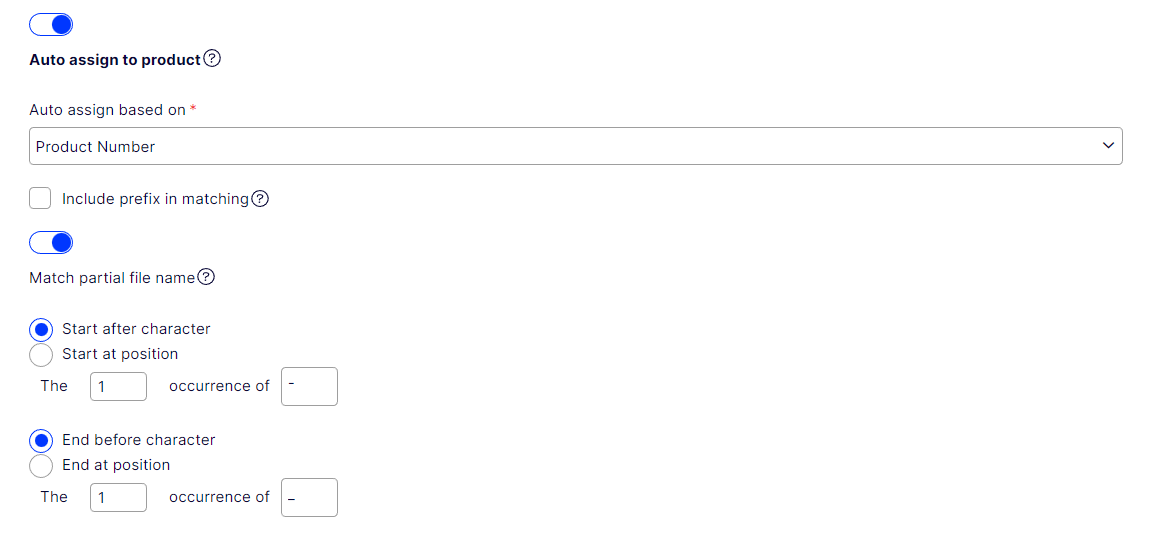
Use Case 3: Auto-assigning with partial match within file name

In this use case, you received assets from a supplier that include the name of the product's brand, as well as the product number and image number.
- Click the import option and select the assets you want to import.
- Enable the auto-assignment toggle.
- Select product number as the "auto assign based on" property.
- Toggle the "Match partial file name" option on.
- Update the starts with options to start after the 1st occurence of -..
- Update the ends with options to end before the 1st occurrence of _.
- Proceed with the import. If any of the selected files do not match products based on the selected property, a warning will display asking if you wish to proceed.
Notes & Caveats:
- The auto-assignment capability currently only works during the import process and cannot be applied for already imported assets.
- The asset import will be slower when using the auto-assignment option and since it has to evaluate each product for matches, the more products you have, the more it will affect the performance.
- When using partial matching logic, the same asset can be assigned to multiple products. There are cases where this is intentional (e.g. many products have the same document attached), but it is also possible to set up matching logic that is not restrictive enough and assigns assets to the wrong products.
For more information on the asset management capability in PIM, check out our full documentation.
Comments