
Adding Web Job to an existing CMS Web App
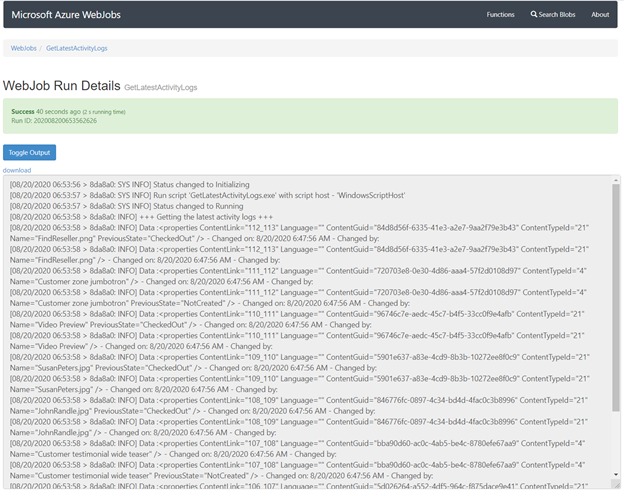
This article will show you how to add a WebJob to an existing CMS web app project. The WebJob will access the CMS database and print out the last 15 activity log entries.
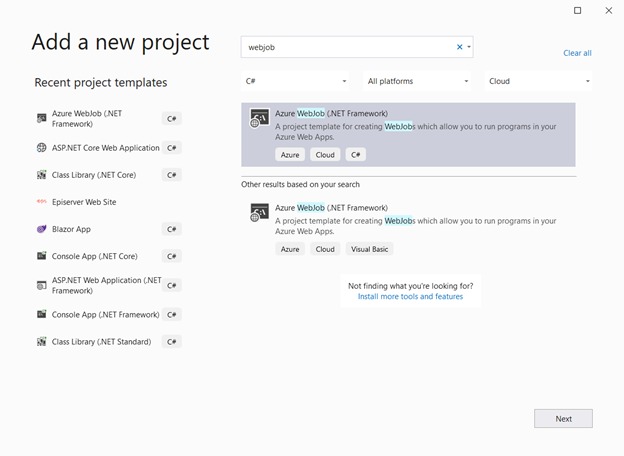
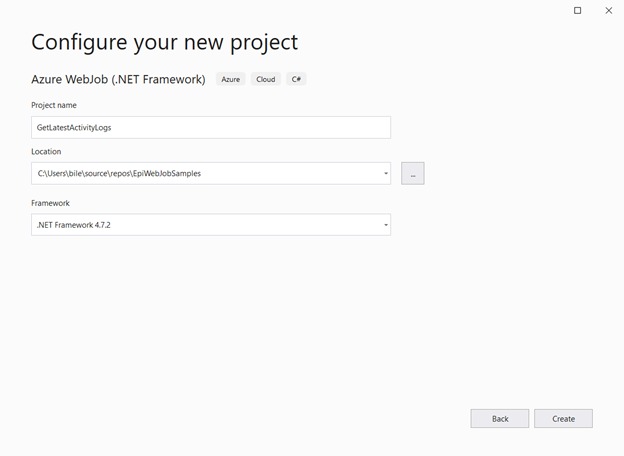
First, add a new project to the solution which has the existing CMS web app and choose Azure WebJob template.
using System.Configuration;
using System.Data;
using System.Data.SqlClient;
using System.IO;
using System.Threading.Tasks;

namespace GetLatestActivityLogs
{
    public class Functions
    {
        public static async Task GetLatestActivityLogs(TextWriter log)
        {
            log.WriteLine($"+++ Getting the latest activity logs +++");

            using (var dbConnection = new SqlConnection(ConfigurationManager.ConnectionStrings["EPiServerDB"].ConnectionString))
            {
                await dbConnection.OpenAsync().ConfigureAwait(false);
                var selectCommandText = "select top 15 AL.LogData, AL.ChangeDate, AL.ChangedBy from tblActivityLog as AL order by AL.ChangeDate desc";
                using (var command = new SqlCommand(selectCommandText, dbConnection))
                {
                    using (var reader = await command.ExecuteReaderAsync(CommandBehavior.CloseConnection).ConfigureAwait(false))
                    {
                        while (reader.Read())
                        {
                            log.WriteLine($"Data :{reader["LogData"]} - Changed on: {reader["ChangeDate"]} - Changed by: {reader["ChangedBy"]}");
                        }
                    }
                }
            }
        }
    }
}
using System;
using System.Threading.Tasks;

namespace GetLatestActivityLogs
{
    // To learn more about Microsoft Azure WebJobs SDK, please see https://go.microsoft.com/fwlink/?LinkID=320976
    class Program
    {
        // Please set the following connection strings in app.config for this WebJob to run:
        // AzureWebJobsDashboard and AzureWebJobsStorage
        static void Main()
        {
            Task.Run(async () =>
            {
                await Functions.GetLatestActivityLogs(Console.Out).ConfigureAwait(false);
            }).GetAwaiter().GetResult();
        }
    }
}
Then add database connection string to the App.config file
<add name="EPiServerDB"
         connectionString="Server=tcp:{dxp_environment_name}.database.windows.net,1433;Initial Catalog=epicms;Persist Security Info=False;User ID={db_user_id};Password={db_password};MultipleActiveResultSets=False;Encrypt=True;TrustServerCertificate=False;Connection Timeout=30;"
         providerName="System.Data.SqlClient" />
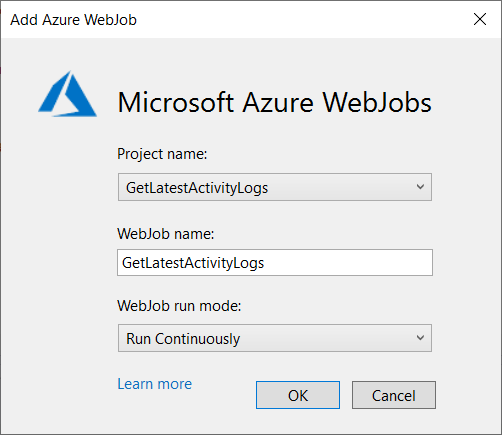
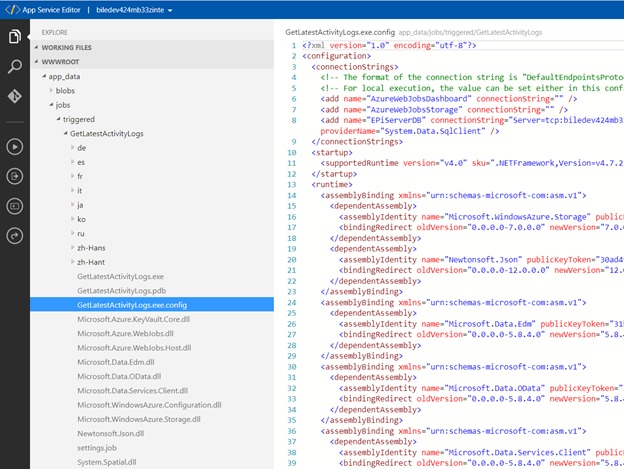
The WebJob project is now ready to add to be deloyed along with the Web App, to do that let's add the project as Azure WebJob to the WebApp

A file named webjobs-list.json added to the web app project
{
  "$schema": "http://schemastore.org/schemas/json/webjobs-list.json",
  "WebJobs": [
    {
      "filePath": "../GetLatestActivityLogs/GetLatestActivityLogs.csproj"
    }
  ]
}
In which the filePath points to path of the WebJob project. And a file added to the project itself, webjob-publish-settings.json, in which defines WebJob name and run mode.
{
  "$schema": "http://schemastore.org/schemas/json/webjob-publish-settings.json",
  "webJobName": "GetLatestActivityLogs",
  "runMode": "Continuous"
}
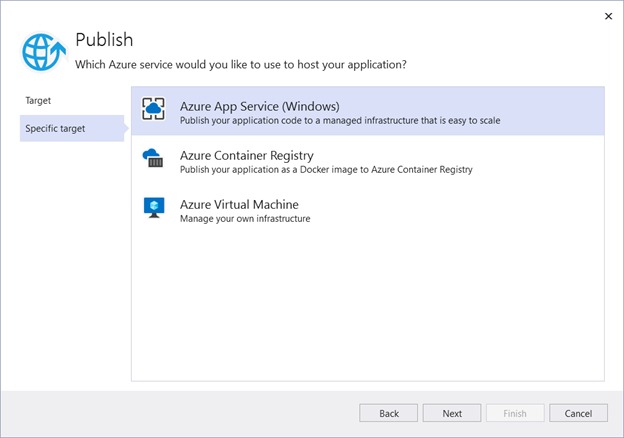
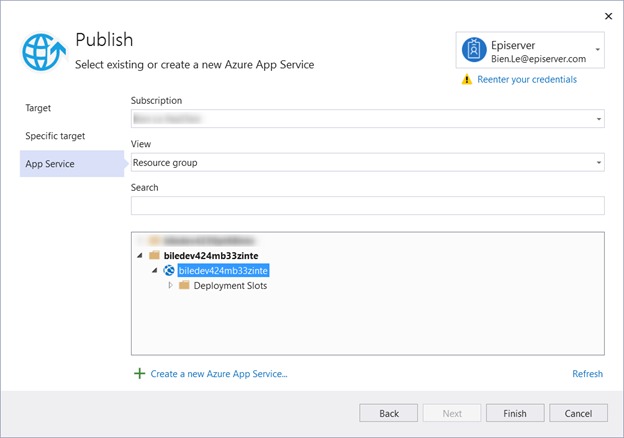
The solution is now ready publish to DXP environment. Select the web app project and choose publish, and then choose [Azure App Service (Windows)] to deploy the site to:
Comments