
Create your first demo site with Optimizely SaaS/Visual Builder
Hello everyone,
We are very excited about the launch of our SaaS CMS and the new Visual Builder that comes with it. Since it is the first time you'll be seeing it, or got a chance to try it (for those that are beta users), here's a walkthrough on how to get started and have your first demo site up and running.
What we'll be going through in this blog:
- Getting started with your SaaS instance / CMS Overview
- Optimizely Starter Kit: sample front-end site and site content
- Configuration of the git repository (where your front-end code goes)
- SaaS CMS Pre-setup
- Configuration of the head hosting platform (Vercel and Netlify)
- Configuration of the SaaS CMS to connect to a front-end (head) hosting platform
Before we get into the details, I want to caveat that all information in this blog is up-to-date as of the time this blog is written.
*Updated on July 12 to reflect the latest release on the change of "Manage Websites" to "Applications", within the "Settings"
Getting started with your SaaS CMS instance
After you get your SaaS CMS instance, you will receive a welcome email with some basic information such as where to login, where to find documentation, where to get community resources and help, and how to contact support.
Ever since we have implemented Optimizely ID (Opti ID), we have made it much easier and simpler for our users to get to and switch between all their Optimizely products in a single location. As the instruction in the email mentioned, you can go to https://login.optimizely.com, or https://home.optimizely.com, both will bring you to the dashboard where it's the starting point for all your Optimizely products.
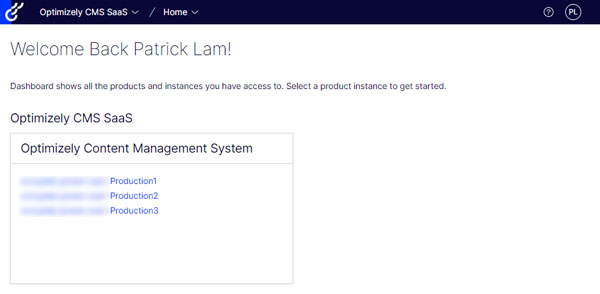
You will be given 3 instances (environment), so if you have not done anything to any of the instances yet, select one of them and you will be brought to an empty website within the CMS.

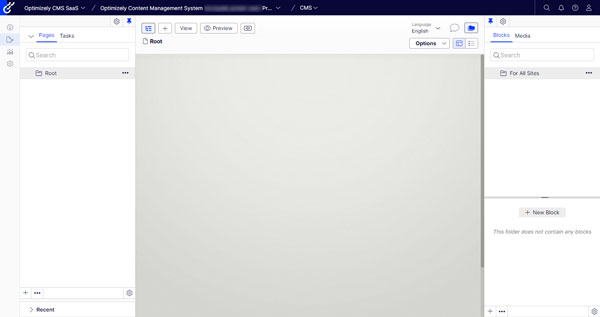
Before we continue on, let's take a quick tour to understand our CMS interface for those that are new. First, at the top in the dark blue navigation, you'll see multiple dropdowns to help you switch between organization, products, and CMS/Graph (if you are in a CMS instance). And then on the right, you'll see four different icons: Search, Notification, Help, and User.

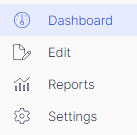
Next, in the side navigation on the left, you will see four options (when you're in the CMS instance). Dashboard, Edit, Reports, and Settings.
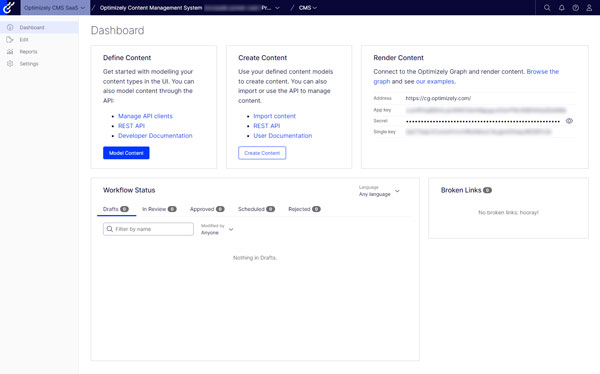
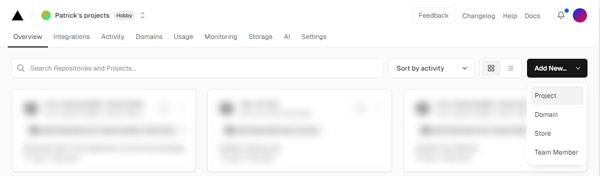
In the CMS Dashboard, you'll be able to get a quick view of links for content management, API keys, workflow status, and broken links report. This is the page that we'll need to refer to when we start setting up our connection to the front-end (head) hosting platform.
Next is the CMS Edit view, here you'll be able to manage the pages and content of your website. For now, because we have not created any content, nor have we connected to a front-end, you will see a very empty edit view. To learn more about the user interface and other details about the CMS, please take a look at our user guide.
I will be skipping over the Reports tab for now, as we will be focusing on the items that will help us configure our CMS and manage our website content. Lastly, it's the Settings view. In here, we are able to control a lot of settings for our website, such as content structures, API connections, permission settings, languages, and logs. But what's important for us right now, is the Scheduled Jobs, Applications (previously known as Manage Websites), and Import Data, which are part of the steps we'll go through when setting up our demo website.
Now that we have familiarize ourselves with the CMS, let's take a look at the other pieces that we'll need to get your first Optimizely SaaS CMS demo website up and running.
Optimizely Starter Kit
Optimizely has created two starter kit for you to start your exploration of the SaaS CMS.
Hello World
The first one being the classic "Hello World" example, is a blank website with minimal styling. It will walk you through how to add your first content and load the website locally. For those that would like to start from scratch, and see something being built from nothing, this is where you should start with.
https://github.com/episerver/cms-visual-builder-hello-world
SaaS Beta - Vercel Sample
Those who have participated in the beta program will already be familiar with this. Optimizely has created a sample website, using Next.js, and connected the head to Vercel. It includes all the styling and configuration you'll need to get a demo site up and running. Another important piece that was provided for beta users (which I've also shared here), but not included in the GitHub repository, is the sample content to go along with the sample website. Before we get into the details of setting up your first sample website on the SaaS CMS with this starter kit, there is one last thing you'll need to do, which is create an account on Vercel and a git repository of your choice (GitHub, GitLab, or Bitbucket), which are all free for anyone to signup. For our example later, we'll be using GitHub, so if it's your first time and you want to follow along, you can create a GitHub account, otherwise, you're free to use others.
https://github.com/episerver/cms-visual-builder-vercel-beta
Started CMS Content File (episerverdata file)
Git Repository Setup
For the remainder of the walkthrough, we'll be using the "SaaS Beta - Vercel Sample" repo as our base. The following instructions will be cater for those that are not familiar with git repo, or have no technical experience whatsoever. If you are familiar with cloning git repo, please skip this section.
Let's start with downloading the sample code from the git repository (https://github.com/episerver/cms-visual-builder-vercel-beta). You can go to the link, click on the "Code" button/dropdown, and click on "Download ZIP".
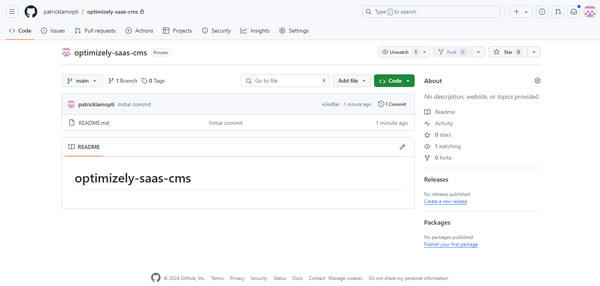
Next, you will log into your GitHub account, and create a new repository (you can use this link directly - https://github.com/new). Give your new repository a name, "optimizely-saas-cms" for example, chose either Public or Private (either will work), and make sure the "Add a README file" option is selected.
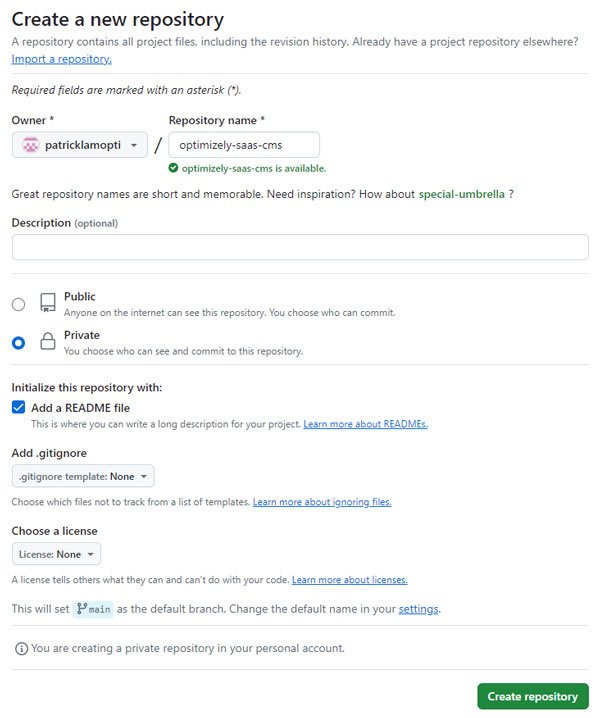
After clicking on "Create repository", you will be brought to the landing page of your newly created repo, which looks something like this.
Now, with the code/zip file we've downloaded before, let's unzip it and make a small change to one of the files. Look for a file called ".gitignore" and open it with any text editor (notepad, textedit, etc). Near the bottom of the file, you'll see the word "dist", let's remove it by either deleting it completely, or comment it out by putting a "#" in front of it.
We are now ready to upload our files into GitHub. Here's a little trick, instead of using the existing interface, you can make a small change in the URL and load a very different interface that will allow us for an easier bulk upload (including folders and their subfolders/files). With the URL of our repo, for example, mine is https://github.com/USER/optimizely-saas-cms, we'll be changing the ".com" to ".dev", so it is now https://github.dev/USER/optimizely-saas-cms. You want to make sure you are looking at the "Explorer" view (first icon on the left, under the 3 horizontal bars). There, you'll see the blank "README" file that was created when we made this repo. Next, you can drag and drop all your files, except for the ".git" folder, in here (in the area where you see "README.md"), and select "Replace" for overwriting the blank "README" file to continue.
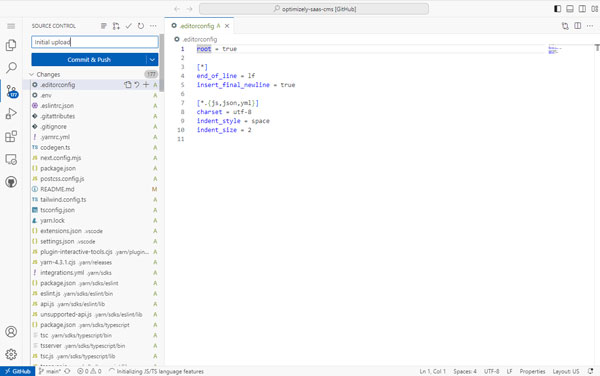
The last thing we'll need to do to complete our git repo setup, is to commit the files we've just uploaded. For those that does not understand the concept of "commit" in the world of version control, it just means "save" (Wikipedia for more details). Go to "Source Control" (third icon on the left under the 3 horizontal bars), enter a message in the text box (you can type "Initial upload"), and then click on "Commit & Push".
SaaS CMS Pre-Setup
Before we get to setting up our head (front-end code), let's load some content into our SaaS CMS. With the data package I've provided above (episerverdata file), let's go to the Settings view of the SaaS CMS. In there, find the tab that says "Import Data" under the "Tools" section. In here, you'll select the episerverdata file to be uploaded, making sure that "Root" is selected under "Select content destination", and then click on "Begin import". Once it's done, you should see an "Import successful" message.
Next, go to "Scheduled Jobs", and start the "Optimizely Graph Full Synchronization". This will prepare all the content we have just imported, and make it available through the Optimizely Graph, which is how our head hosting platforms will communicate with our SaaS CMS.
Setup Head Hosting Platform
Vercel
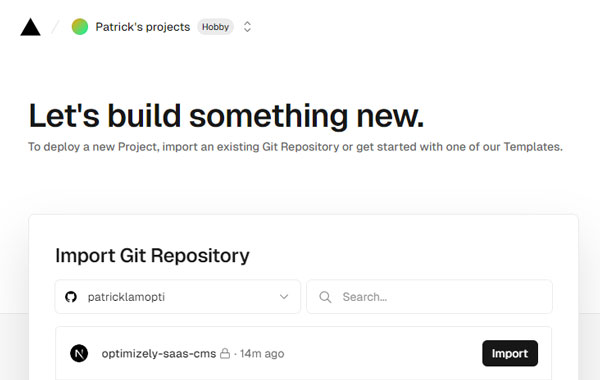
After you have created your Vercel account, we need to create a new project that will load the code we have uploaded to our git repo, as well and make a connection to our SaaS CMS. Start by creating a new project in Vercel, and import the git repo we've uploaded to GitHub.
You might need to connect your GitHub account to Vercel, but once you do, you'll be able to see the git repo we have created earlier, and you can now import it.
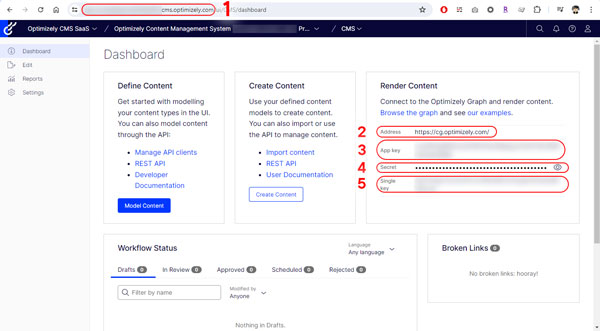
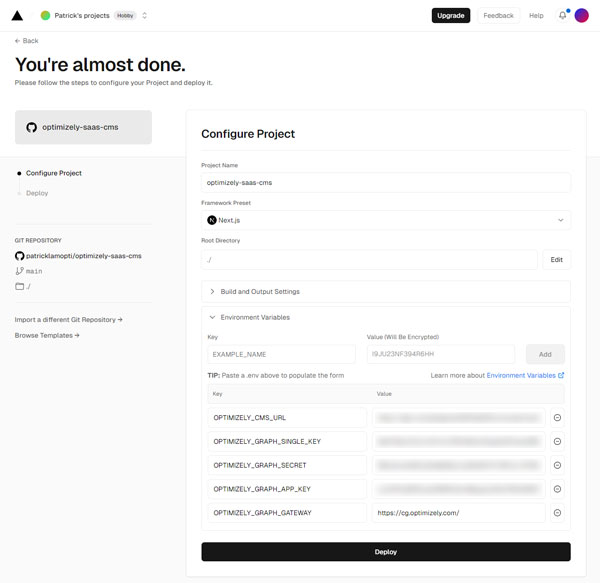
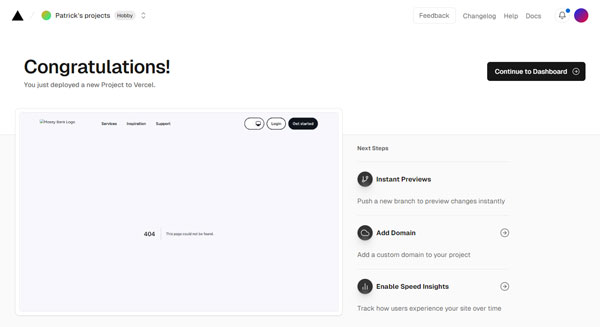
Next, is the important part of connecting Vercel to your Optimizely SaaS CMS. We'll need a few pieces of information from the SaaS CMS Dashboard, and enter them here in the Vercel's project configuration page. We'll need to enter the following environment variables as key/value pair. Please refer to screenshot to see where to find the values for your SaaS CMS instance. When you've entered all the values, you can click on "Deploy" to start running the code on Vercel. If everything is good, it should take roughly 2 minutes to finish.
| Key | Value |
| OPTIMIZELY_CMS_URL | 1. URL - [https://app-INSTANCE-ID.cms.optimizely.com/] |
| OPTIMIZELY_GRAPH_GATEWAY | 2. Address - https://cg.optimizely.com/ |
| OPTIMIZELY_GRAPH_APP_KEY | 3. App key |
| OPTIMIZELY_GRAPH_SECRET | 4. Secret |
| OPTIMIZELY_GRAPH_SINGLE_KEY | 5. Single key |
We are almost done! Just one last change in our SaaS CMS and everything will be hooked up and ready to use!
Netlify
Netlify needs to have all the configurations completed first, before it will work. Please skip to the next section and complete the SaaS CMS setup before coming back to this section for Netlify.
Before you start creating a "Site" on Netlify, you'll need to make a few small updates in the code you've downloaded. Luckily, we can do all of the code changes within the GitHub interface, so let's go back to your repo on Github (for example, https://github.dev/MyAccount/optimizely-saas-cms), within the "Explorer" view, find the ".yarnrc.yml" file add the line "nodeLinker: node-modules". Next, we'll need to add the environment variables that we mentioned in the Vercel step into the ".env" file, as well as update the "SITE_DOMAIN" value to be what we're expecting the custom URL to be.
- .yarnrc.yml
-
nodeLinker: node-modules
-
- .env
-
OPTIMIZELY_GRAPH_GATEWAY=https://cg.optimizely.com/OPTIMIZELY_GRAPH_APP_KEY=YOUR_APP_KEY_FROM_CMS_DASHBOARDOPTIMIZELY_GRAPH_SECRET= YOUR_SECRET_FROM_CMS_DASHBOARDOPTIMIZELY_GRAPH_SINGLE_KEY= YOUR_SINGLE_KEY_FROM_CMS_DASHBOARDOPTIMIZELY_CMS_URL=https://app-INSTANCE-ID.cms.optimizely.com/
# Make sure that the site domain is always setSITE_DOMAIN=optimizely-saas-cms.netlify.app
-
After you have made the code changes, don't forget to commit them. Go to "Source Control", enter a "Message", and click on "Commit & Push".
In Netlify, create a new site by importing from the git repo we just made changes to. Select "Import from Git", and then "GitHub" (sign in to your account if needed), enter a name for your site (this will be your custom URL), enter the environment variables, and then click on "Deploy [custom URL]". The deployment should take about 2 minutes as well. Once it's completed, you'll be able to see your site in the SaaS CMS editor and on the custom URL (given you've completed the SaaS CMS Final Configuration step).
SaaS CMS Final Configuration
The final stretch of getting a fully working demo site is just a few more small changes. In the SaaS CMS, go to "Settings", and click on "Applications". In here, we want to create a new site, so click on "Create Website Application".
- Fill out the name for the site (Application Name), "moseybank" for example
- Choose a "Start Page", "From Existing" > "Mosey Bank", and click "Create Website"
- Once created, click on the name of the new application you just created, "Mosey Bank" for example
- Select "Hostnames", click on "Add Hostname..."
- Copy and paste the URL that is provided for the project we have created on the head hosting platform in the URL field (removing the https:// and ending slashes), for example:
- Vercel: optimizely-saas-cms.vercel.app
- Netlify: optimizely-saas-cms.netlify.app
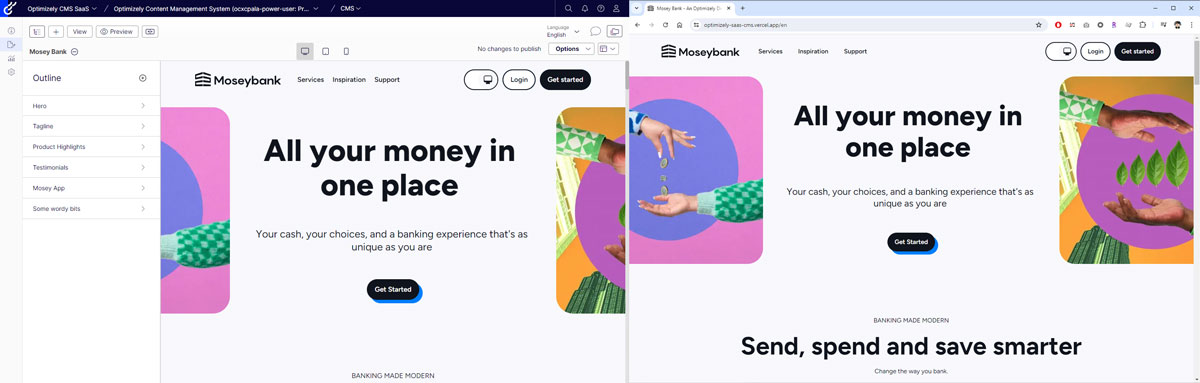
And the very last step is to go to "Scheduled Jobs" and run the "Optimizely Graph Full Synchronization" again. Once that is completed, you should be able to see your site within the SaaS CMS editor, and on the custom URL you've created on the head hosting platform such as https://optimizely-saas-cms.vercel.app/. If you are having issues seeing your site with the custom URL, you can try adding in the language culture at the end. For example, instead of https://optimizely-saas-cms.vercel.app/, you can put the "en" at the end so it looks like https://optimizely-saas-cms.vercel.app/en.
Congratulations!
You have now successfully setup your first demo site using Optimizely SaaS CMS! I hope this guide has been helpful and looking forward to see what you'll do next it! Stay tuned for more content. Meanwhile, don’t hesitate to browse through our additional resources related to our SaaS CMS.
Resources
SaaS CMS
- Next Generation Optimizely CMS webinar (Jul 25) - https://www.optimizely.com/insights/saas-cms-launch-webinar/
- How to Build a Bada$$ website: https://www.optimizely.com/how-to-build-a-website/
- Marketing landing page: https://www.optimizely.com/products/content-management/
- Technical landing page: https://world.optimizely.com/products/cms/saas/
- Developer Doc:https://docs.developers.optimizely.com/content-management-system/v1.0.0-CMS-SaaS/docs/overview-of-cms-saas
- User Doc: https://support.optimizely.com/hc/en-us/categories/27676671778061-Content-Management-System-SaaS
- Github:
- Mosey Bank for SaaS CMS and Visual Builder (beta): https://github.com/episerver/cms-visual-builder-vercel-beta/
- Hello World for SaaS CMS and Visual Builder: https://github.com/episerver/cms-visual-builder-hello-world
- Netlify and Visual Builder: https://github.com/episerver/cms-saas-netlify-demo
- Masterclass:
- SaaS CMS (recording): https://academy.optimizely.com/student/activity/2073798-masterclass-saas-cms?sid=3666e04e-beb8-4856-b2e0-ae50550d735d&sid_i=1
- Next.js and Vercel (Jul 11): https://academy.optimizely.com/student/activity/2057932-masterclass-next-js-with-optimizely-saas-cms?sid=3666e04e-beb8-4856-b2e0-ae50550d735d&sid_i=0
- Happy hour: https://world.optimizely.com/happy-hour
- Community blogs: https://world.optimizely.com/Search/?searchQuery=saas¤tPage=1&sortByDate=True§ionFilter=Blogs&authorFilter=&forumFilter=
Opti ID
- Developer Doc: https://docs.developers.optimizely.com/platform-optimizely/v1.2.0-opti-id/reference/authentication
- User Doc: https://support.optimizely.com/hc/en-us/categories/25425385971469
Great write-up, Patrick.
Any way to use Visual Builder on non-SaaS sites at this time?
Hi Stefan, Visual Builder is currently only available for SaaS right now. There is plan for it to be made available for the next major version of PaaS CMS.
Fantastic writeup Patrick, just to add with the Netlify limitation of not supporting Yarn Plug'N'Play, you can make the change via a terminal as well :
Also remember to re-generate the yarn.lock file after this is done.