
Customize order management in commerce manager
The purpose of the blog to customize the order management UI in the commerce manager and handle out-of-box functionality.
In this blog I am going to cover two scenarios:
- Display the Customer Name into the Customer Information section from the shipping address (First Name + Last Name) if the order placed by an anonymous/guest user.

- Add a complete order button within the order summary section and trigger the button event.
The customization is based on the QuickSilver solution but you can try the recommended file and code changes in your solution.
So, Let’s get start coding fun 😊
- Display the Customer Name into the Customer Information section from the shipping address (First Name + Last Name) if the order placed by an anonymous/guest user.
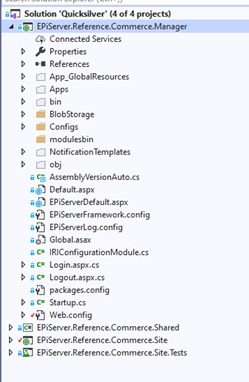
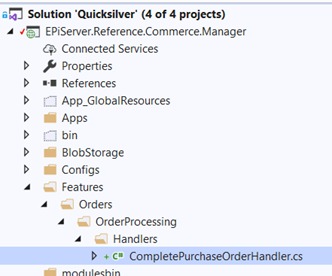
- Goto the EPiServer.Reference.Commerce.Manager site and expand the all folder as above screen and visit the folder.
Folder Path: ..\EPiServer.Reference.Commerce.Manager\Apps\Order\CustomPrimitives
- Include the OrderCustomer.ascx and add a new class with the same name e.g. ‘OrderCustomer.cs’.
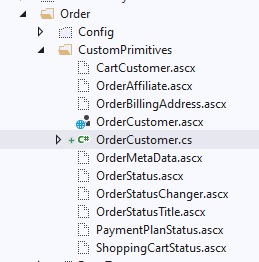
- Open OrderCustomer.ascx and copy the highlighted Inherits tag value (Mediachase.Commerce.Manager.Apps.Order.CustomPrimitives.OrderCustomer)and create the OrderCustomer.cs class and derived from the inherits value.

- Override the OnPreRender(EventArgs e) method and fetch the purchase order shipping address detail using the order helper class
using System; using EPiServer.Commerce.Order; using Mediachase.Commerce.Manager.Apps_Code.Order; namespace EPiServer.Reference.Commerce.Manager.Apps.Order.CustomPrimitives { public class OrderCustomer : Mediachase.Commerce.Manager.Apps.Order.CustomPrimitives.OrderCustomer { protected override void OnPreRender(EventArgs e) { base.OnPreRender(e); if (string.IsNullOrEmpty(this.lblCustomerName.Text)) { var purchaseOrder = this.OrderGroupId > 0 ? OrderHelper.GetPurchaseOrderById(this.OrderGroupId) : null; var address = purchaseOrder?.GetFirstShipment()?.ShippingAddress; if (address != null) { this.lblCustomerName.Text = $@"{address.FirstName} {address.LastName}"; } } } } }
- And in the last re-place the Inherits attribute value from your created class including full qualified namespace + class name.

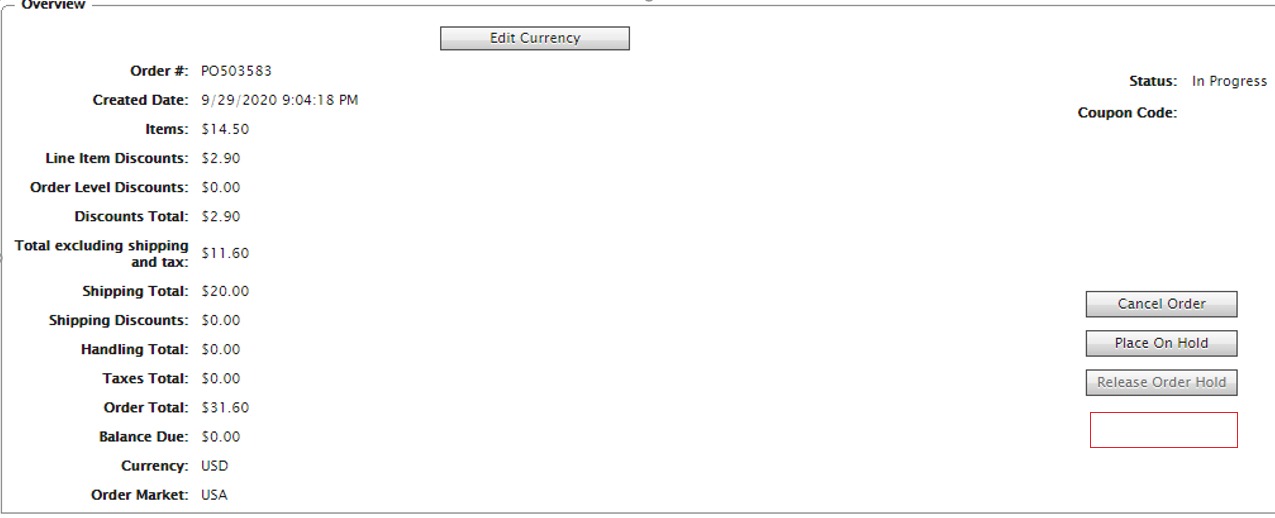
Result (1): Now refresh the purchase order and see the changes.

- Add a complete order button within the order summary section and trigger the button event:
- Goto the EPiServer.Reference.Commerce.Manager site and expand all folder and open the folder.\
Folder path: …\EPiServer.Reference.Commerce.Manager\Apps\Order\Config\View\Forms.
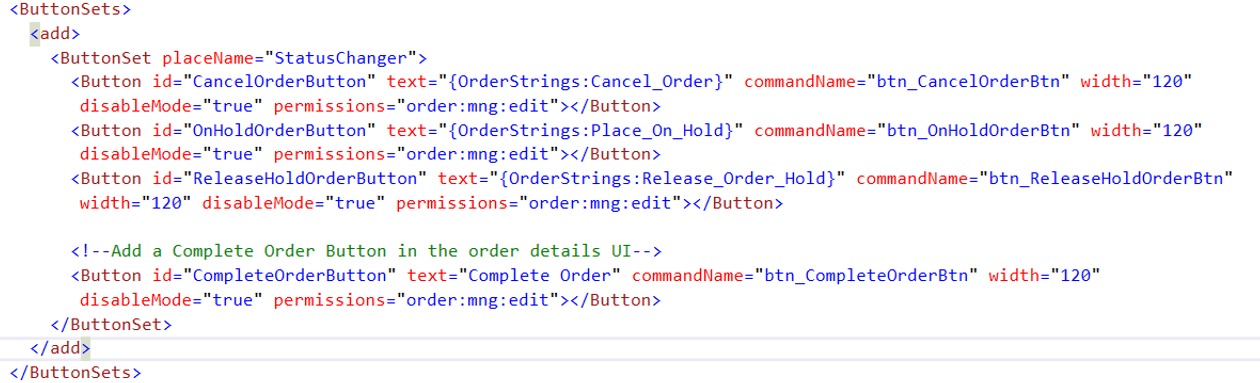
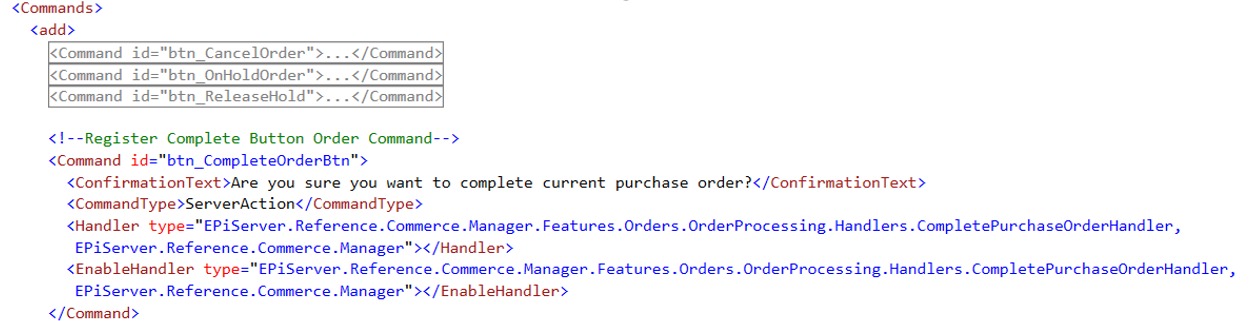
- Include the PurchaseOrder-ObjectView.xml in your solution, If you notice in this file you will find numbers are buttons are already added and display in the order summary section, so similarly add a new button with the command name ‘btn_CompleteOrderBtn’ and permissions.
Create the CompletePurchaseOrderHandler class and inherit it from the TransactionCommandHandler and override the DoCommand method.
You can choose a transaction command handler on basis of the requirements e.g. purchase order, payment plan, and return form handler, etc...
- Commerce.Manager.Order.CommandHandlers.PurchaseOrderHandlers
- Commerce.Manager.Order.CommandHandlers.PaymentPlanHandlers
- Commerce.Manager.Order.CommandHandlers.ReturnFormHandlers
And also enable or disable the button on basis of requirement in the given example the IsCommandEnable method enables the button if the order status is InProgress.
namespace EPiServer.Reference.Commerce.Manager.Features.Orders.OrderProcessing.Handlers
{
    public class CompletePurchaseOrderHandler: TransactionCommandHandler
    {
        protected override void DoCommand(IOrderGroup order, CommandParameters commandParameters)
        {
            order.OrderStatus = OrderStatus.Completed;
            var purchaseOrder = order as IPurchaseOrder;

            var shipments = purchaseOrder.GetFirstForm()?.Shipments?.ToList();

            if (shipments != null)
            {
                this.ShipmentProcessor.CompleteShipment(purchaseOrder, shipments);
            }

            this.SavePurchaseOrderChanges(purchaseOrder);
        }

        protected override bool IsCommandEnable(IOrderGroup order, CommandParameters cp)
        {
            // Enable button if
            return order.OrderStatus.Equals(OrderStatus.InProgress) ;
        }
    }
}- Register the newly created button into the commands and add a handler and confirmation text that will ask for the confirmation before performing the action.
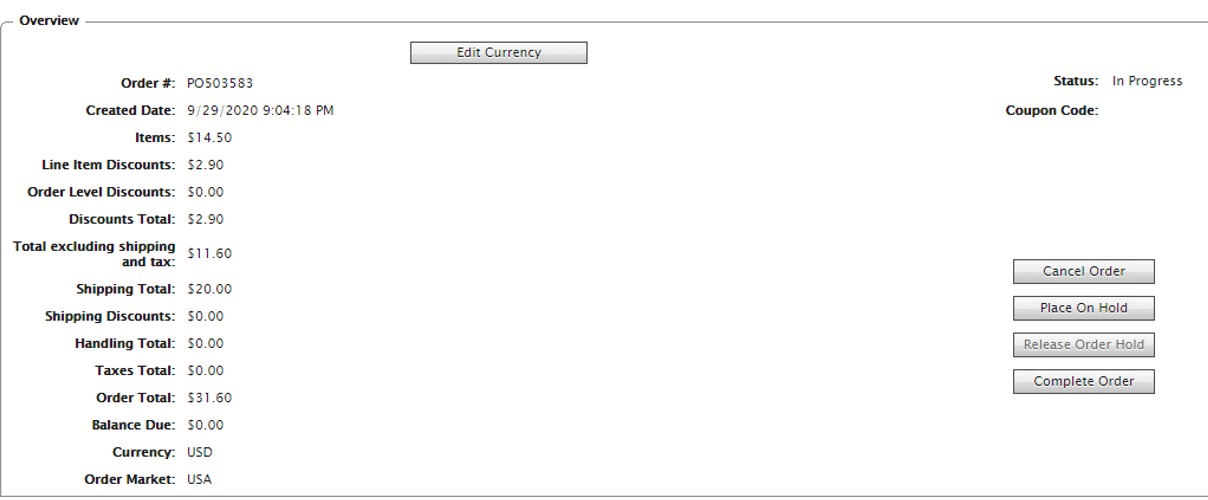
Result (2): Now build your solution and visit in the commerce area and refresh the purchase order screen, you will see a new button with the name ‘Complete Order’ and when the user clicks on the button then the order will be mark as complete.
Enjoy the coding and share your thoughts 😊
Comments