
How to extend Customer Service UI in Commerce 14
The recent release 14.4.0 of Commerce has the ability to extend Customer Service UI. If you want to add some section of your custom UIs to the existing CSR UI, you can do it. You just create your UI using React, bundling it to CommonJS, packing it to a Nuget Package then installing it to your commerce site.
You do not have to build everything from scratch, there is a sample project to start your work. You can clone the code from the link below.
In this article, step by step, I am going to build an extended Header which will be displayed at the header in Cart and Order view. This extended component displays weather information.
You need to download the sample above first, then let's get started. We will build the front end first. From the project root folder, go to the folder CsrExtensions/clientResources/src. There are several sample components already, but we will build our own.
We create a new folder called WeatherComponent then add a file named WeatherModel.ts.
export interface WeatherModel {
    Information: string;
}
Then add a new React file named WeatherComponent.tsx in the same folder.
import axios from "axios";
import React, { useEffect, useState } from "react";
import { WeatherModel } from "./WeatherModel";

const WeatherComponent: React.FC = () => {
    const [weather, setWeather] = useState<WeatherModel>({ Information: "" });

    useEffect(() => {
        axios.get<WeatherModel>("/getWeatherInformation").then((result) => {
            setWeather(result.data);
        });
    }, []);

    return <h1>Weather forecast tomorrow: {weather.Information}</h1>;
};

export default WeatherComponent;
The component is really simple. When it is first rendered, it fetches data from an endpoint and then set the value to a state called weather and then display in h1 tag. This file is an entry point to bundle related files to a commonJS file. The commonJS file is a module which will be loaded for at run time.
Then we add an index.tsx file.
import ReactDOM from "react-dom";
import WeatherComponent from "./WeatherComponent";

if (process.env.NODE_ENV === "development") {
    const { worker } = require("../../mocks/browser");
    worker.start();
}

ReactDOM.render(<WeatherComponent />, document.getElementById("root"));
In this component, we have an axios call so if you want to test this component without real API endpoint, you will need a mock endpoint. So in this index file, we check if the node environment is development, we will start a worker to handle mock API. This index.tsx file is used for development purpose only.
Now go to mocks folder, let's add a mock data file named weather-mock-data.json
{
    "Information": "35 Celsius, very hot!"
}
We also need to add a new mock endpoint /getWeatherInformation into handlers.ts.
import { rest } from "msw";
import CsrExtensionCartTab1Data from "./csr-extension-cart-tab-1.json";
import WeatherMockData from "./weather-mock-data.json";

export const handlers = [
    rest.get("/csr/api/extensions/carttab1/1", (_req, res, ctx) => {
        return res(ctx.json(CsrExtensionCartTab1Data), ctx.status(200));
    }),

    rest.post("/csr/api/extensions/carttab1/1", (_req, res, ctx) => {
        return res(ctx.status(200));
    }),

    rest.get("/getWeatherInformation", (_req, res, ctx) => {
        return res(ctx.json(WeatherMockData), ctx.status(200));
    }),
];
If you want to see how your component looks, you can open the terminal run yarn run dev:server --config-name config-WeatherComponent to start a development server with port 9090. Or you can go back to Weather Component folder, add WeatherComponent.stories.tsx to work with StoryBook.
import WeatherComponent from "./WeatherComponent";
import { handlers } from "../../mocks/handlers";

export default {
    title: "Weather Component",
    component: WeatherComponent,
};

export const WeatherComponentWithoutData = () => <WeatherComponent />;

export const WeatherComponentWithData = () => <WeatherComponent />;
WeatherComponentWithData.parameters = {
    msw: {
        handlers: handlers,
    },
};
There are 2 stories here, the first one is not decorated with handlers, so the Axios cannot get the data and the second one will be able to get.
Open the terminal, you run yarn run storybook, the localhost of StoryBook opens, and you can see the weather component in 2 states: with and without data.
We are done with the view, now we need to create a real endpoint for this component. In the CsrExtensions folder, add a new folder, just say its name is WeatherForecast. Then add a class in this folder.
namespace CsrExtensions.WeatherForecast
{
    public class WeatherModel
    {
        public string Information { get; set; }
    }
}
This class is a model which is mapped with the model at client side we've just created before. Now, it's time to add a controller in the same folder.
using EPiServer.Shell.Web.Mvc;
using Microsoft.AspNetCore.Mvc;

namespace CsrExtensions.WeatherForecast
{
    public class WeatherForecastController : ControllerBase
    {
        [HttpGet]
        [Route("/getWeatherInformation")]
        public IActionResult Get()
        {
            var model = new WeatherModel
            {
                Information = "20 Celsius, rainy!"
            };

            return new JsonDataResult(model);
        }
    }
}
I just want to do a simple API, it returns a model with some weather information. Now we are all set with the weather component. But we need to tell Customer Service UI the existence of this component. We do it by adding some information in the Initialize.cs file in CsrExtensions folder.
// ... omitted code

namespace CsrExtensions
{
    [InitializableModule]
    [ModuleDependency(typeof(InitializationModule), typeof(ShellInitialization))]
    public class Inititalize : IConfigurableModule
    {
        public void ConfigureContainer(ServiceConfigurationContext context)
        {
            // ... omitted code

            context.Services.Configure<ExtendedComponentOptions>(x =>
            {
                x.ExtendedComponents.AddRange(new[]
                {
                   // .... omitted code
                    new ExtendedComponent
                    {
                        ComponentLocation = ComponentLocation.Header,
                        Name = "Weather Forecast",
                        ScriptUrl =  Paths.ToClientResource(GetType().Assembly, "clientResources/dist/WeatherComponent/WeatherComponent.js"),
                        Order = 10,
                        OrderTypes = OrderTypes.Cart | OrderTypes.PurchaseOrder,
                    }
                });
            });
        }
     // .... omitted code
    }
}
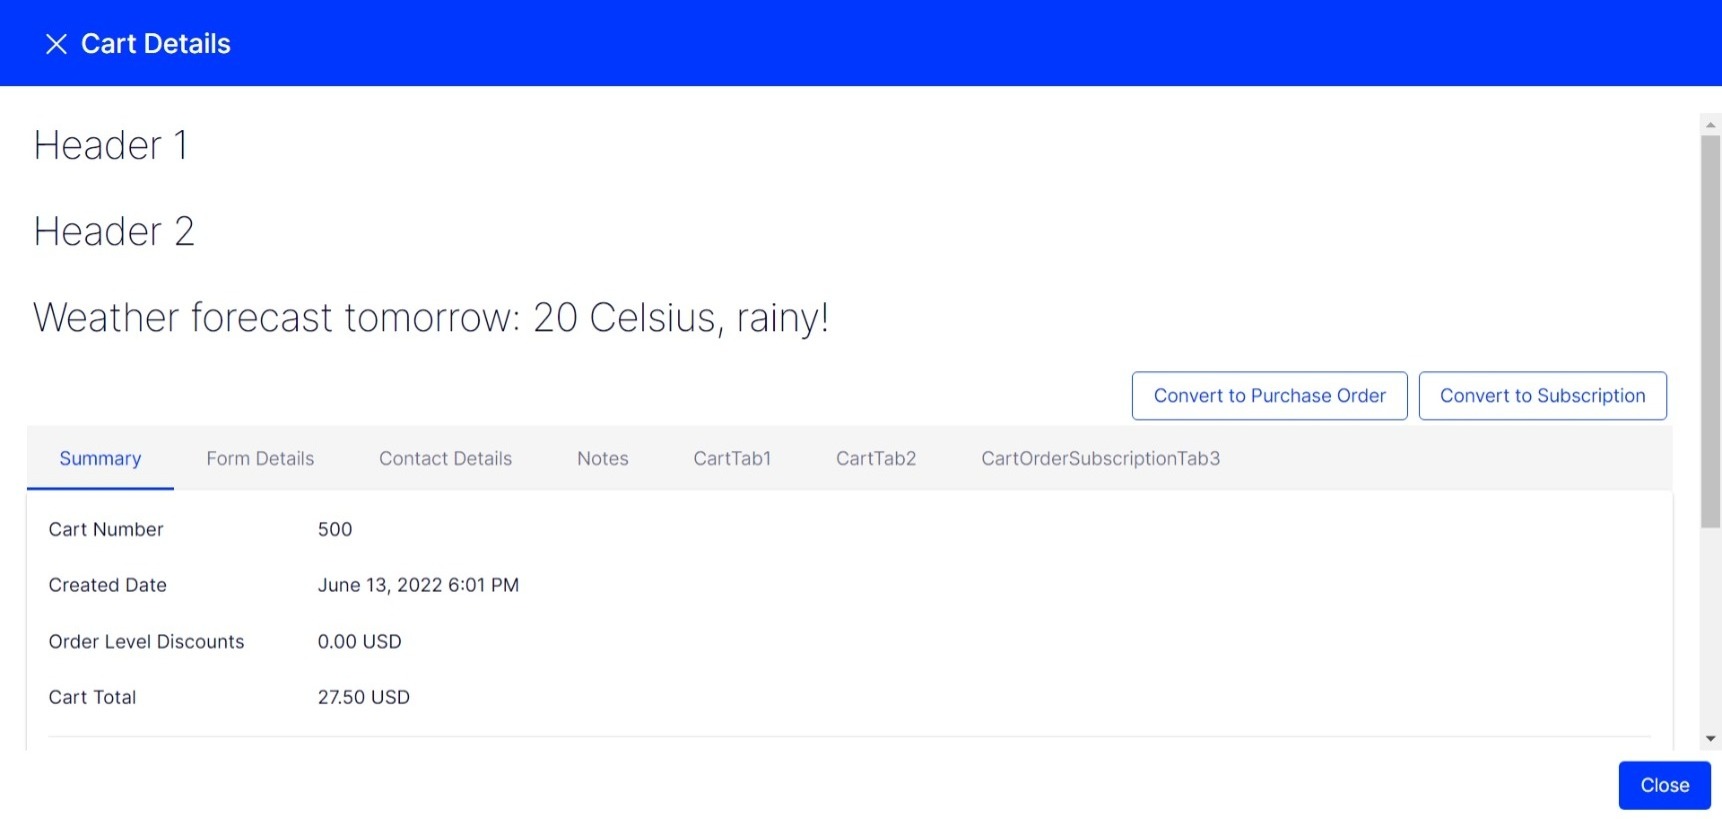
In this Initialization module, you need to give some information. The location you want this component to be located, the name of the component, the order in case there are several components are put at the same location. The order types determine which one you want to extend, order types have flag enum so you can assign several values. And the ScriptURL is where the Customer Service UI can find extended components to load.
More information you can find in README.md.
In the root folder, there are 2 files build.cmd and pack.cmd. Open the terminal, recommeded in Admin mode, we run build.cmd to build the React components and the .NET solution. Then run pack.cmd to generate the Nuget package.
After you run 2 command files, in the folder CsrExtensions/bin/Release, there will be a Nuget package file generated CsrExtensions.1.0.0.nupkg, you can try to install using this file to your Commerce site. And here is the final result. You can see the component says: Weather forecast tomorrow: 20 Celsius, rainy!
We completed our own first component. If you want more information, there is the README.md. Or you can check the component CartTab1, this component has quite a complete demo code with Storybook, testing with Jest, saving data to the Commerce database.
I hope you find this article helpful.
Exiting-- Looking forward to trying it out!
Is it possible to extend the Cart Search View? I would like to add a new filter criteria next to the Site drop-down.
Very welcomed feature, thank you! Can't wait to give it a try!
+1 on @Francisco Quintanilla question about extending the Cart Search View.