Installation instructions - EPiServer 7.5 CMS
This document describes a first time installation of the EPiServer platform and EPiServer CMS. The EPiServer platform package is downloaded to the EPiServer Deployment Center, from where you can configure and install an EPiServer CMS website. You can also do an express installation to set up an EPiServer CMS demo site based on the Alloy templates.
Before you start the installation, check the system requirements to ensure that you have the required environment components.
Installing EPiServer 7.5
For information about the contents of the package and how to install the platform, see Installing EPiServer 7.5.
Installing EPiServer 7.5 CMS
This section describes the installation of CMS from EPiServer Deployment Center. Here you will install and configure a CMS website, including the IIS, database, and file storage. If you chose the Create Alloy Demo Site option in the previous section, the steps described here will be done automatically.
Installing EPiServer CMS with sample site
Install EPiServer CMS and the Alloy sample site as follows:
- Start EPiServer Deployment Center (which is found in under Windows Start > All programs > EPiServer).
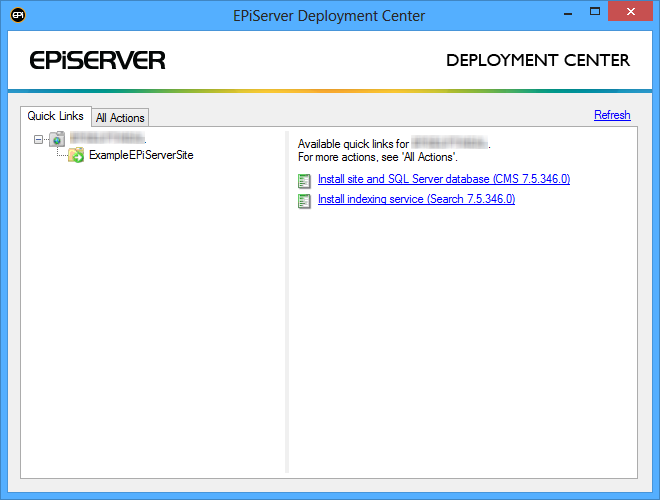
- Under Quick Links, select Install site and SQL Server database (version 7.5.XXXX). Click Run.
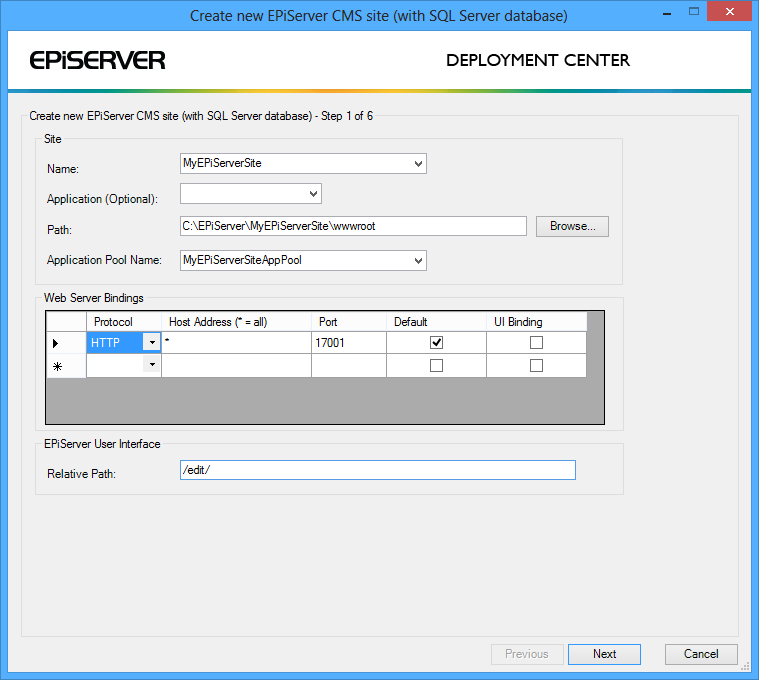
- Enter EPiServer CMS site details for the IIS configuration and click Next:
- Name. Name the site in the IIS instance, type a name or select and existing name.
- Application (Optional). Name the IIS application where EPiServer CMS will be installed. If left blank, EPiServer CMS will be installed as a website in IIS. If a value is entered, EPiServer CMS will be installed as an application under the site specified in Name.
- Path. This is the folder in the file system where the application files will be placed, the suggested value is calculated based on the value in Name. Can be changed if you want to use a different folder.
- Application Pool Name. This is the IIS application pool that will be used to run the site, the value is calculated based on the value in Name. Can be changed if you want to use a different application pool, type a name or select an existing application pool.
- Web Server Bindings. Lists the bindings that will be set up for the site in IIS, at least one must be included. The list is automatically populated with a row that allows all host addresses but requires a specific port, and the installation script will make sure that this port is not used by another site.
- Relative Path. Enter a path used to access the user interface, when combined with any of the site bindings, will access the UI interface. Note that the default value will not be accepted, you have to enter your own value.
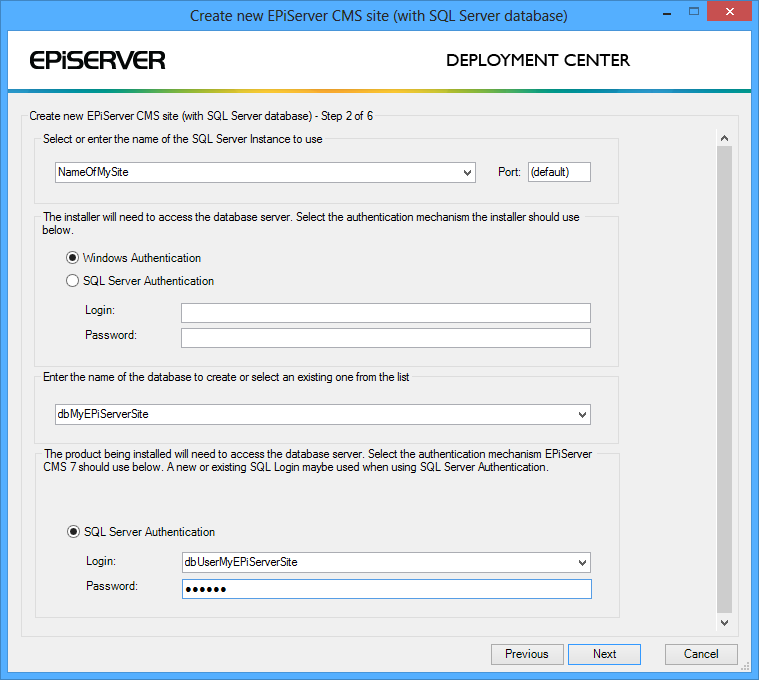
- Select an SQL Server with full text search installed and click Next. Enter values for the SQL configuration:
- Select or enter the name of the SQL server instance to use. Enter the address of an SQL server instance or select an existing instance.
- Select the authentication mechanism the installer should use. Select the credentials the installer should use to perform database operations. The Windows Authentication option (default) will use the credentials of the user running EPiServer Deployment Center. The SQL Server Authentication option is used when SQL Server is located on a different machine. Selecting this option you can specify a login and password to be used.
- Enter the name of the database to create or select an existing database. Enter a name or select from existing database. Note that if an existing database is selected it must contain the EPiServer CMS database schema.
- Select the authentication mechanism EPiServer CMS should use. Enter a user and password or select an existing user with owner rights to the database. Type the password associated with the specified user (password must include lower and upper case, a digit and a non-alphanumeric character). Note that this password is for database access only.
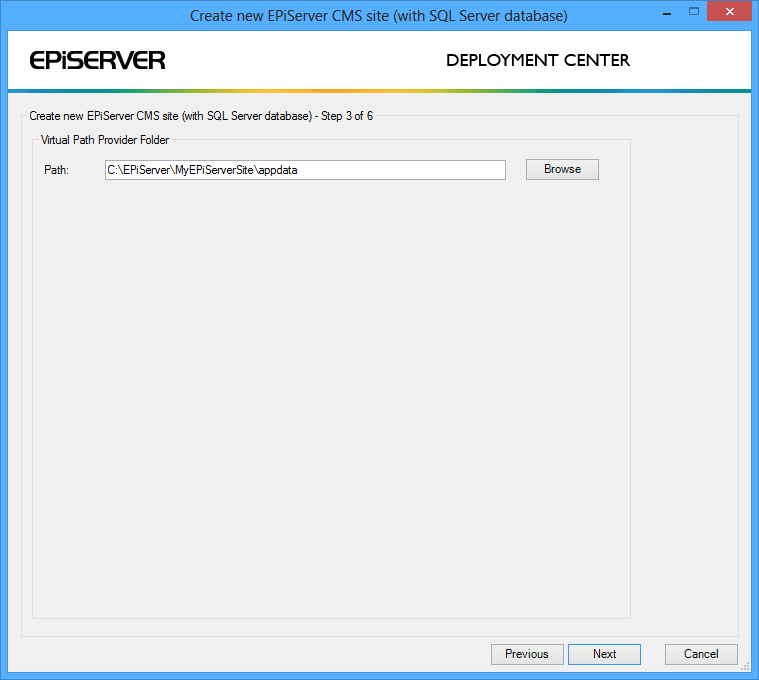
Note During the installation, the existing SQL database collation (sort order) will be used when creating the database. If you have specific collation requirements, consider your choice of collation and create a database which meets your requirements ahead of deployment. - Enter a VPP file Path for file storage and click Next. The default value is automatically calculated based on the value in Name, but can be changed if you want to use a different folder.
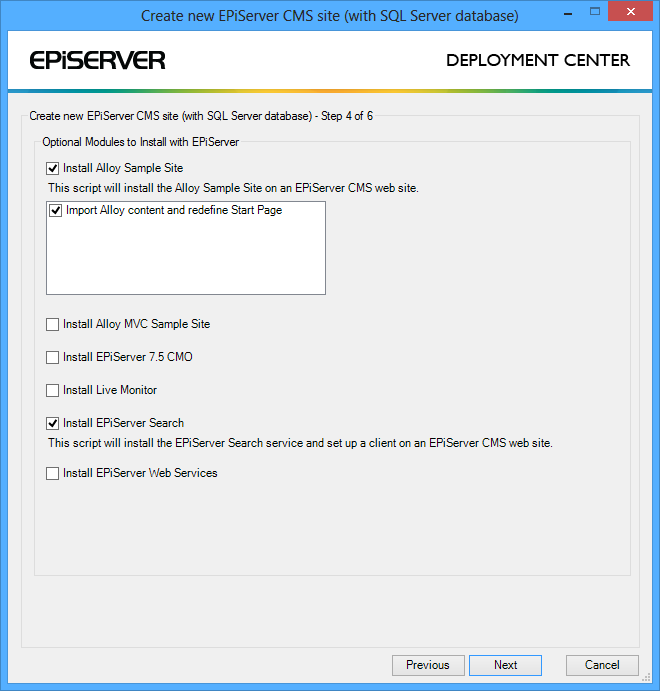
- Select optional sample packages for EPiServer CMS. You can also choose to install the core files only. Click Next.
- Refer to the EPiServer License Center for information on license files. Select an EPiServer license file to use and click Next. (This is optional at this point, if left out the site will be created but will report licensing errors.)
A summary page for the installation will be displayed where it is possible to return to previous steps to change the setup.
- Confirm the installation by clicking Install. When the installation has finalized the website will open in a web browser.
First time log in
Log in (login link at the bottom of the Alloy sample template start page) with a Windows user that is part of the administrators group on the machine (without the domain part of the user name).
Installing Live Monitor
Install the optional Live Monitor as follows:
- Download and run Live Monitor.msi on your computer.
- Start EPiServer Deployment Center (which is found in under Windows Start > All programs > EPiServer).
- Under the Quick Links tab, select the EPiServer 7.5 CMS site for which you want to install Live Monitor. Select InstallLive Monitor.
- When the installation is completed, return to the EPiServer Deployment Center.
Note Live Monitor requires special changes in site templates in order to be able to track user activity, refer to the Configuring Live Monitor section in the Developer Guide.
Getting the latest updates
Refer to Installing EPiServer updates for information on how to get the latest updates for EPiServer 7.5 CMS.
Last updated: April 7, 2014