Installation instructions Episerver 7.5 Commerce
This document describes a first time installation of EPiServer Commerce with CMS and the Commerce sample site. Refer to Installing EPiServer updates for information on how to upgrade an existing site to the latest.
IMPORTANT If you will be running EPiServer Commerce in a cloud environment
In order for the website to work properly with Azure and Amazon, it is required that the databases are created with collation "SQL_Latin1_General_CP1_CI_AS". When creating a new Commerce site, first create the databases with the correct collation. When you then create the site using Deployment Center, use the "Install site without database" option and make sure to point to these databases instead of creating new ones. Refer to Deployment for more information on how to deploy to a cloud environment.
Before you start the installation, check the system requirements to ensure that you have the required environment components.
Installing EPiServer Commerce with sample site
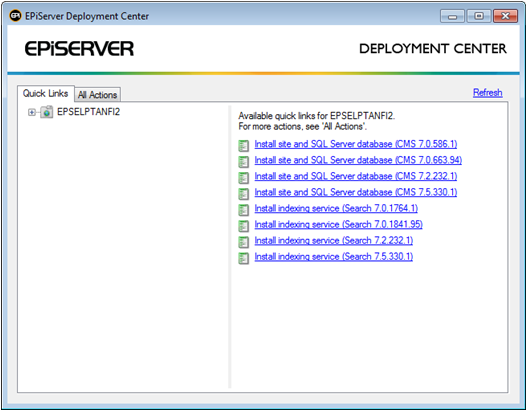
Continuing from here we assume that you have downloaded the EPiServer platform package and selected "Install Commerce" and "Install Commerce Sample site" for the components to be available in Deployment Center, as described above.
- Open Deployment Center and select "Install site and SQL Server database" for version 7.5.
- Fill in the new EPiServer CMS site details. Click Next to continue.

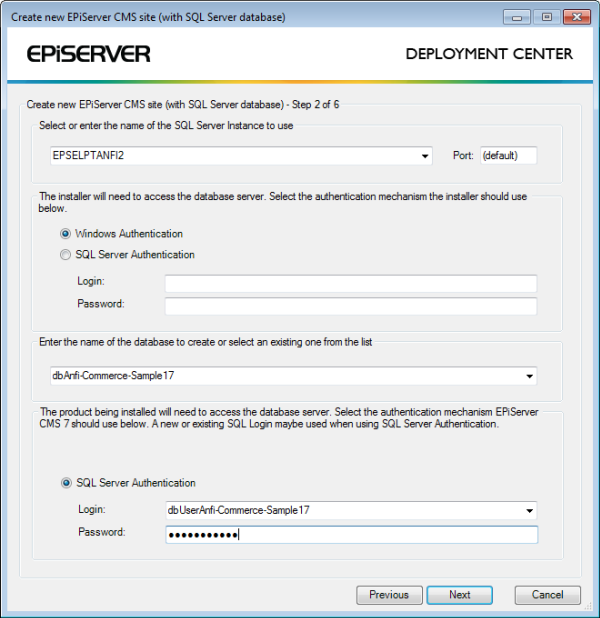
- Select an SQL Server database for CMS (or accept suggested), and add authentication credentials. Click Next to continue.
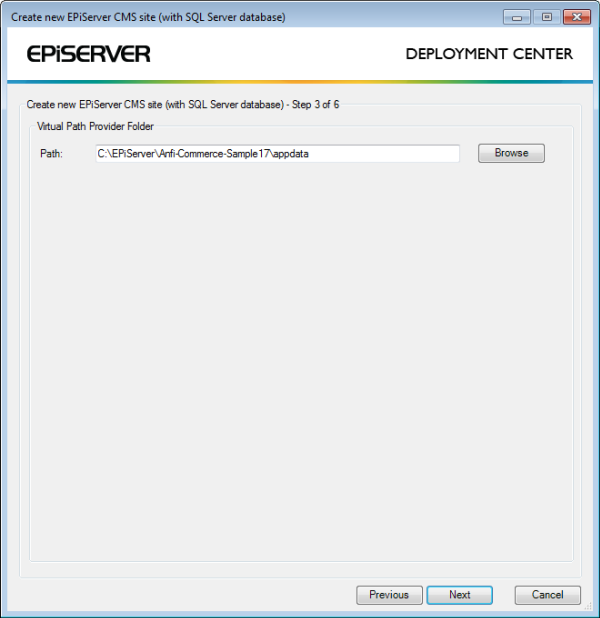
- Enter a file path for file storage for CMS, or accept path suggsted by the system. Click Next to continue.
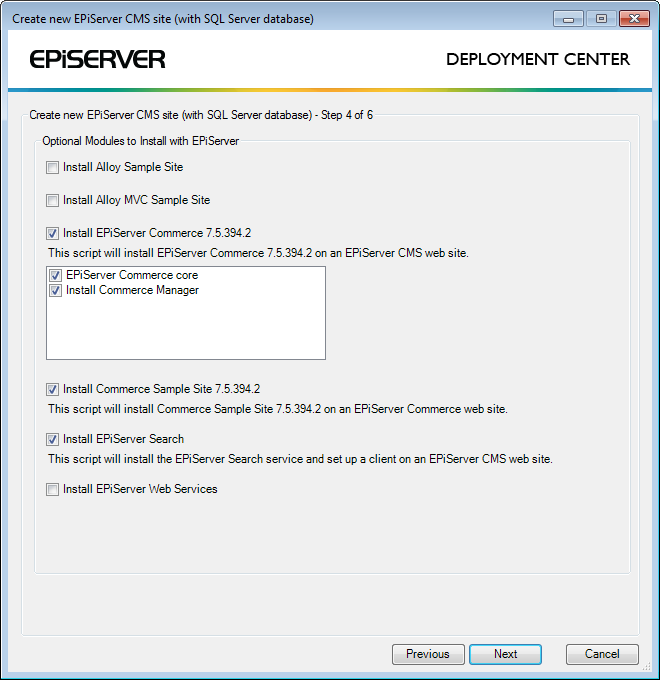
- Select options as shown below for EPiServer Commerce and the sample templates selected in the first step of the platform installation. Click Next to continue.
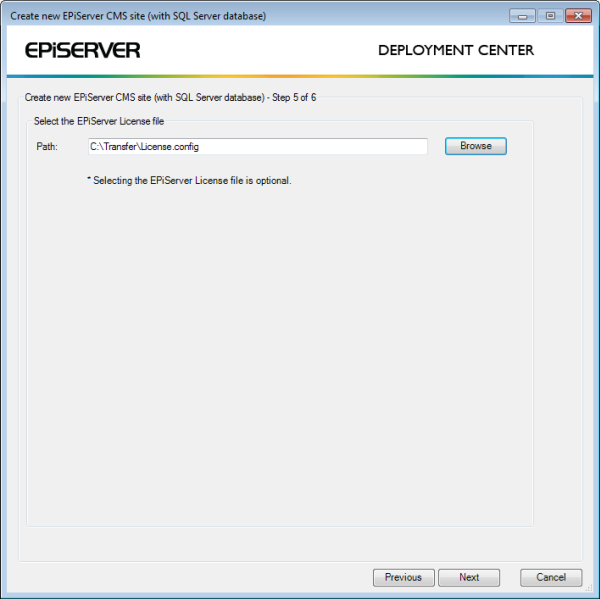
- Select an EPiServer license file to use. Click Next to continue.
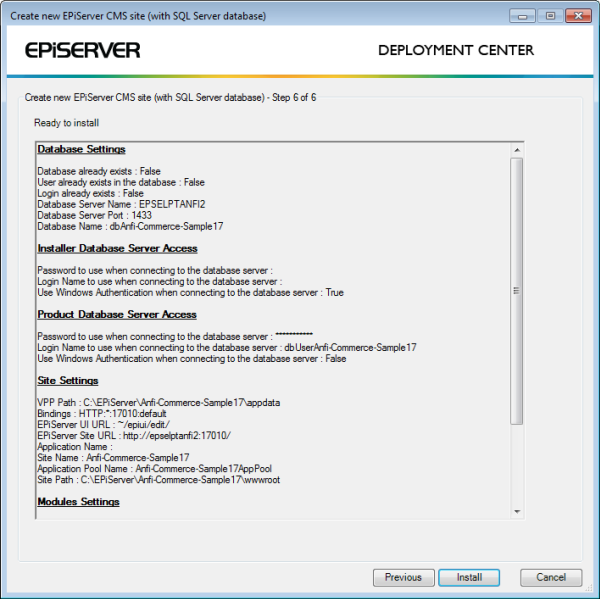
- Confirm the installation by clicking Install.
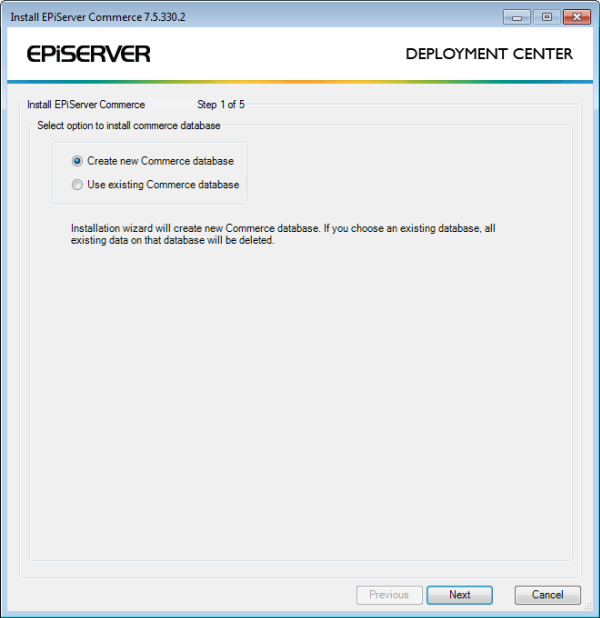
- The installation will continue with the Commerce parts. Select "Create Commerce database" and click Next.
- Select an SQL Server database for Commerce with full text search installed (or accept suggested), and add authentication credentials. Click Next to continue.

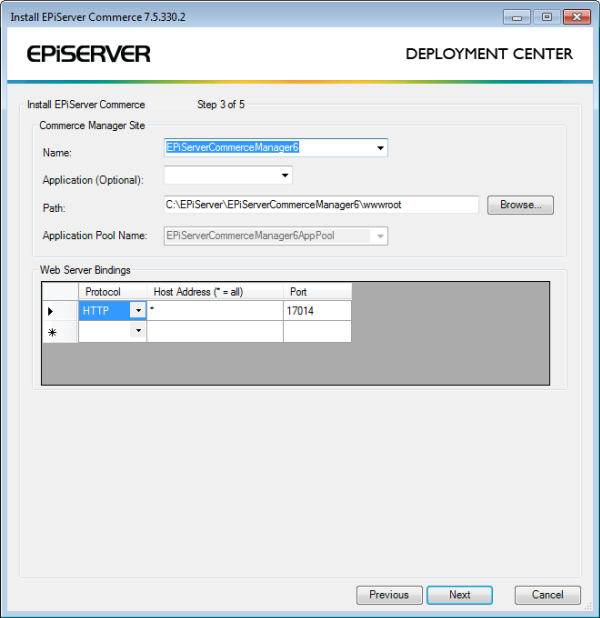
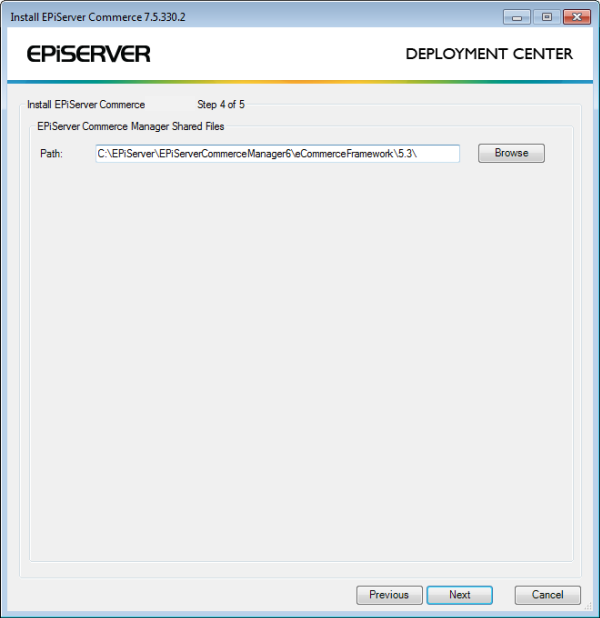
- Fill in the site details for the Commerce back-end site (or accepted suggested settings). Click Next to continue
- Enter a file path for file storage for Commerce, or accept path suggsted by the system. Click Next to continue.
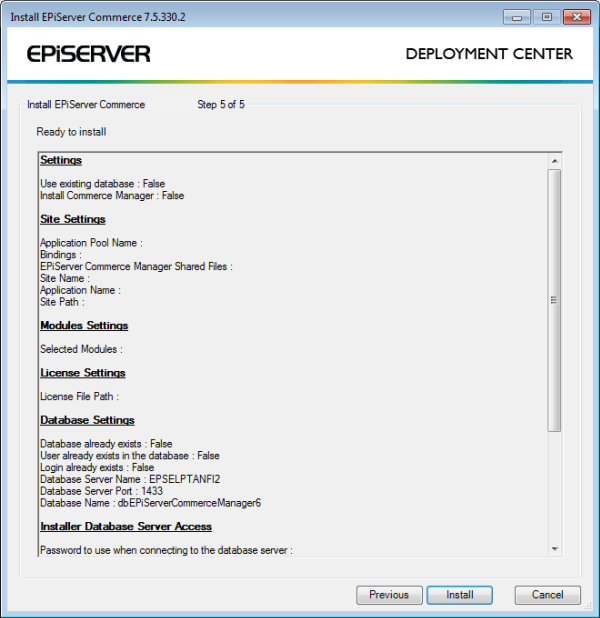
- Confirm the installation by clicking Install.
- The installation will finalize in 5-15 minutes, after which a browser session with the sample site will open.
Known issues
If you receive an error message saying "Cannot start service MSDTC on computer", you may need to manually restart the Distributed Transation Coordinator. This can be done from the Windows Control Panel under System and Security, Administrative Tools and Services. Select Distributed Transation Coordinator and click Start. Then run the installation of Commerce from the Deployment Center again.
First time login
IMPORTANT When you install EPiServer Commerce, you are provided with a default account with the following credentials: Username - admin; Password - store. This is used to login both to the EPiServer CMS website and the Commerce Manager back-end system. It is highly recommended that you change this password when implementing your site! This Admin Account is given full privileges, meaning it will have full access to all systems and all elements within each sub-system.
Do the following to access the EPiServer Commerce site for the first time:
- Browse to the sample site previously created and click on the Log in link on the start page.
- Enter the login details and you will be logged in to the website.
- To access Commerce, select "Commerce Catalog" in the EPiServer menu displayed in the upper right corner.
Next steps
- Refer to the Search section of the EPiServer Commerce Developer Guide for information on how to set up and configure a search index to be used with Commerce.
- There are a number of code samples and tools available for workflows, payment providers and asset migration. Refer to the download of EPiServer 7.5 tools and code samples to get these.
Getting the latest updates
Refer to Installing EPiServer updates for information on how to get the latest updates for EPiServer 7.5 Commerce.