
Adding EPiServer Find to Alloy - Part 1
In this blog series, I will show you step-by-step how to add EPiServer Find to a project and how to use it and the most functions in it.
- Installing EPiServer Find
- Filtering what to index
- Implementing a simple search page
- Extend search page with facets
- Extend search page with simple and advanced autocomplete
- Custom search and click tracking
- Making use of Boosting, Best Bets, Synonyms and Related Queries
- Extend the search service with caching layer and be prepared for Find out of order
Part 1 - Installing EPiServer Find
Adding EPiServer Find, add the EPiServer.Find.Cms nuget package. The simplest way to do this is to run the following command from the Package Manager Console: Install-Package EPiServer.Find.Cms. This command installs two other packages on which that package depends, EPiServer.Find and EPiServer.Find.Framework. So, that command, installs all three packages. When running that command, you might get the message below. If you do, save everything, unload, then load the project again (or restart Visual Studio).
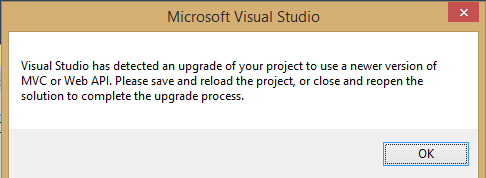
When you try to run the site, you get at least one error. The first time I ran it, I got this error: Cannot add duplicate collection entry of type 'add' with unique key attribute 'name' set to 'ExtensionlessUrlHandler-Integrated-4.0'. This is because one of the Nuget packages adds a handler that already exists in web.config and that does not like IIS. To fix, open web.config, search for ExtensionlessUrlHandler-Integrated-4.0, and remove one of the handlers (I saved the one with verb *).
You also get this error: The serviceUrl cannot be empty. You get this because, when adding the Nuget package, Find did not add a link to your index. So, go to this address http://find.episerver.com/ and sign up with a UserName, email and password. You do not need to be a EPiServer partner or similar to sign up - it is open to everyone. After you are done, sign in (if you are not already logged in). Hint: On this site, use your username to sign in, compared to EpiServer World, for example, where your username and signin are your email address.
After you log in, click Add Developer Services. Name your index, select languages for which you want to be able to use linguistics, accept the terms, then click Create Service. Next, a page of information about the index appears. After a few minutes, press F5, and the page looks something like this: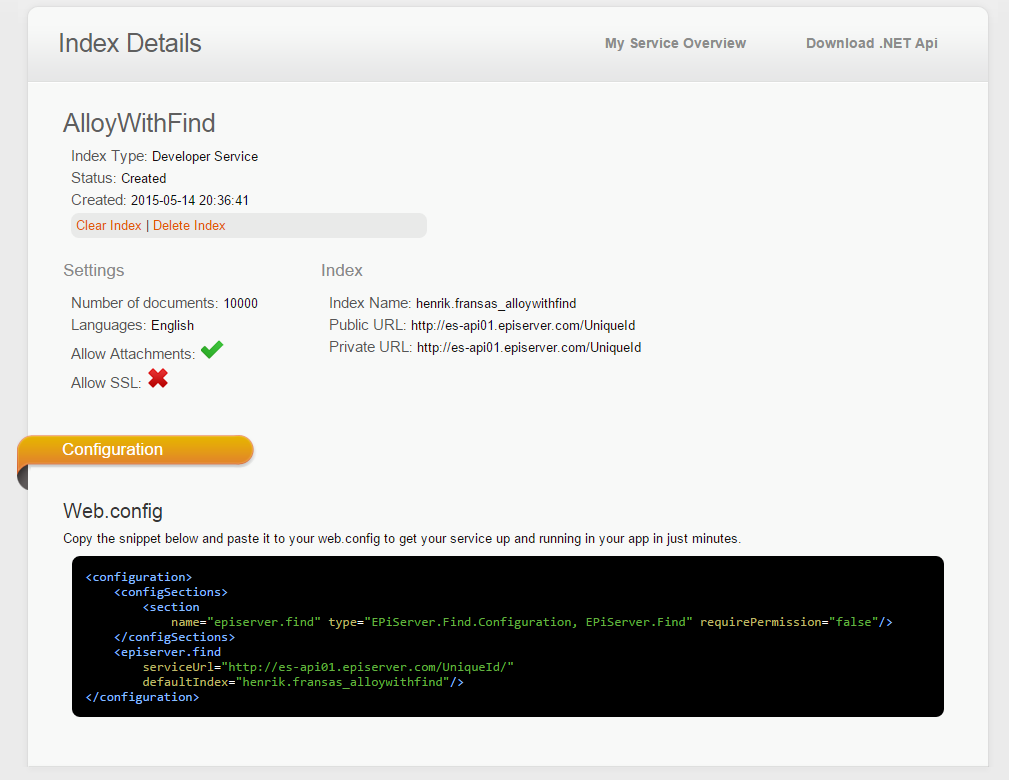
Now, copy the section-part from the black textbox and add it to your web.config file, inside the configsections-element. After that, add the element episerver.find to your web.config, placing it for example directly after </configSections>. Save the web.config, and your site should be up and running.
Once the site is running, inspect what Find indexes out of the box. To do that, start the site again, go into admin-mode, and run the scheduled task EPiServer Find Content Indexing Job. When that is ready, navigate to EPiServer Find and the Overview tab. (You get there from the top-menu inside edit or admin in EPiServer.)
That view displays what was indexed: all content, blocks, media files, container pages, pages, and even trash. This is not what you want. Part 2 shows how to determine what gets indexed.
Comments