
Custom Property Editors in Optimizely CMS 13
When the world first saw how to create custom editors for Optimizely CMS back in 2012, it was a game-changer for Javascript developers. For the first time, we could build custom property editors that made content editors' lives easier and more productive.
However, there was a catch: you needed to master the Dojo framework. Understanding define, declare, mixins and dependecies wasn't exactly straightforward—you had to become a Dojo master to create even simple custom editors.
Fast forward to today, and Optimizely CMS 13 (now available as preview) still supports the Dojo approach (for those who enjoy the classics), but it also introduces a modern, streamlined way to register editors as ES6 modules.
This article will guide you through the new ES6 module approach.
Your First ES6 Module Editor
An editor in CMS 13 is simply a JavaScript function with the following signature:
export default function editorWithAllSettings(editorContainer, initialValue, onEditorValueChange, widgetSettings, readOnly)- editorContainer: The HTML element where your editor should be rendered
- initialValue: The initial value of the property
- onEditorValueChange: A callback function to notify the CMS when the value changes (triggers save to server)
- widgetSettings: Configuration passed from the server (optional)
- readonly: Boolean indicating whether the editor should be read-only
The function can either:
- Return nothing (render directly into editorContainer)
- Return an object with lifecycle methods (render, updateValue, destroy)
Registering the Editor on the Server
After creating client editor JavaScript file, we need to register it on the server side. This part is similar to how you would register any custom editor, with one important addition: you need to set IsJavascriptModule = true to enable the new ES6 module registration.
[ContentType]
public class TestPage : PageData
{
    [ClientEditor(ClientEditingClass = "ClientResources/Scripts/Editors/minimal-editor.js", IsJavascriptModule = true)]
    public virtual string SimpleProperty { get; set; }
}
Now we can look closer at how to implement the editor.
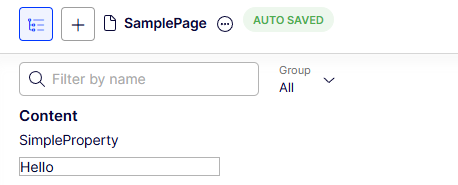
The Simplest Editor: Direct Rendering
Let's start with the most basic example—a function that renders a simple text input directly:
export default function customEditor(editorContainer, initialValue, onEditorValueChange) {
    const input = document.createElement("input");
    input.type = "text";
    input.value = initialValue || "";
    input.onchange = (event) => onEditorValueChange(event.target.value);
    editorContainer.appendChild(input);
}
There are few key points to note about this approach is that no framework dependencies are required. The only requirement is following the function signature convention.
This approach works well for very simple scenarios, such as:
- Read-only displays (e.g., links to external systems)
- Simple labels or informational fields
- Lightweight custom inputs
For scenarios requiring more interaction with the CMS (like handling undo/redo), it's recommended to return an object with lifecycle methods.
Returning an Object with Lifecycle Methods
Instead of rendering directly, your function can return an object with predefined methods.
The required is the "render" method, which is called to render the editor.
export default function customEditor(editorContainer, initialValue, onEditorValueChange) {
    return {
        render: function () {
            const input = document.createElement("input");
            input.type = "text";
            input.value = initialValue || "";
            input.onchange = (event) => onEditorValueChange(event.target.value);
            editorContainer.appendChild(input);
            this._input = input;
        },
    };
}
The above example is functionally equivalent to the direct rendering approach. However, by returning an object, you can also implement additional lifecycle methods for better integration with the CMS.
Additional methods include "updateValue" and "destroy":
export default function editorWithAllSettings(editorContainer, initialValue, onEditorValueChange, widgetSettings, readOnly) {
    return {
        render: function () {
            console.log("rendering custom widget");

            const input = document.createElement("input");
            input.type = "text";
            if (readOnly) {
                input.disabled = true;
            }
            input.value = initialValue || "";
            input.onchange = (event) => onEditorValueChange(event.target.value);
            editorContainer.appendChild(input);
            this._input = input;
        },
        updateValue: function (value) {
            console.log("updating custom widget value");
            this._input.value = value;
        },
        destroy: function () {
            console.log("removing custom widget");
        },
    };
}
Method purposes:
- render(): Called to initially render the editor
- updateValue(): Called when the value needs to be updated (e.g., when using Undo/Redo functionality)
- destroy() :Called when the editor should be cleaned up (e.g., when navigating to a different page). Use this to remove event listeners and prevent memory leaks.
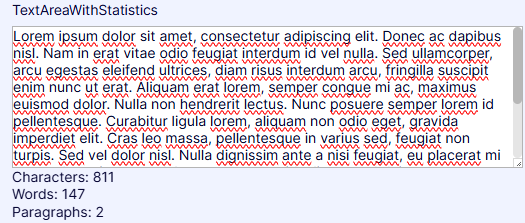
Example: Text Area with Statistics
Now we can look closer at a more complex example that demonstrates the power of this approach. Building on a classic blog post by Ben McKernan, let's create a more sophisticated editor that displays live statistics, like character count, word count, and paragraph count about the text being entered:
const count = (value) => {
    const original = typeof value === "string" ? value : "";
    const trimmed = original.trim();
    return {
        paragraphs: trimmed ? (trimmed.match(/\n+/g) || []).length + 1 : 0,
        words: trimmed ? (trimmed.replace(/['";:,.?¿\-!¡]+/g, "").match(/\S+/g) || []).length : 0,
        characters: trimmed ? trimmed.replace(/\s/g, "").length : 0,
    };
};

export default function editorWithAllSettings(
    editorContainer,
    initialValue,
    onEditorValueChange,
    widgetSettings,
    readOnly
) {
    return {
        render: function () {
            const wrapper = document.createElement("div");
            wrapper.className = "text-area-with-statistics";

            const textarea = document.createElement("textarea");
            if (readOnly) {
                textarea.disabled = true;
            }
            textarea.value = initialValue || "";

            const stats = document.createElement("div");
            const updateStats = (value) => {
                const { characters, words, paragraphs } = count(value);
                stats.textContent = `Characters: ${characters}\nWords: ${words}\nParagraphs: ${paragraphs}`;
            };
            stats.style.whiteSpace = "pre";

            updateStats(textarea.value);

            textarea.oninput = (event) => {
                onEditorValueChange(event.target.value);
                updateStats(event.target.value);
            };

            wrapper.appendChild(textarea);
            wrapper.appendChild(stats);
            editorContainer.appendChild(wrapper);

            this._textarea = textarea;
            this._stats = stats;
        },
        updateValue: function (value) {
            this._textarea.value = value;
            const { characters, words, paragraphs } = count(value);
            this._stats.textContent = `Characters: ${characters}\nWords: ${words}\nParagraphs: ${paragraphs}`;
        }
    };
}
This editor is around 50 lines of code, with no dependencies on any framework. It demonstrates how you can create a rich editing experience with live feedback using just vanilla JavaScript. The "updateValue" method ensures that the statistics are always in sync with the current value, even when changes come from outside the editor (e.g., Undo/Redo).
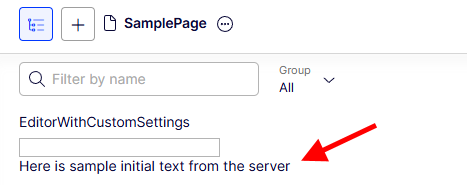
Passing Configuration from the Server
In many scenarios, we might want to pass custom settings from the server to your editor. For example we have dropdown editor and want to populate the options from the server, or we want to pass some initial text or configuration values. The best way to do this is by implementing a custom "EditorDescriptor".
[EditorDescriptorRegistration(TargetType = typeof(string), UIHint = "CustomModuleEditor")]
public class CustomEditorDescriptor : EditorDescriptor
{
    public CustomEditorDescriptor()
    {
        ClientEditingClass = "ClientResources/Scripts/Editors/editor-with-custom-settings.js";
    }

    public override void ModifyMetadata(ExtendedMetadata metadata, IEnumerable<Attribute> attributes)
    {
        base.ModifyMetadata(metadata, attributes);

        metadata.EditorConfiguration["isJavascriptModule"] = true;
        metadata.EditorConfiguration["initialTextFromServer"] = "Here is sample initial text from the server";
    }
}
Important: Don't forget to set metadata.EditorConfiguration["isJavascriptModule"] = true to enable ES6 module mode.
Then we can use this editor descriptor in our content type by specifying the "CustomModuleEditor" UIHint.
[ContentType]
public class TestPage : PageData
{
    [UIHint("CustomModuleEditor")]
    public virtual string EditorWithCustomSettings { get; set; }
}
The server configuration is simply available through the widgetSettings object as field parameter:
export default function editorWithAllSettings(editorContainer, initialValue, onEditorValueChange, widgetSettings, readOnly) {
    return {
        render: function () {
            const wrapper = document.createElement("div");

            const input = document.createElement("input");
            input.type = "text";
            if (readOnly) {
                input.disabled = true;
            }
            input.value = initialValue || "";
            input.onchange = (event) => onEditorValueChange(event.target.value);
            this._input = input;

            const descriptionEl = document.createElement("div");
            descriptionEl.textContent = widgetSettings.initialTextFromServer;

            wrapper.appendChild(input);
            wrapper.appendChild(descriptionEl);
            editorContainer.appendChild(wrapper);
        },
        updateValue: function (value) {
            this._input.value = value;
        }
    };
}
Advanced Scenarios: Modern Tooling and Frameworks
The real power of ES6 module registration goes beyond just simpler code. You can now build custom editors using modern JavaScript tooling and development practices.
The editor can be implemented outside of the CMS project, with its own dependencies, build process, and development environment. You can use React, Vue, Angular, or any framework you prefer, and bundle it with tools like Webpack or Vite.
For example:
- TypeScript for type safety
- React for component composition
- Vite for fast builds
- Optimizely Axiom for consistent UI components. Which give you same design system as Optimizely's own products, ensuring a polished, professional look and feel.
- Storybook for component development and documentation
- Vitest for unit testing
Example Project Structure for textarea with statistics editor
CustomEditorSample/
├── src/
│   ├── TextAreaWithStats.tsx          # React component
│   ├── TextAreaWithStats.stories.tsx  # Storybook stories
│   ├── count-statistics.ts            # Business logic
│   ├── count-statistics.test.ts       # Unit tests
│   └── index.ts                       # ES6 module wrapper
├── vite.config.js                      # Build configuration
└── package.json
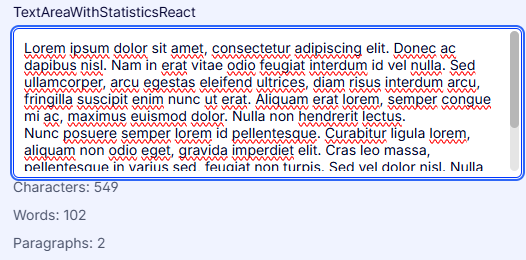
The React Component
import React, { useState, useEffect } from 'react';
import { AxiomProvider, Textarea, Box, Group, Text } from '@optiaxiom/react';

export const TextAreaWithStats: React.FC<TextAreaWithStatsProps> = ({
    initialValue = '',
    onValueChange,
    readOnly = false,
}) => {
    const [value, setValue] = useState<string>(initialValue);
    const [stats, setStats] = useState<TextStats>({ characters: 0, words: 0, paragraphs: 0 });

    useEffect(() => {
        setStats(countStatistics(value));
    }, [value]);

    const handleChange = (e: React.ChangeEvent<HTMLTextAreaElement>) => {
        const newValue = e.target.value;
        setValue(newValue);
        if (onValueChange) {
            onValueChange(newValue);
        }
    };

    return (
        <AxiomProvider>
            <Box>
                <Textarea
                    value={value}
                    onChange={handleChange}
                    disabled={readOnly}
                    placeholder="Enter text..."
                />
                <Group mt="4" flexDirection="column" gap="2">
                    <Text fontSize="md" color="fg.secondary">
                        Characters: {stats.characters}
                    </Text>
                    <Text fontSize="md" color="fg.secondary">
                        Words: {stats.words}
                    </Text>
                    <Text fontSize="md" color="fg.secondary">
                        Paragraphs: {stats.paragraphs}
                    </Text>
                </Group>
            </Box>
        </AxiomProvider>
    );
};
The "index.ts" file exports the editor function that the CMS expects, while using React internally:
import React from 'react';
import { createRoot, Root } from 'react-dom/client';
import { TextAreaWithStats } from './TextAreaWithStats';

export default function editorWithAllSettings(
    editorContainer: HTMLElement,
    initialValue: string,
    onEditorValueChange: (value: string) => void,
    widgetSettings?: Record<string, unknown>,
    readOnly?: boolean
) {
    let root: Root | null = null;

    return {
        render: function () {
            const container = document.createElement('div');
            editorContainer.appendChild(container);

            root = createRoot(container);
            root.render(
                React.createElement(TextAreaWithStats, {
                    initialValue,
                    onValueChange: onEditorValueChange,
                    readOnly,
                    widgetSettings,
                })
            );
        },
        updateValue: function (value: string) {
            if (root) {
                root.render(
                    React.createElement(TextAreaWithStats, {
                        initialValue: value,
                        onValueChange: onEditorValueChange,
                        readOnly,
                        widgetSettings,
                    })
                );
            }
        },
        destroy: function () {
            if (root) {
                root.unmount();
                root = null;
            }
        },
    };
}
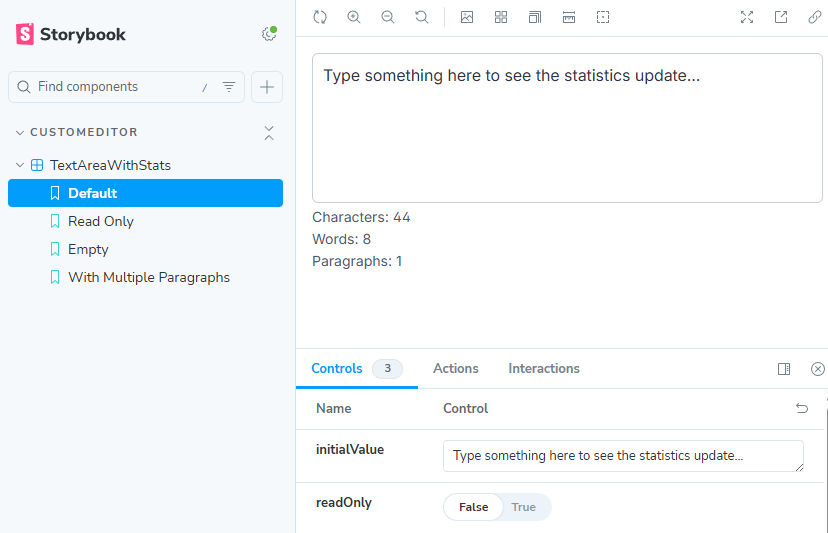
Development with Storybook
Storybook allows you to develop and test your editor in isolation, without needing to run the full CMS.
Unit Testing
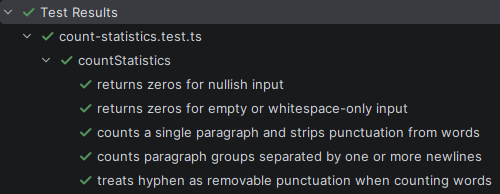
Write tests for your business logic using Vitest:
import { describe, expect, it } from "vitest";
import { countStatistics } from "./count-statistics";

describe("countStatistics", () => {
    it("counts a single paragraph and strips punctuation from words", () => {
        expect(countStatistics("  Hello, world!  ")).toEqual({
            paragraphs: 1,
            words: 2,
            characters: 12,
        });
    });

    it("counts paragraph groups separated by newlines", () => {
        expect(countStatistics("First line\nSecond line\n\nThird line")).toEqual({
            paragraphs: 3,
            words: 6,
            characters: 28,
        });
    });
});
The ES6 module approach gives you complete freedom to use vanilla JavaScript, React, Vue, or any framework you prefer, while taking advantage of modern development practices like TypeScript, ESLint, and Prettier. You can write unit tests, use Storybook for component development, and benefit from hot module replacement and fast builds with Vite. The code is cleaner, more maintainable than Dojo-based editors, and easily reusable across projects.
The module approach in Optimizely CMS 13 is a step forward in custom editor development. While the Dojo framework served us well for over a decade, the new approach embraces modern JavaScript standards and development practices.
Whether you're building a simple text input or a sophisticated React component with real-time validation, the ES6 module registration makes it easier, more maintainable, and more enjoyable to create custom property editors.
The best part? You can adopt this gradually—your existing Dojo editors will continue to work, so you can migrate at your own pace.
Happy coding!
Thanks for a good write-up! I think this is an improvement going forward.
That said, I appreciate that Dojo widgets are still supported to avoid having to re-write all existing custom editors. 😮💨
This is great! will you continue adding templating (html) as dojo have? and more needed functionality?