Customizing the TinyMCE editor
EPiServer supports TinyMCE editor version 3.5.11. See the TinyMCE website for information on how to create the client-side code of a TinyMCE plug-in.
You can configure the .css style sheet files used with the TinyMCE editor. This topic describes the EPiServer attributes you use to define the TinyMCE editor’s styles and the handling of element-specific classes. It also covers how to add your own plug-ins, and tips for using TinyMCE on your template page.
- Configuring the TinyMCE editor CSS files
- EPiServer attributes to extend the CSS file
- Localizing a styles menu
- Adding a TinyMCE plug-in
- Using TinyMCE on your template pages
Configuring the TinyMCE editor CSS files
To configure the CSS files that the TinyMCE editor loads and uses, use one or more of the following methods. Note that In-page or dynamic properties override the corresponding web.config property.
- Content CSS Path setting in the TinyMCE editor. To change the Content CSS Path setting, do either of the following:
- Create a global settings set that contains the desired Content CSS Path value and select it from the drop-down list.
- Select the Use custom settings radio button and set the Content CSS Path value. Use XHTML string properties to define TinyMCE editor settings. To edit the properties:
- After logging in, click CMS > Admin.
- Click the Content Type tab.
- Click name of page type that contains the property.
- Click the property’s name.
- Click the Custom Settings tab.
Custom and global settings are essentially the same, except you can reuse global settings for several XHTML properties. After you define a global settings set, it is available in the Use global settings drop-down for all XHTML string properties.
- As a setting in web.config. If no page property specifies alternate style sheets, TinyMCE uses the uiEditorCssPaths setting in the web.config file. This setting is a comma-separated list of paths to the style sheets.
<episerver>
  <applicationSettings
    ...
    uiEditorCssPaths="~/Templates/Public/Styles/Glossy/Editor.css"
    />
</episerver>
- As a dynamic or standard page property. Name the property UIEditorCssPaths and assign a comma-separated list of paths to the style sheets. The following examples shows a comma-separated css-path list:
~/Templates/Public/Styles/Glossy/Editor.css, ~/Templates/Public/Styles/Glossy/Editor2.css
EPiServer attributes to extend the CSS file
To define the TinyMCE editor’s styles and the handling of element-specific classes, use the following EPiServer attributes.
- ChangeElementType. Lets you apply a class and change the element type for text block elements (p, h1, h2, and so on).
Code sample
h2.italic
	{
	ChangeElementType: true;
	EditMenuName: Heading 2 Italic;
	font-style: italic;
	}
You should only apply element-specific classes (such as p.myClass) to elements of the correct type. For example, if you apply p.myClass to an h1 element, nothing happens.
- EditMenuTitle. Adds a new drop-down menu heading.
- EditMenuName. Adds menu items under the parent heading.
NOTE: The Styles tool shows styles in the order you define them in the CSS file. Also, in EditMenuName and EditMenuTitle values, replace spaces with underscores .
The following example shows CSS menu attributes and the resulting drop-down menu.
Code sample and image
.style1
	{
             EditMenuName: Style1;
        }
		.style2
	{
		EditMenuName: Style2;
	}
		h1
	{
		EditMenuTitle: Heading Styles;
		EditMenuName: Heading 1;
	}
		h2
	{
		EditMenuName: Heading 2;
	}
Localizing a styles menu
Follow these steps to localize the EditMenuName and EditMenuTitle attribute values.
- In the lang folder, add the translations to an XML file.
- At language_root/editorstyleoptions, create a new element.
- Add translation strings as children of the new element. The following example shows the XML code and resulting drop-down menu when an editor selects the Swedish style sheet.
Code sample
<language name="svenska" id="sv">
        <editorstyleoptions>
        <style1>Stil 1</style1>
        <style2>Stil 2</style2>
        <heading_styles>Rubrikstilar</heading_styles>
        <heading_1>Rubrik 1</heading_1>
        <heading_2>Rubrik 2</heading_2>
        </editorstyleoptions>
        ...
        </language>
Adding a TinyMCE plug-in
Follow these steps to add your own plug-ins to the TinyMCE editor.
Step 1: Adding the JavaScript
The TinyMCE version included in EPiServer CMS is located in ~/Util/Editor/tinymce. Add your plug-in files to the plugins subfolder. Because ~/Util/ is a virtual path pointing to C:\Program Files, you should add the JavaScript files (and possibly dialog files) there. You have the following options:
- Add a physical folder structure from site root, /Util/Editor/tinymce/plugins. Place plug-in files there.
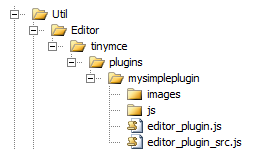
The plug-in folder you create should have the same name as the name of the plug-in added to TinyMCE PluginManager. The main JavaScript files responsible for registering the plug-in are named editor_plugin.js and editor_plugin_src.js. The first file should be a compressed version of the second one. For information about development of TinyMCE plug-ins, see TinyMCE plugins. Here, file and folder naming is explained in more detail.
- Add another virtual path pointing to either ~/Util/ folder or directly to ~/Util/Editor/tinymce/plugins, as shown in the following XML example.
Code sample
<add name="TinyMCEPlugins" virtualPath="~/Util/Editor/tinymce/plugins"
        physicalPath="C:\MyTinyMCEPlugins"
        type="EPiServer.Web.Hosting.VirtualPathNonUnifiedProvider, EPiServer.Framework" />
If you add a virtual path, remember that the last VPP added is the first one called when the system looks for files, so you should add your new VPP in the beginning of all VPPs.
Step 2: Creating an empty class with TinyMCEPlugIn attribute
EPiServer CMS plug-ins have an empty class with the attribute, so you must create a new class when you create a new plug-in. The following plug-in attributes (with examples) contain data that EPiServer CMS needs to correctly show the plug-in in edit view and Admin view. If a plug-in has one or more buttons, use TinyMCEPluginButton; if not, use TinyMCEPluginNonVisual.
TinyMCEPluginButton
[TinyMCEPluginButton(PlugInName = “mybutton", ButtonName =
            "mybutton", GroupName = "misc", LanguagePath =
            "/admin/tinymce/plugins/mypluginwithbutton/mybutton", IconUrl =
            "Editor/tinymce/plugins/mypluginwithbutton/mybutton.gif")]
    public class mob
    {
    }
TinyMCEPluginNonVisual
[TinyMCEPluginNonVisual(LanguagePath =
             "/admin/tinymce/plugins/mysimpleplugin", PlugInName = "mysimpleplugin"]
        public class MySimplePlugin
        {
					}
TinyMCEPlugin properties
- PlugInName
The name of the TinyMCE plug-in, which must correspond to the plug-in name registered in TinyMCE PluginManager (and sub-folder name in plugins folder).
- LanguagePath
Set this path to the language XML file where the new plug-in was placed. This path gets correct translations of the plug-in in the Plug-in Manager.
- EditorInitConfigurationOptions
A string representing a JSON object with configuration settings to set in the TinyMCE init. You can override init settings but be aware of conflicts between plug-ins. Normally, settings are overridden but configuration settings can merge where several plug-ins alter the same setting. The settings that are merged (if nothing is changed in the configuration file) are valid_elements, extended_valid_elements, invalid_elements, and valid_child_elements. To change which settings are merged, add an element called <tinyMCE> in the <EPiServer section> of the configuration file, and set the attribute mergedConfigurationProperties on the element to the elements that are merged, as shown in the following XML.
<tinyMCE mergedConfigurationProperties="valid_elements, extended_valid_elements, invalid_elements, valid_child_elements">The following C# code shows how to use EditorInitConfigurationOptions if your plug-in needs to extend the img element with some attributes:
Code sample
[TinyMCEPluginButton(PlugInName = "Whatever", ...,
            EditorInitConfigurationOptions = "{ extended_valid_elements:
            'img[class|src|border=0|alt|title|hspace|vspace|width|height|align|onmouseover|onmouseout|name]'
            }")]
You can find information about plug-in overrides for each page type in Admin view. On the Page Type tab, click on a page type to check if there is any plug-in conflicts for the type. If there is, a yellow warning message is shown specifying which plug-in that has overridden a specific value. Overriding EPiServer CMS default configuration options does not cause warning messages.
For information about TinyMCE init configuration options, see TinyMCE wiki.
- DynamicConfigurationOptionsHandler
Specifies a class that implements the IDynamicConfigurationOptions interface, which has only one method: IDictionary<string, object> GetConfigurationOptions() that creates a list of init options. The following C# code shows how the image editor plug-in uses this functionality.
Code sample
[TinyMCEPluginButton(PlugInName = "epiimageeditor", ButtonName = "epiimageeditor", GroupName = "media", LanguagePath = "/admin/tinymce/plugins/epiimageeditor", IconClass = "mce_epiimageeditor", DynamicConfigurationOptionsHandler = typeof(EPiImageEditor))] public class EPiImageEditor : IDynamicConfigurationOptions { public IDictionary<string, object> GetConfigurationOptions() { Dictionary<string, object> customSettings = new Dictionary<string, object>(); customSettings.Add("epiImageEditor_dialogWidth", Configuration.EPiServerSection.Instance.ImageEditorSettings.WindowWidth); customSettings.Add("epiImageEditor_dialogHeight", Configuration.EPiServerSection.Instance.ImageEditorSettings.WindowHeight); return customSettings; } } - GroupName (TinyMCEPluginButton only)
The group name of the plug-in that is used in Admin view for grouping the tools in the inactive buttons area. You can specify your own values, or use one of the following default values:
- misc
- textchar
- textpara
- media
- paste
- table
If you specify your own group, also add translations in the language files as shown in the following XML code:
<admin> <propertysettings> <tinyeditorsettings> <groups> <mygroupname> - ButtonSortIndex (TinyMCEPluginButton only)
Sort index used when sorting the buttons within a group in the inactive part of the editor Admin view.
- ButtonName (TinyMCEPluginButton only)
Name of the TinyMCE button, which must correspond to the name of the button added by the plug-in the JavaScript file.
- IconClass (TinyMCEPluginButton only)
The CSS class to use for the plug-in icon. This attribute is for internal use but is useful if you want to map existing CSS classes to other buttons.
- IconUrl (TinyMCEPluginButton only)
If there is no CSS class to style the button with background image, you can enter an URL to an image that is displayed in Admin view. The URL is relative to Util folder.
- AlwaysEnabled (TinyMCEPluginNonVisual only)
To enable the plug-in, set to true. To disable, disable the plug-in in the Plug-in Manager in Admin view.
Step 3: Handling translations
The <tinymce> section of a language XML file contains the plug-ins for the CMS. The LanguagePath parameter must match this XML path.
Organize plug-ins in the <plugins> section with the same name as the plug-in. For example, add elements <displayname> and <description> with descriptive text to provide translations for the plug-in in the EPiServer CMS Plug-in Manager. If the plug-in has one or more buttons, create a sub-element for each button and, within that, insert the <displayname> and <description> elements, as shown in the following example.
<admin>
  <tinymce>
    <plugins>
      <mypluginwithbutton>
        <mybutton>
        <displayname>My Button</displayname>
        <description>Button to click for magic things to happen</description>
        </mybutton>
      </mypluginwithbutton>
...
To also get translations for the editor, add a section under <tinymce> element at same level as <admin> element, as shown in the following example.
<tinymce>
  <mypluginwithbutton>
    <myButton_desc>My Button</myButton_desc>
    <mySecondButton_desc>Another button</mySecondButton_desc>
    <additionaltext>Extra text</additionaltext>
  </mypluginwithbutton>
...
If you have an existing TinyMCE plug-in, naming conventions for the elements are as follows:
- Plug-in element with the same name as the plug-in.
- Button element with the same name as each button in the plug-in followed by _desc. Admin view uses these to get a translated tooltip for each button.
- Additional translations for dialog boxes and so on: named as you want to reference them in JavaScript and HTML code.
The following C# code shows how to reference the translations from within a JavaScript plug-in.
// Register example button
            ed.addButton('mybutton', {
             title : 'mypluginwithbutton.mybutton_desc',
             cmd : 'mceMyButton',
             image : url + '/myButton.gif'
})(tinymce, epiJQuery);- After you add the plug-in, go to a page type in admin view and click MainBody on the page type.
- Go to the custom settings tab and select use custom settings. The new plug-in appears under Inactive tools or Plugins without a button, depending on the type of plug-in you created.
- Mouseover the button and look at the tooltip.
- Add the plug-in to the PropertyXhtmlStringControl by dragging it to one of the rows under Editor Toolbar or select the check box if it is a non-button plug-in.
- Save the changes and go to edit mode to test the plug-in.
Using TinyMCE on your template pages
If you want to use TinyMCE on your template pages, download your own version and place it on your website, because the TinyMCE version shipped with EPiServer has a dependency to the user interface.
Last updated: Feb 23, 2015