A critical vulnerability was discovered in React Server Components (Next.js). Our systems remain protected but we advise to update packages to newest version. Learn More.
AI OnAI Off
A critical vulnerability was discovered in React Server Components (Next.js). Our systems remain protected but we advise to update packages to newest version. Learn More.
This topic describes how to add custom reports in Episerver Commerce. The built in reports are done with Microsoft SQL Server Reporting Services using local reports. You can create local reports and reports stored on a reporting services server. If you use the remote option, you can take advantage of the subscription services to distribute the reports automatically at a desired frequency.
Classes in this topic are available in the following namespaces:
Follow the steps below to create a custom report.
Example: adding report links
<Link id="NewLocalReports" text="New Local Reports" iconUrl="~/Apps/Reporting/images/report-group.png" iconCss="treeIcon">
  <Link id="ApplicationLog" text="Application Log" iconUrl="~/Apps/Reporting/images/report.png" iconCss="treeIcon"
   command="ApplicationLogReportCommand" />
</Link>
<Link id="NewRemoteReports" text="New Server Reports" iconUrl="~/Apps/Reporting/images/report-group.png" iconCss="treeIcon">
  <Link id="ServerReport" text="New Report on Server" iconUrl="~/Apps/Reporting/images/report.png" iconCss="treeIcon"
   command="NewServerReportCommand" />
</Link>Example: adding report links to navigation
<Command id="ApplicationLogReportCommand">
  <CommandType>ClientAction</CommandType>
  <ClientScript>CSManagementClient.ChangeView('Reporting', 'viewApplicationLog')</ClientScript>
</Command>
<Command id="NewServerReportCommand">
  <CommandType>ClientAction</CommandType>
  <ClientScript>CSManagementClient.ChangeView('Reporting', 'viewNewServerReport', 'Report=testreport')</ClientScript>
</Command>The following example shows two new views to go with the two new links created earlier.
Example: adding report views to a view file
<View id="viewApplicationLog" name="Application Log" controlUrl="Reporting/LocalApplicationLog.ascx"></View>
<View id="viewNewServerReport" name="New Server Report" controlUrl="Reporting/RemoteReportViewer.ascx"></View>If you are using SQL Reporting services, you can add the ASP.NET ReportViewer control to the ascx. If you use this control, you can add a LocalReport element with a ReportPath specified as: "Apps\Reporting\Reports[Your report name]", or you can point the report viewer control to the server if you have a server instance set up.
Follow the steps below to create a local report.
Example: adding ReportViewer
XML
<%@ Control Language="C#" AutoEventWireup="true" CodeBehind="LocalApplicationLog.ascx.cs"
  Inherits="ReportingDeveloperGuide.LocalApplicationLog" %>
<%@ Register Assembly="Microsoft.ReportViewer.WebForms, Version=9.0.0.0, Culture=neutral,
  PublicKeyToken=b03f5f7f11d50a3a" Namespace="Microsoft.Reporting.WebForms" TagPrefix="rsweb" %>
<div>
  <h2>Local Report</h2>
  <rsweb:ReportViewer SizeToReportContent="True" AsyncRendering="false" ID="MyReportViewer"
    runat="server" Width="100%" Height="90%"HyperlinkTarget="_blank" style="margin-top: 0px">
    <LocalReport EnableHyperlinks="false">
    </LocalReport>
  </rsweb:ReportViewer>
</div>Example: getting the report data
using System;
using System.Collections.Generic;
using System.Configuration;
using System.Data;
using System.Data.SqlClient;
using System.Linq;
using System.Web;
using System.Web.UI;
using System.Web.UI.WebControls;
using Microsoft.Reporting.WebForms;

namespace ReportingDeveloperGuide
  {
  public partial class LocalApplicationLog : System.Web.UI.UserControl
    {
    /// <summary>
    /// Handles the Load event of the Page control.
    /// </summary>
    /// <param name="sender">The source of the event.</param>
    /// <param name="e">The <see cref="System.EventArgs"/> instance containing the event data.</param>
  protected void Page_Load(object sender, EventArgs e)
     {
    if (!this.IsPostBack)
       {
       BindReport();
       }
     }
     /// <summary>
     /// Binds the report.
     /// </summary>
 	 private void BindReport()
        {
          string qry = @"SELECT TOP 100 [LogId]
           ,[Source]
           ,[Operation]
           ,[ObjectKey]
           ,[ObjectType]
           ,[Username]
           ,[Created]
           ,[Succeeded]
           ,[IPAddress]
           ,[Notes]
           ,[ApplicationId]
        FROM [ooi_main].[dbo].[ApplicationLog]
        ORDER BY Created desc";

        SqlConnection connection = new
		SqlConnection(ConfigurationManager.ConnectionStrings["EcfSqlConnection"].ConnectionString);
        SqlCommand cmd = new SqlCommand(qry, connection);

        SqlDataAdapter da = new SqlDataAdapter();
        da.SelectCommand = cmd;
        DataSet ds = new DataSet();
        da.Fill(ds);

        MyReportViewer.LocalReport.DataSources.Clear();
        MyReportViewer.LocalReport.DataSources.Add(new ReportDataSource("Logging_ApplicationLog", ds.Tables[0]));
        MyReportViewer.LocalReport.ReportPath = this.MapPath("Reports\\rpt_ApplicationLog.rdlc");
        MyReportViewer.DataBind();
        }
    }
} The following steps show how to connect to a reporting services server.
Example: adding ReportViewer
<%@ Control Language="C#" AutoEventWireup="true" CodeBehind="RemoteReportViewer.ascx.cs" Inherits="ReportingDeveloperGuide.RemoteReportViewer" %>
<%@ Register Assembly="Microsoft.ReportViewer.WebForms, Version=9.0.0.0, Culture=neutral, PublicKeyToken=b03f5f7f11d50a3a" Namespace="Microsoft.Reporting.WebForms" TagPrefix="rsweb" %>
<div>
  <h2>Server Report</h2>
  <rsweb:ReportViewer AsyncRendering="false" ID="MyReportViewer" runat="server" Width="100%" ShowParameterPrompts="true" ProcessingMode="Remote">
  <ServerReport DisplayName="MySavedReport" ReportPath="" ReportServerUrl="" />
  </rsweb:ReportViewer>
</div>Example: defining report path and server URL
using System;
using System.Collections.Generic;
using System.Configuration;
using System.Linq;
using System.Web;
using System.Web.UI;
using System.Web.UI.WebControls;

    namespace ReportingDeveloperGuide
    {
        public partial class RemoteReportViewer : System.Web.UI.UserControl
        {
            protected void Page_Load(object sender, EventArgs e)
            {
                if (!this.IsPostBack)
                {
                    BindReport();
                }
            }

            private void BindReport()
            {
                this.MyReportViewer.ServerReport.ReportServerCredentials = new ReportViewerCredentials(ConfigurationManager.AppSettings["ReportServerUsername"],
                    ConfigurationManager.AppSettings["ReportServerPassword"], "");
                this.MyReportViewer.ServerReport.ReportServerUrl = new Uri(ConfigurationManager.AppSettings["ReportServerUrl"]);
                this.MyReportViewer.ServerReport.ReportPath = "/Reports/" + Request.QueryString["Report"];
                this.MyReportViewer.ServerReport.Refresh();
            }
        }
}Note: For the server report, you can reuse the same control and just pass the name of the report to be viewed by the report viewer control. In this way, you can add links, and the same control can be used for each link.
Do the following to deploy and test the reports:
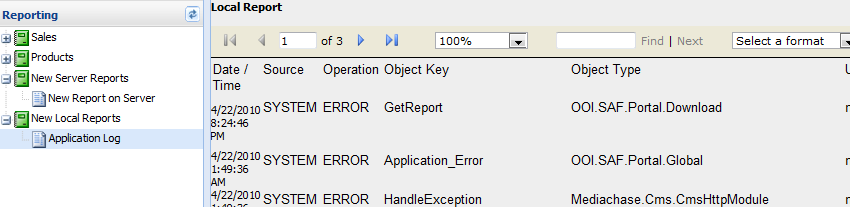
Local report
Server report

See Reporting options in Episerver Commerce for information about creating custom SQL reports to display data from your Episerver Commerce website.
Last updated: Oct 12, 2015